Articles
Published
20 years agoon
Imagine that your best customer calls with a 75,000-piece, two-color pad-printing job. He needs 300 samples of the printed parts by the day after tomorrow. Of course, the parts haven’t arrived yet, the artwork is in the wrong file format and needs to be recreated, and cliches have to be made. Sound familiar?
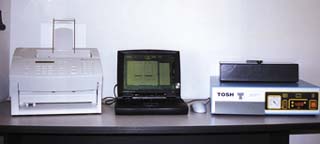
Because pad printing is generally the last of many steps required to produce a finished part, pad printers often find themselves facing tight turnaround and little or no time to prepare for the job at hand. Fortunately, several prepress options that weren’t quite up to speed just a few years ago are now available to enhance the efficiency of the entire pad-printing process. Specifically, they include sophisticated graphic-design software, low-cost methods to generate film, and photopolymer cliche materials. On the following pages, you’ll learn about these developments and how they can be used to form a complete prepress system (Figure 1), one that can reduce the time it takes to produce a job successfully.
Artwork and film generation
Since the quality of original artwork and the film positives created from it directly impact the quality of the imaged cliche, improvements in art and film generation are the best place to start the discussion. If you have a process camera and your customer provides suitable camera-ready artwork, producing a positive for cliche making is a no brainer. But in most shops today, the process camera has gone the way of the dinosaur, and electronic art files are more commonly provided by customers than anything resembling camera-ready artwork.
Since digital files are now the norm, it’s important to have a good graphics program that can import a variety of file formats without requiring that you modify the files significantly. The degree of flexibility you need depends on the types of customers you serve and the industries they represent, since different industries favor certain file formats.
In most cases, you’ll be well equipped if you keep current editions of popular graphic-design programs, such as Adobe Illustrator, CorelDRAW!, and Macromedia Freehand. I’m not a software guru, but I know from experience that programs like these are powerful and versatile, offering extensive file import and export capabilities. Additionally, for those who deal with process-color images or frequently work with scanned images and photos, bitmap editing software, such as Adobe Photoshop, can also be quite useful.
If your customers tend to be oriented toward engineering rather than graphic arts, you may occasionally face design files created with computer-aided design (CAD) programs. However, such files are typically unsuitable for making cliches. Images saved as CAD files don’t offer the smooth curves, solid fills, and halftoning capabilities you expect from a graphic-design file, nor do they usually import into other graphics programs with good results.
Preparing the artwork
Once you’ve acquired the design file and opened or imported it into your own graphic-design program, you can begin adjusting and separating the image to match the requirements of your pad-printing process. The following sample procedure for preparing color seps offers a general description that is applicable whether you use a PC or a Mac. It is based on a two-color image and assumes that positives will be generated on a desktop laser printer.
1. Draw a template of the actual cliche. Figure 2A shows a sample template for a cliche measuring 70 x 150 mm. (2.75 x 5.9 in.) Note that the template shows not only the outline of the cliche, but also the exact location of the ink cup at its proper diameter and lines for registration.
2. Locate the composite two-color design in the desired location, using the register lines as guides. The image should be centered within the ink cup’s area (Figure 2B). When complete, group all the elements of the image (template and graphic design).
3. Create a duplicate of the entire template and graphic image (Figure 2C). This ensures that your separations will match in terms of size and position and that the cliche images for each color will be precisely preregistered in relation to one another when you are complete.
4. Next, you must selectively delete design elements from each cliche image so that only design elements of the same color appear on each cliche. To do this, ungroup each of the duplicate images and delete the unwanted elements.
5. Replace the color of each remaining design element on each of the two cliches with black. This ensures that when you print separations, the design elements are printed as dark as possible (some lighter colors are represented as screened percentages of black when output from a laser printer). Also delete any register marks that appear near the image area of the cliche to reduce the chance that they’ll be printed along with the image.
To avoid confusion, you may wish to indicate which color the cliche is to print when the job goes to press. Simply place a descriptive comment somewhere outside of the pad’s compression area so that the comment doesn’t become part of the design (Figure 2D). Some printers also include a job number or file name on a corner of the cliche to aid in filing.
6. In most pad-printing applications, cliches are exposed with the emulsion side of the positive (or toner side, in the case of laser-printer positives) making contact with the cliche surface. So in order to get a right-reading image upon printing, the design elements for each separation need to be reversed or mirrored prior to producing the positive (Figure 2E).
Printing Separations
Your options for producing film from digital artwork varies with the type of output device and materials at your disposal. At the low-cost end of the spectrum are conventional laser and inkjet printers that image directly on vellum or film. Next are thermal imagesetters designed specifically for chemical-free film imaging. And at the high end are laser imagesetters with resolution capabilities far beyond what the typical pad-printing job calls for.
For applications like the sample job discussed previously, where the design involves relatively simple spot-color line art, I recommend using a laser printer for film output. For the best results with the least expense, you should use a laser printer with a minimum resolution of 600 dpi.
You should also use media designed specifically for producing film positives on a laser printer (typically, the most stable materials are polyester based). Definitely avoid using standard cotton vellum or over-the-counter transparency film, which can lead to exposure and registration problems.
If you think the toner density produced by your laser printer won’t be high enough to effectively block light in image areas during exposure, you can buy various spray products to enhance this density. Your pad-printing equipment or supply vendor should be able to recommend suitable products.
Photopolymer cliche materials
Improvements in photopolymer materials have led to economical cliches that support high-resolution images, have a long print life, and are easy to process in house. Photopolymer cliches consist of a resistant layer of photosensitive material anchored by an adhesive layer to a steel base plate. The steel base plate allows the cliche to be easily affixed to the magnetic cliche holders found on most pad-printing presses.
The photosensitive surface of the cliches come covered with a protective foil, and the entire cliche is generally packaged in a bag that protects the cliche from exposure to UV light. The packaging and the protective foil on the cliche should not be removed until you are ready for exposure, and they should only be removed under safe-light conditions, meaning that lighting is filtered to exclude UV wavelengths. You don’t need to work in the red-light conditions of a “darkroom,” but you do need to shield cliches from sunlight and the full spectrum of wavelengths produced by standard fluorescent bulbs. Special UV-filtering sleeves that slide over fluorescent bulbs are available from most screen- and pad-printing suppliers.
Cost, durability, and image resolution can vary significantly from one type of polymer material to another. Some photopolymer cliches are developed in water, and some are developed in alcohol. In general, water-developed cliches are less durable than their alcohol-developed counterparts, so this article will focus only on alcohol-developed cliches. Even within this single classification you’ll find numerous differences between available cliche blanks. The thickness of the base material and adhesive layers and the type and thickness of the photosensitive polymer can all vary.
Base material thickness can be an important consideration depending upon the method used to mount the photopolymer cliche to a base plate for printing. Magnetic cliche holders with pin-register systems provide the easiest, most consistent means of cliche installation, alignment, and removal. Adhesive sprays, double-sided tape, and screws are other methods employed to attach cliches on press, but these options don’t utilize pin registration. Without a pin-register system, alignment can become a guessing game, and when tape or spray adhesive is used, even a careful operator may bend a cliche while removing it from a base plate for realignment or cleaning.
In my experience, cliches with precision-machined base plates that correspond to magnetic holders on press are the best bet, both because they provide a secure attachment and because they promote rapid alignment through pin-registration systems. If you use a press with a magnetic cliche holder, the base material of your cliche can be just about any thickness. But on presses where the cliche is attached with tape or an adhesive, you need a thicker, heavier base to make sure the cliche remains flat and doesn’t slip from position. Thicker, heavier bases are also recommended where cliches will be attached to the press with screws, which can warp cliches with thin base layers when tightened.
The adhesive layer between the polymer and its base plate determines how well the layers stick together. The thinner the adhesive, the better the chances that the polymer will release from the base near the edges of the cliche when the cliche is cut to size and punched for locating pins. Delamination near cliche edges rarely has more than a cosmetic effect on the cliche. However, when the loss of adhesion is severe, it indicates that the polymer material has probably exceeded its shelf life or been subjected to extremes in temperature and humidity that will lead to poor printing performance.
The specific type of polymer material used and the thickness of that material have the biggest affect on the durability and image resolution of the finished cliche. Polymer materials have different molecular structures. When these materials are exposed to UV radiation during exposure, the molecules join in chains through a process called polymerization. The length of the resulting chains determines how dense or hard the finished cliche is.
High-quality polymer materials can withstand more than 100,000 impressions, with an image resolution that meets or exceeds that of etched steel cliches. But lower-quality materials may only last for several hundred to a few thousand impressions and provide lower-quality image resolution. Generally speaking, the higher the quality and the thicker the material, the better.
When dealing with a single supplier of your cliche materials, it’s likely that you’ll have several varieties of photopolymer cliche to select from. Most suppliers use the same base and adhesive thickness on all their cliches, but vary the polymer thickness.
For example, if your supplier offers three varieties of alcohol-developing cliche, the photopolymer layers may be 30, 40, and 50 microns thick, respectively. The thinner cliche at 30 microns is typically a general-purpose “one-step” cliche that requires only one exposure prior to development. Such a material has a large exposure window and produces a pretty consistent etch depth.
The two thicker materials (40 and 50 microns) each require two exposures: the first with the desired artwork, and the second with a halftone screen. This second exposure has several purposes. First, it controls the etch depth of the cliche. Second, it forms a dot pattern in the image area that supports the doctoring mechanism on both open-inkwell and sealed-cup pad-printing presses. Specifically, the halftone pattern prevents the doctor blade or sealed-cup edge from scooping excess ink out of the image areas of the cliche. Third, the halftone pattern helps prevent ink from flowing when the pad is compressed onto the surface of the cliche, which minimizes the chance of ink being “squished” beyond the image edges of the cliche and ruining print definition.
While one-step materials may be easier to prepare, they have limited use due to the fact that the etched areas cannot be screened to prevent the doctor blade or ring from scooping ink out during doctoring, nor can the etch depth be varied significantly for different degrees of ink coverage on the final print. In short, one-step cliches work well for fine copy, but not for bold text, images with large open areas, or images with a combination of both fine and bold areas.
Cliches that support dual exposures for screening (sometimes called screened cliches) are more versatile. By varying the line count of the halftone screen, you can control not only the image resolution, but the etch depth as well. In most applications, a 300-line/in. (120-line/cm) screen with 90% dots is the recommended screen to use, but this line count can be varied up or down to alter the etch depth–the higher the line-count, the shallower the etch.
Which type of polymer cliche is right for your applications? Nine times out of ten, you’ll be best served by the highest quality material that supports a second exposure with a halftone screen. The combination of high durability, good image resolution, and controllable etch depth makes the high-quality cliche a logical choice.
On the surface, the greater price of a high-end cliche may make it seem less appealing than a lower-cost one-step material. But in the long run, the increased durability of the thicker cliche will lead to savings, particularly through reduced labor. Why? Because the better-quality cliche will last much longer, so you won’t have to stop the press to make additional cliches. Additionally, you’ll save time in press setup because it’s easier to get a high-end cliche to doctor cleanly.
Cliche exposure and development
What do you need to correctly expose and develop photopolymer cliches? First, you need an exposure unit. Most pad-printing equipment manufacturers offer some type of exposure equipment. The cost of exposure equipment is directly proportional to the size of the cliches you need to make. Small units start at around $500, while larger units can cost $3000 or more. Here is a checklist of things to look for in an exposure unit:
1. Vacuum is a big plus, as it ensures a good contact between the cliche and the film during exposure. Insufficient or uneven contact can result in an uneven etch depth, poor image resolution, or both conditions.
2. A light source with a UV wavelength of 350-400 nanometers (nm) is ideal. The closer the output is to 350 nm, the better, since photopolymer plate materials are generally tuned to polymerize most efficiently and completely at this wavelength.
3. An accurate timer is important. Having an accurate, integrated timer will ensure that your exposures are consistent in length. A digital timer doesn’t wear out as easily as a wind-up one, and if the timer is integrated, it’s set to provide a specific degree of exposure and adjusts exposure time automatically to correspond with the actual lamp output. This means you can leave the unit unattended during exposure.
Exposure guidelines
If your exposure equipment and cliche suppliers are the same people, they should be able to give you explicit instructions for exposure and development. If they aren’t, you’ll need to determine the correct exposure yourself. Start by asking both the cliche and exposure-unit provider for their recommendations. They should be able to give you at least a good idea of where to begin.
Depending on the specific cliche materials and exposure equipment you use, your exposure routine may resemble the following procedure:
1. Remove the protective film from the cliche surface. Inspect the surface and remove any visible dust or debris. Place the film positive (emulsion side down) in the desired location. Gently rub any air bubbles out from between the cliche and the film with the pad of your thumb.
2 . Place the cliche in the exposure unit and engage vacuum (Figure 3). Ensure that there is a good draw on the vacuum. Expose for 4 min.
3. (For dual-exposure materials only. Otherwise, skip to step 4.) Remove the film positive from the cliche, replacing it with the halftone screen as shown in Figure 4. The film should be placed on the cliche emulsion side down. Engage the vacuum, again ensuring that there is a good draw. Expose for 4 min.
4. Remove the halftone film and place the cliche in the developing bath. Ensure that there is enough developer to completely cover the surface of the cliche. Using a very soft brush or a paint pad, gently agitate the cliche surface (Figure 5). Do not scrub. Just use the weight of the pad or brush and gently slide it over the cliche surface to remove unexposed material from the image area. Develop for 2 min.
Your developer tray should be large enough to accommodate the cliche with room to spare, and it should have a cover to keep developer evaporation to a minimum. Tupperware or Rubbermaid containers work well.
5. Remove cliche from developing bath. Wipe surface gently with a soft tissue to remove excess developer. Do not rinse with water.
6. Place cliche back in exposure unit (without using any film or vacuum) and post-expose for 20 min. The heat generated by the lamps during the post-exposure process should be sufficient to dry the cliche. If very little heat is generated by your exposure equipment, oven dry the cliche at 120


Subscribe

Magazine
Get the most important news
and business ideas from Screenprinting Magazine.
Most Popular
-

 Art, Ad, or Alchemy2 months ago
F&I Printing Is Everywhere!
-

 Case Studies1 month ago
High-Density Inks Help Specialty Printing Take Center Stage
-

 Andy MacDougall2 months ago
Functional and Industrial Printing is EVERYWHERE!
-

 Columns2 weeks ago
8 Marketing Mistakes Not to Make When Promoting Your Screen Printing Services Online
-

 Editor's Note2 weeks ago
Livin’ the High Life
-

 Marshall Atkinson2 weeks ago
How to Create a Winning Culture in Your Screen-Printing Business
-

 Thomas Trimingham2 months ago
“Magic” Marketing for Screen Printing Shops
-

 News & Trends1 month ago
What Are ZALPHAS and How Can You Serve Them in Your Print Business?