Articles
Published
19 years agoon
Computer-to-plate (CTP) technology is not new in the printing industry. It’s used on a daily basis in offset and flexography shops, and the screen-printing marketplace also has seen substantial growth in the use of computer-to-screen imaging systems. The concept of CTP and the equipment that makes the process possible are still very new in the world of
pad printing, but recent developments and improvements in the technology have allowed laser-based plate-etching systems to begin to take a significant hold. In fact, the pad-printing market appears to be ready for a total conversion to CTP over the next couple of years.
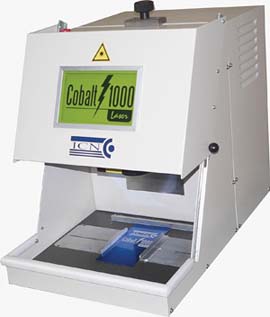
CTP systems, as they apply to pad printing, enable the user to take a digital graphic file and, by means of a laser, make high-quality pad-printing plates (cliches) without the use of film, exposure systems, or chemicals (Figure 1). Advancements in automation, increased efficiency, direct cost savings, and superior image quality have led to such dramatic improvements compared to other existing clichemaking technologies that those who see the results with CTP systems become instant converts.
Common plate technology
Polymer and steel are popular materials for making pad-printing cliches. Polymer cliches are ideal for short runs (usually between 10,000-15,000 impressions) and can typically be made in house. They’re excellent for those printers who need to provide quick turnaround for their customers. Quality images can be produced with film positives generated by an imagesetter or high-quality laser printer and developed with an aqueous or alcohol-based solution. The processes of exposing and developing polymer plates often takes between 15-30 minutes and must be followed carefully for optimum results (see the sidebar “The Creation of a Polymer Plate” on p. 32).
Even though polymer plates can yield very good image quality when the exposure and developing workflows are carefully managed, there are many steps in the process. As such, something can easily—and often does—go awry. Those printers who make a substantial number of polymer plates often run into problems that affect their ability to make cliches of consistent quality, inevitably reduce machine up-time, and hinder overall company profitability. Typical problems encountered with polymer plates are described in Table 1.
| Table 1 Typical Problems with Polymer Plates | |
| Problem | Typical cause |
| Inconsistent depth | Film positive not opaque Exposure-unit bulbs need to be replaced Developer solution is old Developer solution is mixed incorrectly Too much pressure while developing Screen film is damaged or not clean |
| Plate scratching | Plates not being post-exposed Plates not being post-cured Humid weather causing plate softening |
| Spots on plates | Heat causing alcohol to come to plate’s surface Matte film not being used |
| Poor print quality (bold/fine image) | Only one screen pattern can be used |
| Poor print quality (scooping) | Dot pattern not effective for bold images |
Thin and thick steel plates are typically used for very long production runs—500,000-1,000,000 impressions. They are commonly used in decorating products for the automotive, medical, and consumer-electronics industries.
The production of steel cliches is almost always outsourced to professional etching houses because aggressive chemicals, such as ferric chloride, are used in the platemaking process. Many of the same steps taken to etch polymer cliches carry over to steel plates. It’s difficult to hold a fine dot pattern in steel and challenging to get straight-walled etching, because pooling of the etching chemicals (Figure 2) causes keyholing—edges that are undercut. Laser-based CTP systems enable the pad-printing shop to bring steel etching in house without the concerns of dealing with hazardous materials, and they provide more control over the etch, especially when it comes to halftones and edge quality.
The benefits of CTP
Laser-based CTP systems eliminate the myriad variables and time-consuming steps that are required to make polymer plates. The entire laser CTP system workflow can be completed in as few as four steps: Import the graphic file into the system’s software, apply the halftone pattern to the image, specify the etch-depth parameter in the laser’s operating software, and press start. Image engraving can take anywhere from one to five minutes. The resulting images on laser-etched pad-printing cliches are of extremely high quality, and the image quality is completely repeatable.
Another significant advantage to using a laser-based CTP system to produce cliches is that the etch depth and halftone pattern can be accurately fine-tuned to match the type of image you want to print, the viscosity and rheology of the ink used, the speed of the printing machine, and the durometer of the printing pads used. Controlling all of these parameters in the software enables the user to create a plate that is tailored specifically for the job at hand and to fine-tune settings unique to each production environment.
Laser-based CTP systems can accommodate operating settings for fine images, combination fine/bold graphics (Figure 3), and bold images. Polymer cliches don’t handle large, bold graphics very well, but the laser can easily transfer these kinds of designs.
By setting the laser for a large halftone pattern, big dots are left in the plate to hold the ink in place and eliminate scooping, which is when an ink cup or flexible doctor blade dips into the image areas and causes fading in printed graphics. Scooping is among the most difficult problems to solve when printing with polymer plate materials. Generally speaking, CTP-generated cliches offer the following advantages over traditional polymer plates:
• Print quality is improved. Laser-imaged graphics are first generation, so there is no loss of resolution. Cliches made from a film-based workflow are second generation.
• Platemaking is controllable and repeatable. Plates can be made the same every time, and software parameters can be saved on disc or a network server.
• Plates can be made with combination etching. Halftones for bold areas and open etches for fine graphics can easily be integrated into the same cliche.
• Ink lay-down is improved. Laser-engraved plates have a straight-walled etching and more precise inkwell than polymer cliches and thin or thick steel plates.
In addition, because the CTP process requires fewer consumable materials, CTP users are able to enjoy a number of cost-saving benefits: Double-sided laser-etched plates can accommodate up to four images, which reduces plate usage; costs of laser-etched plates are similar to those incurred by producing polymer cliches; and costs for films, chemicals, consumables shipping, and removal of hazardous materials are eliminated, as are maintenance contracts on processing equipment.
Finally, as far as savings in time are concerned, computer-to-plate systems offer a number of benefits that directly affect the bottom line. For example, a laser system can etch a plate in as little as 1/6th the time it would take to create a polymer cliche. Furthermore, complete control over image and depth yields consistent plates every time—no need to worry about machine downtime or remaking bad cliches (Figure 4).
The benefits associated with implementing CTP technology are numerous, but it’s important to develop an understanding of how these systems work before you make the decision to buy a CTP unit for your shop. There are a few areas that are key to the evaluation process: laser type, software capability, and system features.
Lasers
To date, three types of lasers have been used to make pad-printing plates: diode-pumped Yttrium Aluminum Garnet (YAG), Ytterbium fiber laser (YAG wavelength), and CO2. The primary differences between these units are the maintenance required, the spot size, and ability to ablate (etch) various materials.
Maintenance The diode-pumped YAG has a diode bar that heats up and can warp after about 10,000 hours of use, thereby requiring costly replacement. The Ytterbium fiber laser has no diode bar; therefore, it has no maintenance requirements for up to 70,000 hours of operation. The CO2 laser also does not require a significant amount of maintenance.
Spot size The wavelength of a YAG laser (1.064 microns) is exactly ten times smaller than the CO2 wavelength (10.64 microns); therefore, it has a resulting spot size that is 10 times smaller than a CO2 (in the same setup). YAG lasers are able to produce more detailed graphics than CO2 when both laser types are put into the same machine setup.
Materials YAG lasers are ideally suited for metals, but their wavelengths are not easily absorbed by many other materials (i.e., wood, acrylic, plastics, fabrics). A CO2 laser beam has much more latitude and can be absorbed easily by many organic materials—wood, paper, plastics, glass, textiles, and rubber—but is not easily absorbed by metal.
Software
The laser software is a critical element in the production of pad-printing plates that are able to meet today’s demanding quality standards. When lasers were first introduced to make cliches, they were only able to engrave plates with straight, open etching. They were incapable of engraving bitmap, gradient, halftone, or process-color images, and they were not able to handle graphics software considered standard by the industry.
The most common graphics applications used in the industry today are Adobe Illustrator, CorelDRAW, and Adobe Photoshop. It is essential that the laser software be able to handle documents created in the latest versions of these programs, whether on Mac or PC systems. This allows any laser-based platemaking system to be seamlessly integrated into the shop’s workflow.
Dot pattern and depth are crucial software parameters that enable the operator to completely control image depth and appearance for the ideal laser cliche. The halftone or dot pattern applied to the target image can be programmed in with hatch parameters.
The hatch, or separation, between the laser lines is applied to the image and can be varied depending on the type of image. A small hatch can be applied for fine-line graphics, a larger hatch will prevent scooping in bold graphics, and a variety of hatch patterns can be applied to the same image when dealing with challenging graphics that combine bold design elements and fine lettering.
Precise depth control is typically achieved by etching multiple passes of the same image so that a small amount (0.0002-0.0003 in., depending on settings) of plate material is removed on each successive pass of the laser. The power and frequency of the laser also can be varied to fine-tune the plate depth. This produces the best printing plate for the type of ink, production speed, and substrate.
System features
A laser-based CTP system can easily be run by one operator, and a day or two of training is typically sufficient to develop proficiency in making plates. CTP systems offer several features that ensure cliche quality and streamline the workflow, and they’re available in benchtop and standalone models, which enables their use in a variety of shops.
Vector-tracing software is a very important component, because artwork must be clean before it’s imported for etching. That means vector files need to have all lines continuous and complete with no crossed lines. Manual touchup is sometimes necessary to make artwork ready for etching, but tracing software can simplify and standardize the process. You should also look into features that enhance repeatability (such as microadjustable focal distance and a plate-registration system) and efficiency (an auto-load system, pre-etch laser pointer, and particulate-evacuation system, for example). The flexibility to accommodate future expansion is also very important.
Are you ready for CTP?
The selling price of the laser systems in the market today still may be out of reach for some pad-printing shops, particularly those that do not produce many plates. But for larger shops that make many polymer plates, or for those that outsource their steel platemaking, an investment in CTP laser systems can be easily justified by the reduction in consumables, simplification of the workflow, consistency of quality, and the ability to control the entire process of steel cliche-making by bringing it in house.
As with any innovation, it is expected that the price of these systems will decrease as they become more common and the technology evolves. Computer-to-plate systems for the pad-printing industry are a natural progression of digital technology, and the advantages they bring to the platemaking process put them in a strong position to become the de facto standard for producing cliches.
The Creation of a Polymer Plate
Failure to control the variables when making a polymer cliche can yield a low-quality plate or worse—a cliche that’s completely unusable. There’s even more at stake when you consider that it may take up to 30 minutes when using conventional methods to create a polymer cliche. A traditional workflow used to create polymer pad-printing cliches involves the 15 steps described here.
First exposure
1. Center the polymer plate, metal side down, on the platen of the exposure system.
2. Place the film positive, emulsion side down, on the polymer plate and center on polymer plate.
3. Turn on the vacuum and drape the vacuum blanket over the film/plate combination. Wipe the vacuum blanket smooth to ensure there are no air pockets trapped or creases in the blanket.
4. Set the exposure timer (see Table). Note that times will vary with different exposure units.
5. After the first exposure, open the exposure unit, and remove the film positive from the plate.
Second exposure
6. Place the halftone screen film, emulsion side down, on the polymer plate.
7. Turn on the vacuum, close the exposure unit, and set the exposure timer (see Table).
| Film exposure | Screen exposure | Screen size | Depth of etch |
| 60 sec | 60 sec. | 200 lines/in. (90% image area) | 1 mil |
| 90 sec | 90 sec. | 300 lines/in. (90% image area) | 1 mil |
Plate developing
8. Remove the plate from the exposure unit.
9. Use a pad soaked in alcohol to wash developer solution. Rub gently for about a minute to wash out the uncured material from the plate.
10. Neutralize the developer solution by spraying the plate with a light mist of fresh, warm water.
11. Gently blow dry both sides of the plate with clean, filtered air.
Post-exposure
12. Open the exposure unit, and place the plate on top of the platen. Do not cover the plate with the vacuum blanket.
13. Post-cure the plate by setting the exposure time for 10 minutes. The post-cure ensures plate longevity by fully curing the etched area and surrounding material.
14. Place the plate into a convection oven, preheated to 140°F (60°C), for 8-10 minutes.
15. Remove the plate from the oven. Allow to cool down to room temperature.
Important notes
• The first exposure time on the film positive determines the overall depth of the ink well. The shorter the exposure time, the deeper the plate.
• The second exposure on the film positive determines the amount of ink, the size of the dot, and the spacing between the dots.
• Reducing the second exposure time on the screen will reduce the height of the dot and will let more ink transfer.
• You can control the printing effects by varying halftone screens. For example, a 300-lines/in. screen will print finer graphics with a shallower plate; a 200-lines/in. screen will print medium graphics with a plate of medium depth; and a 150-lines/in. screen will print coarse graphics with a deeper plate.
About the author
Benjamin Adner is president of Inkcups Now in Danvers, MA. He’s been developing equipment and consumable products for the pad-printing industry during a career that spans more than 17 years. For more information, call Inkcups Now at 978-646-8980 or visit the company online at www.inkcups.com.


Subscribe

Magazine
Get the most important news
and business ideas from Screenprinting Magazine.
Most Popular
-

 Case Studies2 months ago
High-Density Inks Help Specialty Printing Take Center Stage
-

 Art, Ad, or Alchemy2 months ago
F&I Printing Is Everywhere!
-

 Andy MacDougall2 months ago
Functional and Industrial Printing is EVERYWHERE!
-

 Columns3 weeks ago
8 Marketing Mistakes Not to Make When Promoting Your Screen Printing Services Online
-

 Editor's Note3 weeks ago
Livin’ the High Life
-

 Marshall Atkinson3 weeks ago
How to Create a Winning Culture in Your Screen-Printing Business
-

 Thomas Trimingham2 months ago
“Magic” Marketing for Screen Printing Shops
-

 News & Trends2 months ago
What Are ZALPHAS and How Can You Serve Them in Your Print Business?