Garment Printing
Published
11 years agoon
Digital printers designed for producing quality graphics on T-shirts have reached a new level in quality and ease of use. This newer decoration method has its own challenges. There are particular styles of artwork that fit well with the digital process; however, many decorators quickly find out that clients don’t always provide artwork that is easy to deal with and make friendly for these digital printers. Most of the time, a few simple adjustments to the artwork can be made so that the work meets the approval of the client and the shop.
Digital printers designed for producing quality graphics on T-shirts have reached a new level in quality and ease of use. This newer decoration method has its own challenges. There are particular styles of artwork that fit well with the digital process; however, many decorators quickly find out that clients don’t always provide artwork that is easy to deal with and make friendly for these digital printers. Most of the time, a few simple adjustments to the artwork can be made so that the work meets the approval of the client and the shop.
If you are designing your own artwork for a digital printer, or if you are buying art from a freelance supplier, it’s important to spell out certain issues and qualities in the art so that the final design is easy to produce and profitable. The most common challenges that can crop up with artwork for digital printing are design-border issues, underbase concerns, consistency with solid colors, and converting the artwork to work best with digital imaging.
Costs and labor
It is best to get a clear idea of costs before you start tackling art issues with the digital printer. The inks can be very expensive, so any scrap—especially with the tendency for orders of digitally printed shirts being smaller in volume—can quickly turn an order from a profit to a loss. A good way to finalize your cost is to track consumables against the square inches of coverage in the designs that have been printed, remembering to add a multiplier for a white underbase. Of course, some designs have more saturated colors than others, but if you have a variety of designs and then average it, you can at least then get a measurable number.
The next important factor is the labor involved in shirt prep (pretreatment or heat pressing) and then the curing of the design. A final factor that can be difficult to estimate, but necessary with digital printing is a certain amount of cost added for routine and unexpected machine maintenance. Some garment printers will help with the estimation of ink used, and this is great, but the real costs are often hidden in the labor and extra steps, including pre-testing the design.
The reason that costs are important to nail down before the art-adjustment process can start is that there are some orders that are not possible to fill at a profit, depending upon the cost vs. the amount of work that may need to be done. The challenge with creating art for DTG printing is that the lower volume of a T-shirt order may simply not support extensive manipulation of the artwork to make the design look good on the shirt.
Even if the client is willing to pay extra costs to manipulate the artwork and make it work on a dozen shirts, it may not be a good investment if the art will take hours to adjust. This will take time away from higher volume (and more profitable) work.
A way of dealing with this is to have a couple of the basic art processes spelled out, and then draw a hard line on what you and your art department are willing to invest on each job. Clients may have to settle for a quicker art process than they originally wanted, but it’s a win/win if the printer is making a profit on every digital job.
Border issues with artwork supplied for digital printing
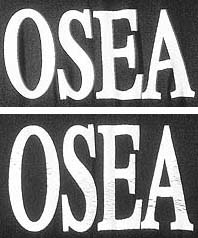
A common challenge in artwork for DTG printing is that an image has edges that are not defined and the customer wants it printed on shirt colors that differ from the background in the original image (Figure 1). In these cases, as previously mentioned, a decision has to be made as to how much art investment will be put into the design to extract it from the background. Otherwise, the image would have to be printed as a big square, which is an equally unappealing solution because of the high cost of ink coverage.
There are several quick ways to define a border on an image, but they can vary depending upon the complexity and blending in the edges of the original image. Adobe Photoshop has great tools for extracting the detailed parts of images quickly and creating borders around simple and complex images. You’ll have to work to develop the necessary skills, but, in the end, there is no better tool for prepping images for digital printing.
Simpler images with sharp, properly defined edges can be defined quickly using the Magic Wand tool. The only concern in these cases is if the extracted part of the image has certain colors that lack contrast or need a border to look appropriate on a shirt color that differs from the original image. To test the image, create a new layer below the image and drop the color in it. A good way to keep the test accurate is to download a color reference from the actual garment and then stretch it out to cover the background layer (Figure 2).
If the design needs a boost to correct for poor contrast or color clash against the T-shirt color—for example, yellow text against a yellow shirt—then you can always add an effect to the extracted design with a stroke, a drop shadow, or an outer glow.
If you’re working with a complicated design that fades out into the background, try to use the Color Range tool and then adjust the fuzziness of the capture to define just the background outside of the active design area. This selection can be then saved to an extra channel.
The next step is to use this selection from the channel (Ctrl-click or Cmd-click on the channel) and go back and create an extra layer above the original image. You can then carefully blend this additional layer into the active design elements using Photoshop tools such as the Airbrush and Pen. In this manner, you can quickly create an extraction that blends slowly in some areas that fade out and still leaves the design nice and clean in areas such as type and geometric shapes with sharp outlines (Figure 3).
Once this layer is defined, then you can select it and copy the original layer and then delete the selection to create a floating version of the design. There are always exceptions to art techniques, and it may be that in using a Color Range selection some elements inside of the design area are selected that you didn’t want extracted or deleted. This is where the advantage of copying to a channel comes in. Any area that you don’t want in the selection can be deleted quickly prior before you delete the image border from the design.
White underbase
The addition of the white underbase on a digital print is a relatively new concept (compared to screen printing) that allows the design to be imaged on a variety of dark shirts and prevents the design from changing color or fading out. This additional print is typically an extra step that takes place before the colors in the design are printed. Depending on the printer, the design file will probably have to contain an additional layer or channel that will dictate which parts of the design are to be underbased.
Different printers have software that will produce an underbase for you, or they will have suggested processes to follow in Photoshop to create one. In either case, it is common for the printer to have to adjust this layer or channel in the artwork prior to final output. Ideally, the black in a design shouldn’t be underbased, and if the design fades out into the background of the shirt, the underbase will have to be smaller than the top colors to avoid an awkward transition to the shirt fabric (Figure 4).
An additional concern is when a design has colors in it that need a certain density of white to be bright enough. If a graphic has really bright reds, blues, and yellows, then the underbase may need to be boosted in these areas, depending on the production method used.
A common way to create a quick, working underbase in an image to be digitally printed is to take the extracted design—with the outside border removed so the active image area is floating in a layer in Photoshop—and then make a solid, black layer behind it, duplicate it, and then convert the image to L*a*b* color. The resulting image can be used for an underbase by going into the Channels menu, selecting the Lightness channel, and copying it and then pasting it back into another version of the image as an underbase file.
This channel will likely need to be boosted in the most saturated areas of primary and secondary colors, but it will have a good start as an underbase. The final process is to selectively fade areas back if they show underneath the top colors in a digital proof. You can check this by viewing the image channels and then turning the additional white channel on and making it a contrasting color, like bright green, so that it’s a clear indicator where the underbase may be likely to spread out past the top printed colors.
A final note is that not all colors may be underbased correctly by using the Lightness channel method or a printer’s RIP software, so it is a worthwhile investment to create a color-reference guide for your printer. One way to do this is to use a reference of Pantone colors captured as an RGB image and then imported into Photoshop (Figure 5). This guide can then be digitally printed onto a black shirt using several underbase settings to determine which colors need more of an underbase and which can be left alone. The other advantage of this guide is that it can help with color matching when a customer requests a specific color and there is some uncertainty whether the supplied file will provide the right hue after being processed and printed onto the shirt.
Solid colors
An ironic twist of digital printing vs. screen printing is that designs that are perfect for simple screen prints tend to make the hardest digital prints and vice versa. A simple design with several large areas of solid colors will show any inconsistencies in banding, registration, and ink coverage on a digital printer—not to mention that these are also the most expensive prints to execute digitally. To combat this issue on an artistic level isn’t that hard if you have a couple designs ready and can show a client how the art can be modified for a digital print.
An easy way to break up solid colors so they are easier to reproduce digitally is to add some shading, gradients, and possibly a distressed overlay to the artwork (Figure 6). Not only does this give a cool rendered or vintage appeal, but it also makes the print a lot less likely to show any small shifts in color banding or registration. If you can talk the client into doing a worn-out look, then see if you can make it into a more tonal print on the garment. The print can then be produced more profitably because you’ll be using less ink, and it should print more efficiently, too. Obviously, there are many times where you can’t adjust the artwork, but having some examples to show will increase the chances that customers may decide to change the art for the better.
Converting the artwork
Big advances in quick image creation and manipulation over the past few years have given customers lots of sources images to use in a design. With this wide variety of graphics comes a big assortment of image-color modes, saturation levels, and gamut ranges. Although modern digital printers are better at handling a variety of changes to graphics, there is still a question of how the artwork should be adjusted prior to prepping it for DTG printing. Some images may run well with no changes or adjustments, and others may require extensive color-mode and saturation changes to prevent colors from shifting unpredictably.
The first step is to use all of the information about your specific printer and its ink system in comparison to the gamut of the images provided. If you have CMYK inks, then you will have quite a few colors in images that won’t print correctly and will need adjustment. Other printers have RGB printing systems with expanded-gamut colors to handle more saturated colors, but the image may still need minor adjustments if the colors have a lot of different combinations of hues. The best thing to do is to test colors with a few different color palettes and then see what the final Photoshop values look like when the colors are printed on the final shirt.
Creating and editing artwork for a DTG printer doesn’t have to be difficult. You just need to estimate, test, and then edit your files properly to compensate for the DTG’s variables. Using a couple of standard procedures to prep artwork prior to production can make all the difference when it is time to print your next rush job on a DTG system.


Subscribe

Magazine
Get the most important news
and business ideas from Screenprinting Magazine.
Most Popular
-

 Case Studies2 months ago
High-Density Inks Help Specialty Printing Take Center Stage
-

 Art, Ad, or Alchemy2 months ago
F&I Printing Is Everywhere!
-

 Andy MacDougall2 months ago
Functional and Industrial Printing is EVERYWHERE!
-

 Columns3 weeks ago
8 Marketing Mistakes Not to Make When Promoting Your Screen Printing Services Online
-

 Editor's Note3 weeks ago
Livin’ the High Life
-

 Marshall Atkinson3 weeks ago
How to Create a Winning Culture in Your Screen-Printing Business
-

 Thomas Trimingham2 months ago
“Magic” Marketing for Screen Printing Shops
-

 News & Trends2 months ago
What Are ZALPHAS and How Can You Serve Them in Your Print Business?