Embroidery
Published
16 years agoon

All embroiderers at one time or another experience the frustration of not having a design sew out as planned. Not only can this be expensive in terms of ruined garments, but it can also be time consuming to try to figure out what went wrong and how to correct the problem. The following pointers address some common embroidery concerns and offer simple solutions.
Q: I sometimes notice that a line of stitches is missing in the middle of my fill when I’m sewing a fill area. What can I do to keep this from happening?
A: If you create a fill area that sews part of the way in one direction, then walks to the other end of the fill and sews back in the other direction, it will often leave a gap in the middle of the fill. Material bunching is the cause. Material slightly builds up ahead of the stitching as you sew the fill. It does the same thing when it walks away and starts sewing back to the middle, and you’ll find a buildup of material where the two fill areas meet that looks like it’s missing a few rows of stitching.
You can do a couple of things to keep this from happening. In general, you want your fill to sew all in one direction. Create a fill area in your digitizing software and close your shape, then select where you want to put your exit point. If you were stitching horizontally, you would want to set your exit point at the top or the bottom. If you were stitching vertically, you would want your exit point on the left or the right side. It doesn’t usually matter which direction you sew as long as you sew in one direction.
Another way to prevent buildup is the proper use of underlay. A netting underlay works well for simple fill areas. A cross-hatch underlay provides great stability for the top stitching and is a favorite underlay for fill areas for many embroiderers. If the fill area is a very complex shape, or if it has lots of void areas, the netting underlay may sometimes be too haphazard to provide good results. If this is the case, then you should choose a packing or full packing underlay. Both create an underlay that is perpendicular to the top stitching. The full packing also does an edge walk. Using proper underlay and sewing your fills in one direction will alleviate your challenge with this issue.
Q: I am running a design that is lettering only. It is three words, and these words contain 23 letters. I’m trimming between all the letters, which is really slowing down my production. Do you have any suggestions?
A: Excessive trimming can really slow down your production, thus cutting into your profits. If you are only running one or two items, the production value of the design is not that much of an issue. Production value becomes more and more important as the orders get larger. For example, when doing font lettering, it’s best to reduce the kerning and make the letters close enough to each other where trimming between each letter becomes unnecessary, leaving only the trims between each word. In this case, you reduce the number of trims from 23 to three. The machine takes about seven seconds to stop, trim, and then get back up to full running speed. Eliminate 20 trims and multiply that by seven and you’ll save about 140 seconds. That’s more than two minutes per design! While not that big of a deal when running one design, this reduction over the course of 200 pieces represents more than seven and a half hours of run time. That’s a big difference.
Another example of how trims can be eliminated can be seen in Figure 1. It has 68 letters in the crossword. Trimming each letter would be terrible for production. These letters were digitized by walking into and out of the bottom of each letter and traveling between letters and words using a running stitch. The digitizer traveled underneath the black satin stitches that create all the squares and then stitched the black after all of the lettering was complete. This process reduced the trims from 68 to four, which is the number of colors in the lettering. Reducing the number of trims and color changes to the fewest possible, while still keeping the integrity of the design, will not only increase your production, but it will also increase your bottom line.
Q: I’m having a hard time making my trademark and register marks look good, especially on pique shirts. After completing the design I trim and jump to the TM or the ® and often find it missing some stitches or not looking too good. Is there a better way to do this?
A: Sewing something that is really small typically requires a manual or running stitch. Always use the manual stitch, because you want to be in control of each needle penetration. This technique works best when you walk into and out of running-stitch lettering. Trade and register marks are usually very close to the last object. Snug them in a little closer and stitch them before the last object. Four to six revolutions of the hook are required to connect the top thread to the bobbin thread. If you trim before attempting one of these marks, it is almost impossible to make it look good.
You also want to keep the stitches long enough to lay on top of the material. Most people put too many stitches going around curved areas like the circle and part of the letter R, then the stitches sink into the material and aren’t very clear. The example shown in Figure 2 was run on pique with one piece of no-show mesh backing and without a topping. Using a topping will almost always make your stitching look better on pique. You won’t be able to get the topping out of the register mark, but it will come out after the first washing.
Q: I’ve been using a stock design to sew on placemats, and it runs fine at the original size. Now my customer wants me to sew it on a napkin at about half the original size. I reduced the design size and am now getting lots of thread breaks and frays. Do I need to adjust my tensions? Or is there something else I need to do?
A: You first want to make sure you’re using the proper file type for scaling a design. You must use an outline file (.bdf, .cnd) for proper resizing of a design. If you try to scale a stitch file (.dst, .pes, .exp, and others), the stitch count will basically stay the same. That means if you enlarge it very much, the design will look very sparse on the sew out. And if you shrink it very much, it will be packed with stitches. You’re limited to approximately ±10% in scalability on a stitch file. Using an outline file gives you a much larger range of resizing options, but some limitations still exist.
Make sure that the satin stitches don’t get too narrow when reducing the size of a design. Satin stitches need to be at least 0.05 in. wide to sew well. If you start with a design that already has satin stitches that are only 0.05 in. wide, the design won’t reduce much at all without creating sewing challenges. Satin stitches that are too narrow cause thread breaks and frays. When they sew out, they look like poor quality running stitches instead of nice, smooth satin stitches. The easiest way to correct the problem is to isolate just the narrow satin stitches and add pull compensation to them. You need to add at least 50-60% pull comp when dealing with narrow satin stitches like these. If you can’t, then you need to redigitize the stitching as a running stitch instead of a satin stitch. Sometimes you can just delete stitches without much of an effect on the look of the sew out.
You have to be concerned about the satin stitches getting too wide when enlarging a design. To correct this in your digitizing software, highlight the satin stitch and change it to fill stitches. The scaling of designs can be very useful, but keep in mind that the design and the stitch types within the design determine the amount of scalability.
Q: I have a stock design of a shell that I’ve successfully run many times on tote bags. Now I’m trying to run the design on polar fleece, but the stitches are not covering each other. Does this have to do with tensions, or should I change the design in some way?
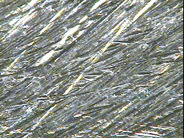
A: Many stock designs have little or no underlay, which works fine for a stable material like your tote bag, but you’ll normally need to add an underlay to the design when switching to a more unstable material like fleece or pique. The top shell in Figure 3 was sewn as-is, while the addition of a cross-hatch underlay to the shell on the bottom solved the gapping problem.
You can create the underlay by digitizing two light-density fill shapes. Digitizers usually use around 20%, and then change the angle of the fill to 45° on one and 135° on the other. Next, cut and paste both fills to sew first in the design. Looking at the sewouts, you can see that the bottom shell looks much better than the top shell. Both of these were sewn in the same hoop.
The bottom shell still shows a little bit of material in some places because the original punching (digitizing) did not have enough distortion. You need to overlap satin stitches that run side by side. These were just barely overlapped, which is why gaps are being pulled. Since this is a stitch file, you would need to convert it back to an out-line file, but then you could add pull compensation. If you don’t have stitch processing, you could try running the shell with the underlays using a topping, which would most likely take care of the few spots that are showing.
Q: I’m trying to sew a 2-in. letter S on a cap using puffy foam and am not having much luck. It doesn’t look very good, and there are bits of foam sticking out everywhere. How can I make it better?
A: There are a few things you can do to improve the quality of your sewout. A very important factor is that the color of the foam and thread should be as close as possible. Too much contrast between the foam and the thread is very obvious. The density needs to be increased. Digitizers use anywhere from 130-200%, so somewhere around 150% should work well. You always need to cap the open end(s) of a satin stitch with another satin stitch to cut the foam properly (Figure 4). The satin stitch sews perpendicular to the top stitching. It should extend out beyond the end of the top stitching or the top stitching falls off the edge and gets loopy. Some digitizers slant the edges of the cap in so they won’t pop out from under the top stitching, and some use a random edge on the inside edge of the satin to avoid cutting the foam where they don’t want it cut. Both methods work equally well.
You can digitize in several ways. Some digitizers use a double-edge walk underlay before stitching. Others stitch the letter twice. They lay down the foam, sew the letter first at a 50-75% density, then stop the machine and pull the foam, then sew the letter again over the top at a normal density. You will need experiment for yourself, because there is no shortcut to experience.
Remove the foam after you sew the design. Foam materials vary tremendously. They don’t all pull off the same or have the same loft, even if they have the same thickness. Even different colors from the same brand don’t behave the same way. In many cases, it’s best to pull off the foam like you’re pulling off a bandage—one quick, pulling motion. After pulling off the foam, you will often see little fuzzies that you can clear up with a steamer, steam iron, hair dryer, or something similar. These techniques should improve your sewing quality.
Several solutions
Building experience as an embroiderer gives you a powerful assortment of tools and techniques to use when you face roadblocks in production. But even the experts encounter problems that require them to try several remedies in order to complete the more challenging sewing jobs. Don’t get frustrated when a process doesn’t work out the first time. Try another approach, and be sure to sew on scraps so that you don’t risk ruining good garments. Remember: Practice leads to the productivity that can make you a successful embroiderer.
Sherry Higgins is a freelance writer, marketing consultant, and president of Total Marketing Solutions LLC, a full-service agency specializing in marketing strategy and de-sign. She has more than 20 years of experience in marketing and public relations, with expertise in the garment-decorating market. She can be reached at 908-686-9031 or sherrylhiggins@hotmail.com.
Malcolm Eckel is a technical engineer for the Industrial Products Div. of Brother Int’l Corp. He’s been in the embroidery industry since 1980 and has punched more than 15,000 designs. Eckel started in the days before computerized embroidery, when every design was punched stitch for stitch.EMBROIDERY Q & A


Subscribe

Magazine
Get the most important news
and business ideas from Screenprinting Magazine.
Most Popular
-

 Art, Ad, or Alchemy1 month ago
F&I Printing Is Everywhere!
-

 Case Studies1 month ago
High-Density Inks Help Specialty Printing Take Center Stage
-

 Andy MacDougall1 month ago
Functional and Industrial Printing is EVERYWHERE!
-

 Columns2 weeks ago
8 Marketing Mistakes Not to Make When Promoting Your Screen Printing Services Online
-

 Editor's Note2 weeks ago
Livin’ the High Life
-

 Thomas Trimingham2 months ago
“Magic” Marketing for Screen Printing Shops
-

 Marshall Atkinson2 weeks ago
How to Create a Winning Culture in Your Screen-Printing Business
-

 News & Trends1 month ago
What Are ZALPHAS and How Can You Serve Them in Your Print Business?