Garment Printing
Published
22 years agoon
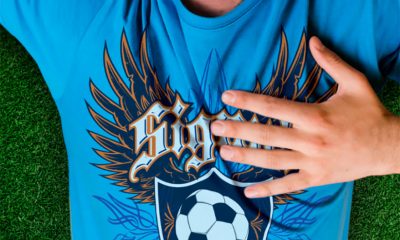
I never cease to be amazed at the creativity and imagination behind many of today’s garment decorations. Graphic designers are constantly reinventing the wheel and introducing innovative new graphics and ways to apply them to fabrics. Exciting garment decorations often result from mastery of tried-and-true decorating methods. Others spring from the release of new specialty inks or the development of creative techniques to apply existing inks. This month, we’ll look at two applications that reflect both creativity and printing skill: printing over seams and inverted printing.
I never cease to be amazed at the creativity and imagination behind many of today’s garment decorations. Graphic designers are constantly reinventing the wheel and introducing innovative new graphics and ways to apply them to fabrics. Exciting garment decorations often result from mastery of tried-and-true decorating methods. Others spring from the release of new specialty inks or the development of creative techniques to apply existing inks. This month, we’ll look at two applications that reflect both creativity and printing skill: printing over seams and inverted printing. Printing over seams Domestic printers have been printing over the sleeve of jerseys and T-shirts for years. The trick to printing over seams is to make the design appear even despite the fact that you are printing over an uneven surface. Printers take several approaches to printing over seams, and each will produce a different effect. In terms of minimizing the hand of the print at the seam, the most effective decorating methods use water-based inks. However, an important challenge in using water-based inks is ensuring that the garment receives sufficient heat to drive all of the water from the ink in seam areas. The larger the seam, the greater this problem becomes. The easiest means to avoid ink buildup in seams is, of course, to print the garment in cut-piece form and assemble (sew) the garment after printing. Due to the ease of handling finished garments, few domestic garment printers work with cut pieces. Most high-volume cut-piece programs have now moved out of the country to take advantage of lower labor and material costs offered by foreign competitors. Cut-piece printing can also be taken a step further. For the ultimate in speed and the ability to get an all-over printing effect without ink buildup, rotary screen printing of fabrics in bolt form prior to cutting is the best solution. The primary drawback to this method is that its very difficult to cut and sew the final garments in such a way that graphic elements on sleeves and adjoining panels of the garments will align properly. Rotary printing works best when graphics involve abstract patterns, where alignment is less critical. This brings us to standard screen printing of finished garments. Again, the goal is to bridge the image across the seam of the garment with as little interference to the garment or the image as possible. One simple method of getting a graphic to cross a seam is to break up the image so that you can print a portion of it on either side of the seam. This is commonly done with athletic jerseys, where the letters of the team’s name are separated across the garment so that the seam of the garment falls between characters. With more complex images, however, this approach can make it difficult to maintain the integrity of the design. The biggest problems when splitting graphics come when the image will be printed on garments of different size. Depending on the graphic, you may need a separate set of screens for each garment size you will be printing. You’ll face no bigger obstacles than when you want to completely overprint the seam in order to preserve the graphics integrity. In these situations, you generally must strive for a happy medium. Although you can print across the seam with multiple colors and solid images, you will inevitably have to stop production frequently to wipe the screens (ink will build up on the screen around seam areas of the print). You also will have to keep the following two points in mind: * As you print from garment to garment, no two prints will fall in the exact same place on the garments. In other words, the seam of the garments will always make contact with a different part of the screens, leading to ink buildup that can eventually cause smearing of the printed image. * As the ink builds up on the screen, an occasional garment seam will line up with this buildup, and the heavy volume of ink will be transferred and fill the seam. The excessive ink deposit will lead to the curing problems mentioned previously. Knowing up front that seam printing is a more costly and time-consuming process is half the battle when taking on such applications. The rest of the fight lies in maintaining the graphics integrity and not producing a huge smear of ink around seams. A final option to consider when overprinting seams is to break the image up in a way that minimizes the actual amount of ink that will come in contact with the seam. Depending on the graphic, you can possibly graduate the image with halftone patterns as opposed to solid areas of ink. This will reduce the volume of ink that inevitably is transferred to the seam. Inverted printing Inverted printing is a technique that was originally developed in Europe. The concept is to print the design on the inside of the garment (with the image inverted as you would when printing a heat transfer). You then allow the pressure of the squeegee to push the ink through the fabric, thus creating a residual image on the outside of the garment. This method leads to a "distressed" appearance in the image that’s visible on the outside of the garment. More importantly, this distressed image appears different and unique for each and every garment printed, despite the fact that the original graphic is the same. In this process, the image is generally printed with water-based inks. The unique look that each garment exhibits when printed this way results from variations in the absorbency of the fabric and the pressure of the squeegee during printing. The smallest variations in the fabric and squeegee pressure influence where ink comes through to the front of the fabric and how much ink comes through. An alternative approach that can lead to even more unpredictable and unique results is to print the inverted graphics with discharge inks, which would discharge the garment dyes from the inside of the fabric. Few domestic garment screen-printing operations work with water-based inks, so some might be inclined to attempt inverted printing with plastisols. Plastisols will work in much the same way that water-based inks do. But plastisols are heavier, denser inks and require additional pressure to be forced through the fabric in order to create a visible effect on the opposite side. The heavy hand that results on the inside of the garment is the primary drawback to inverted printing with plastisols. Another downside to inverted printing is that every garment must be turned inside-out prior to printing and then right-side out when the print is complete. You may be able to cut labor in half, however, by asking your garment supplier to ship garments inside-out, which is the way they are sewn. However, these sorts of requests usually just apply when your garments are custom manufactured. If you are printing on stock product, you will need to execute the garment-turning process twice. Be supreme, go extreme In the competitive world of garment decorating, the ability to make your products stand out is key to remaining successful. And if your company can produce attractive all-over prints that include graphics over seams, you’ll definitely be among a select class of printers. Also, don’t be afraid to try unconventional techniques, such as inverted printing. The one-of-a-kind results you’ll get with this method go a long way toward achieving the custom-decorated look that many of today’s garment customers are after.


Subscribe

Magazine
Get the most important news
and business ideas from Screenprinting Magazine.
Most Popular
-

 Case Studies2 months ago
High-Density Inks Help Specialty Printing Take Center Stage
-

 Art, Ad, or Alchemy2 months ago
F&I Printing Is Everywhere!
-

 Andy MacDougall2 months ago
Functional and Industrial Printing is EVERYWHERE!
-

 Columns3 weeks ago
8 Marketing Mistakes Not to Make When Promoting Your Screen Printing Services Online
-

 Editor's Note2 weeks ago
Livin’ the High Life
-

 Marshall Atkinson2 weeks ago
How to Create a Winning Culture in Your Screen-Printing Business
-

 Thomas Trimingham2 months ago
“Magic” Marketing for Screen Printing Shops
-

 News & Trends2 months ago
What Are ZALPHAS and How Can You Serve Them in Your Print Business?