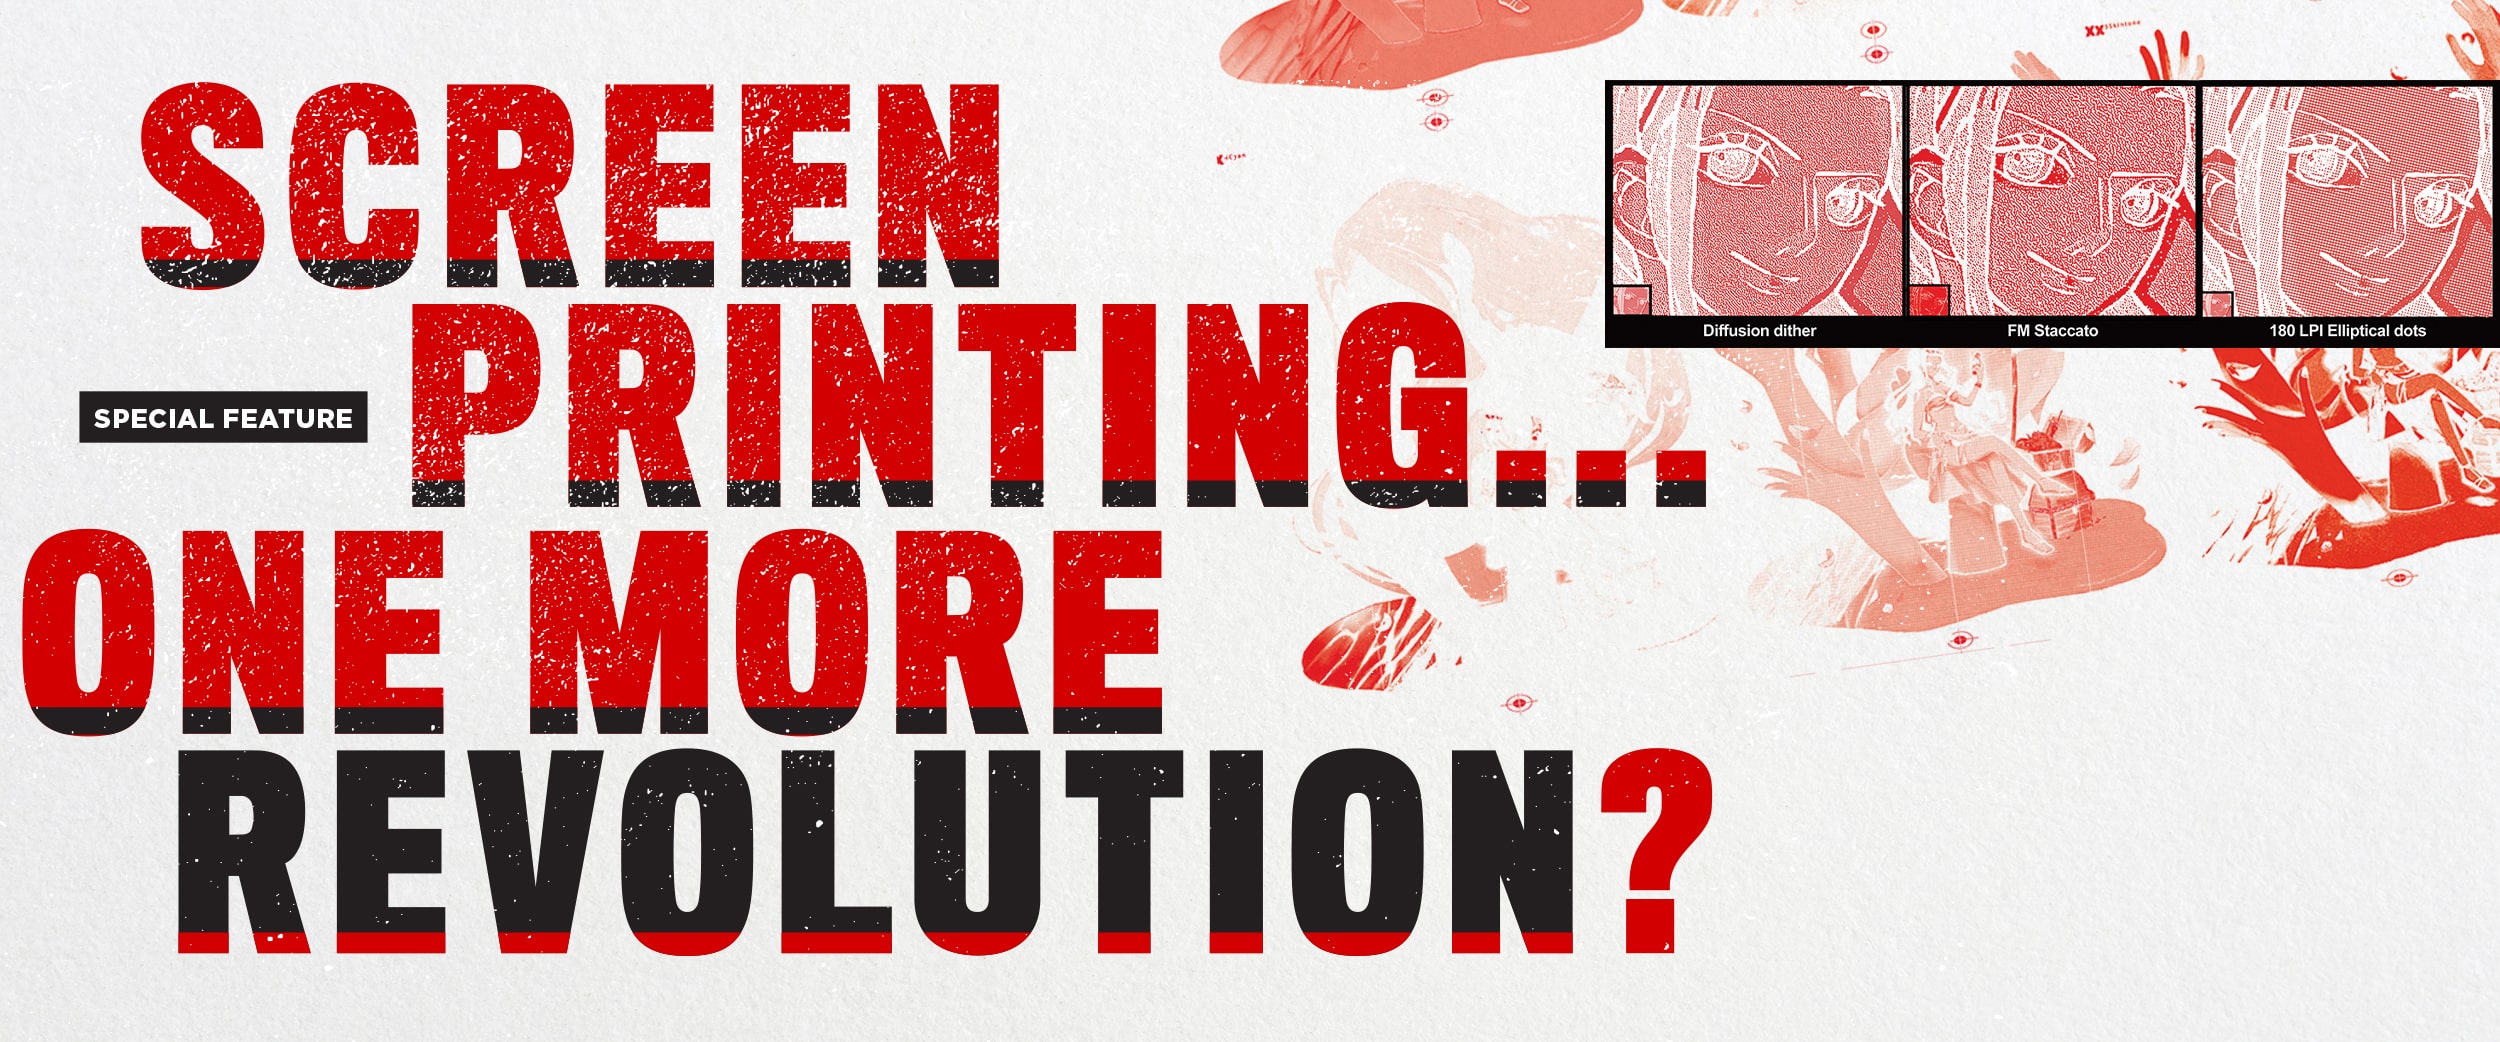
Why you should replace digital films printed in black with films printed in red/orange.
PREAMBLE — MICHEL CAZA
Twenty years ago, seeing the problems experienced by screen printers printing films for their screens with inkjet – silver photoengraving was becoming scarce due to high prices and pollution – I wondered, “Why weren’t these films printed in red/orange?” After all, in the stenciling rooms, orange lighting was used, the inactinic touch-up markers were red, and the fabrics of the screens were yellow to reduce the dispersion of UV rays in the white mesh. So, why not red films instead of black?
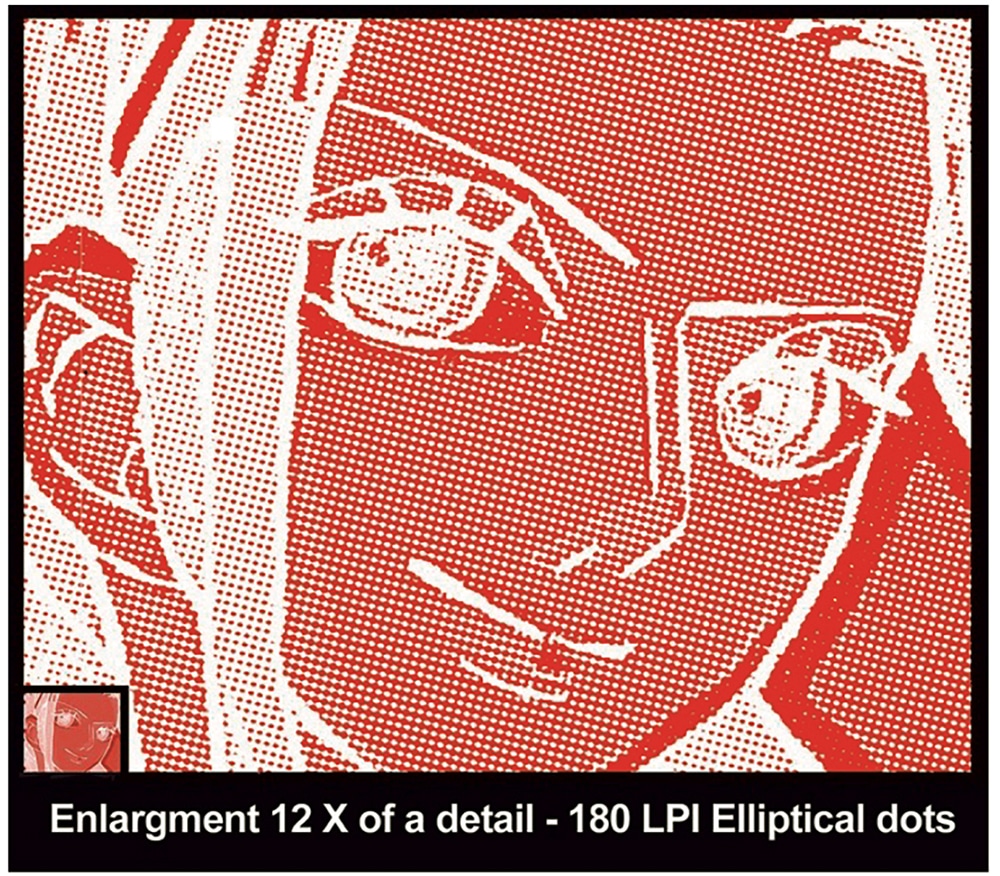
I had indeed noticed – from someone like myself who used to print halftones in ultra-fine lines from 150 to 300 LPI – that trying to exceed 115 LPI with these black films made with an inkjet press was almost impossible.
Why? Mainly because the dots generated and printed in this way were neither really “sharp” nor really “fully opaque.” They looked like small clouds, and their size on the screen varied according to the duration of the exposure. In addition, the finest dots tended to completely disappear.
Considering what I said before, I asked several of the big manufacturers of these inkjet presses if they could manufacture an inactinic red ink. They told me: “Impossible for such a small market.” Full stop? Yes, for quite a few years!
A few months ago, I spoke about it to one of my new “First Circle” students, The Quyen Cun, a brilliant Vietnamese screen printer and researcher. He immediately got to work with the genius idea of using the standard magenta and yellow of inkjet presses to achieve the result I wanted. And he did!
Quyen is a screen printer and freelance researcher on the concept of “Color Reproduction” and “Pixel Technique” in printing.
BACKGROUND — THE QUYEN CUN
I used to work in the music production industry, but a small accident caused me to temporarily lose my inherent sensitivity to sound. But in return, my eyes have acquired a special ability to perceive colors and groups of light spectrums. Simply put: I can see sharp color light and the halo of reflected rays and segments radiation on the surface of any object when it is acted upon by light.
I began learning about the screen printing industry in 2017 by self-studying through YouTube videos and documents collected on the internet. At the same time, I also learned a lot on my own: the theory of color mixing, the artistic thinking of painting, and its application in combination with the theories and techniques of the printing industry.
This self-study had many difficulties in reaching a professional level in the printing industry. Fortunately, I met “Grandpa” Michel Caza through in an international screen printing group on Facebook in 2020. Looking at his work, through my own artistic perception, I knew I had found a great teacher – the best for myself.
When I told Michel about the power of my eyes, I was embarrassed because before, people in the screen printing industry in Vietnam or international printing colleagues thought I was crazy and delusional.
But Michel didn’t. He responded to me with very positive comments and encouraged me to take advantage of this faculty to research and improve my skills in printing, and also accepted me as a student in his “Second Circle” group (with thousands of other students he connects and helps).
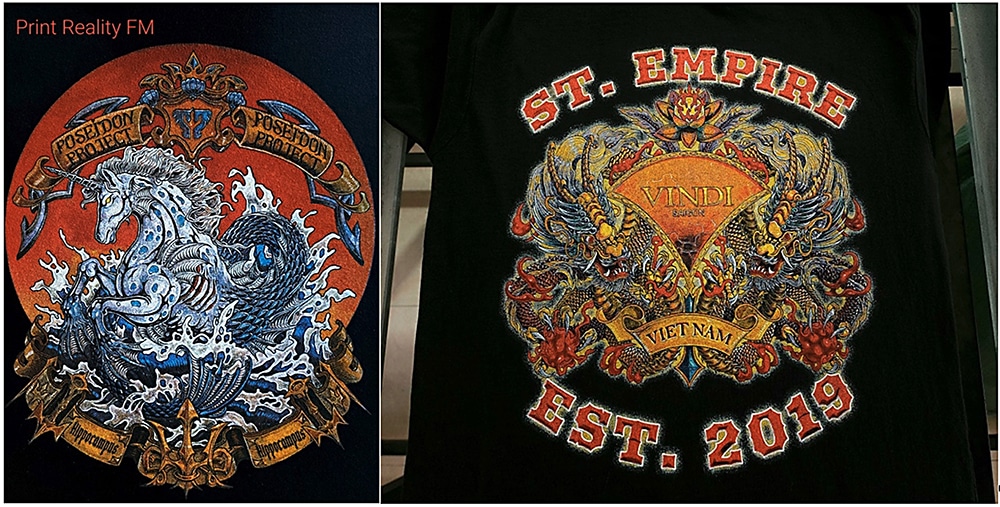
Then, he sent me a lot of documents, textbooks, and articles about his research results during his 65 years of work. Since then, I have learned the knowledge of the printing industry firmly. Pictured below are a few of my prints dating back to the time I started studying with Michel, all the way up until he recognized me as a student of the “First Circle” group.
Advertisement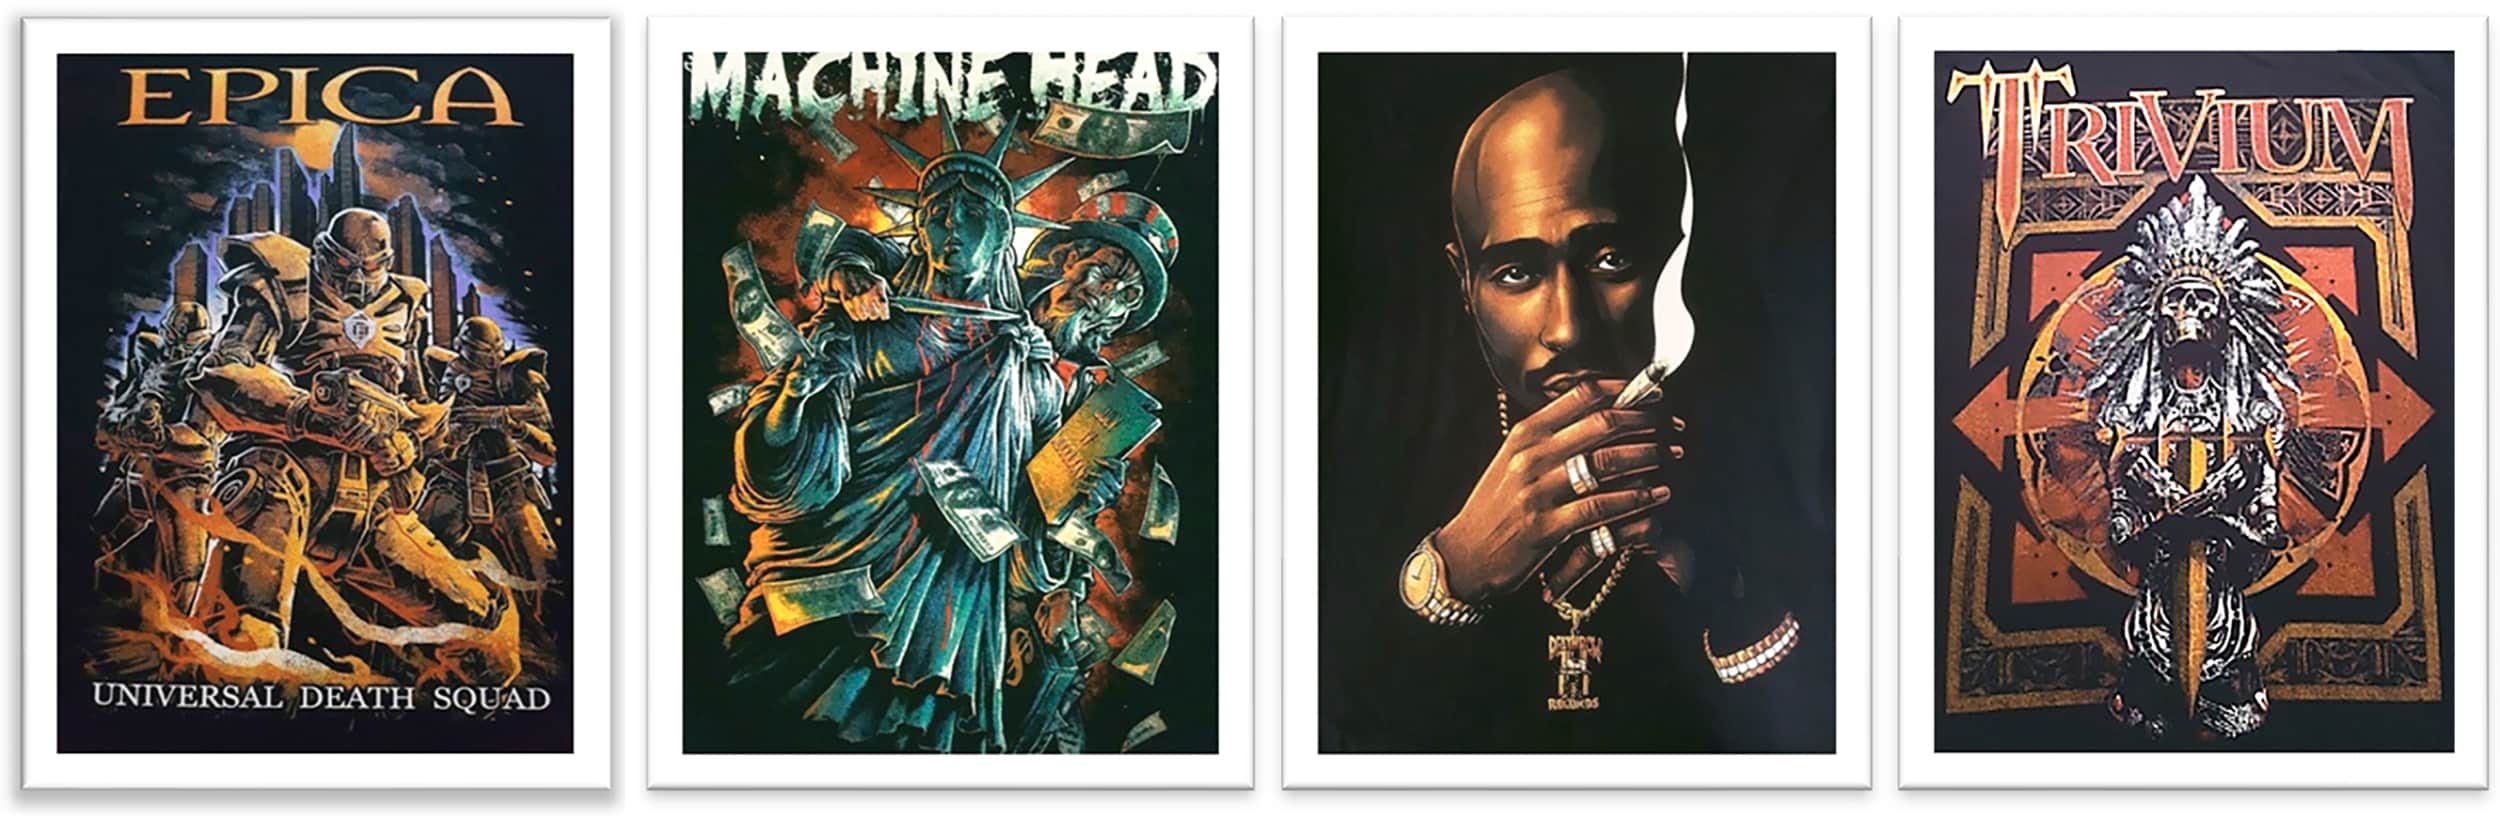
The striking colors used in these designs were achieved using Quyen’s techniques.
USING RED INK
TO OUTPUT FILM
After perfecting how to make RIP FM Staccato 360 – 720 LPI with my own inkjet printer under the guidance of Caza, I brought that film to output with high-density black ink for exposure.
But the result was terrible. I lost a lot of micro-dots, and it made it very difficult to wash off the unhardened emulsions after exposure.
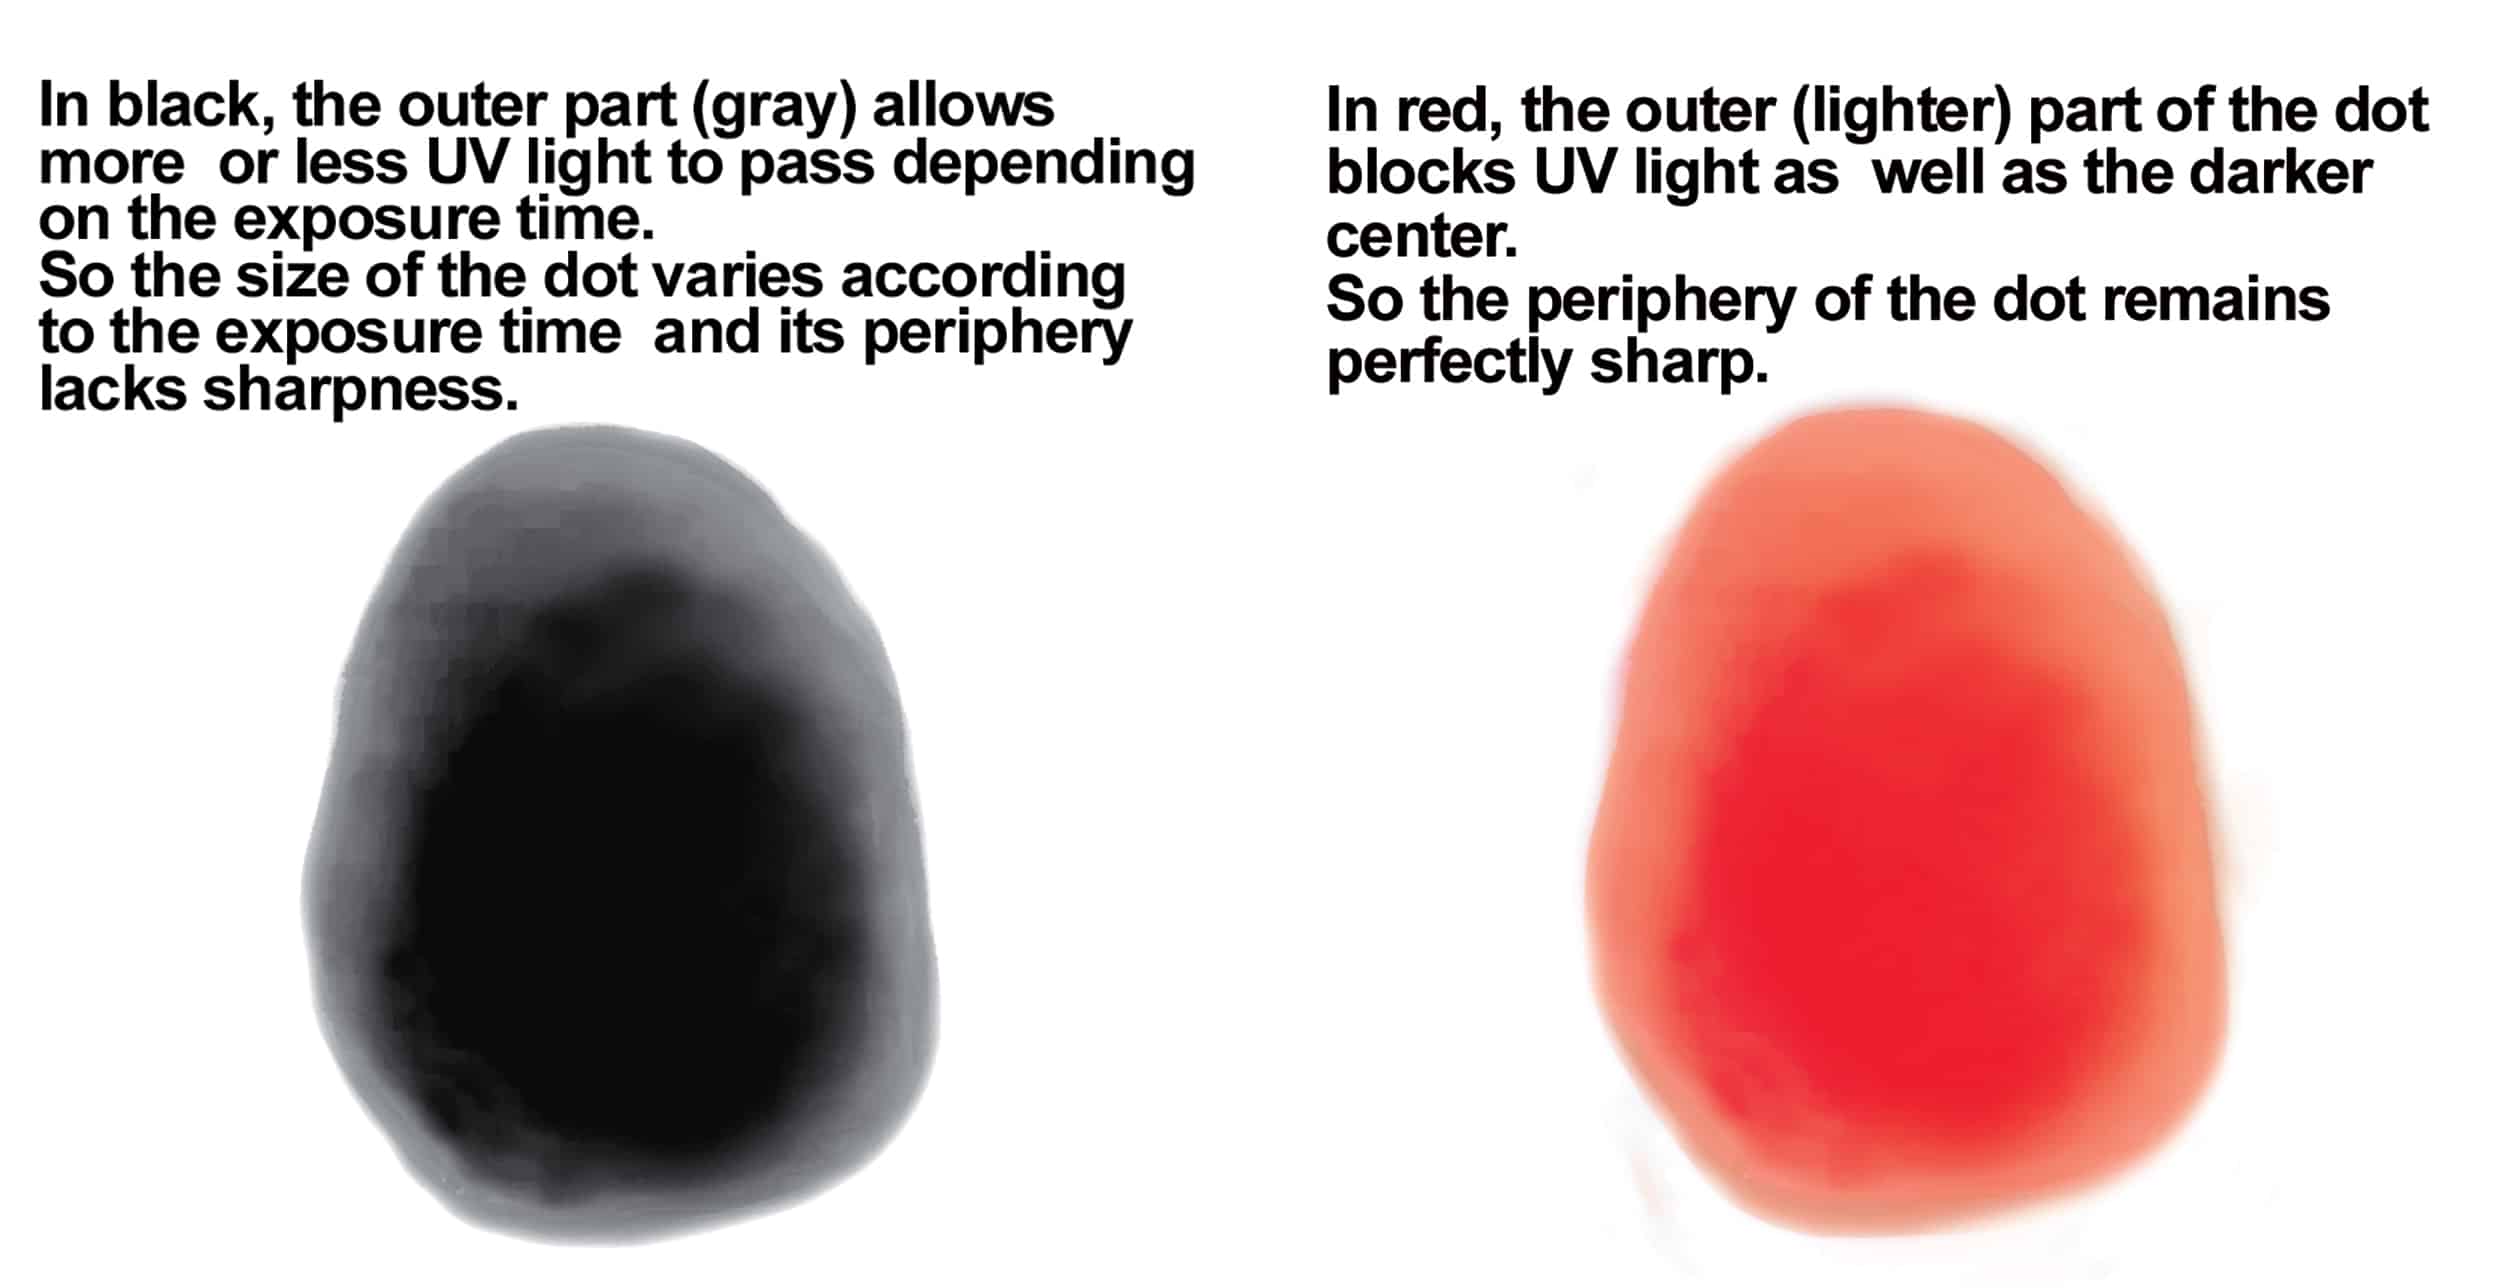
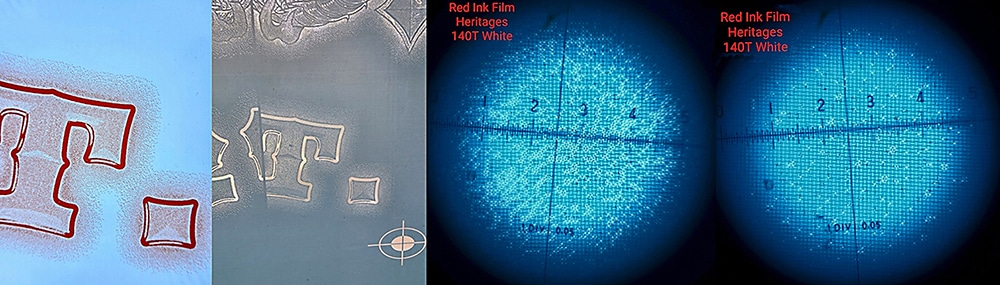
Despite Michel’s standard exposure techniques, the dots on the emulsion were only about half as good of those on the film. And then I put the film on the table to examine it again. I discovered there was a bluish light fringe around the edges of the black lines and patches. I used a 30X magnifying glass to take a closer look, and I found a bright edge completely covering the area of the micro-dot, but the micro-dot was in black ink, completely covering the light below the lamp.
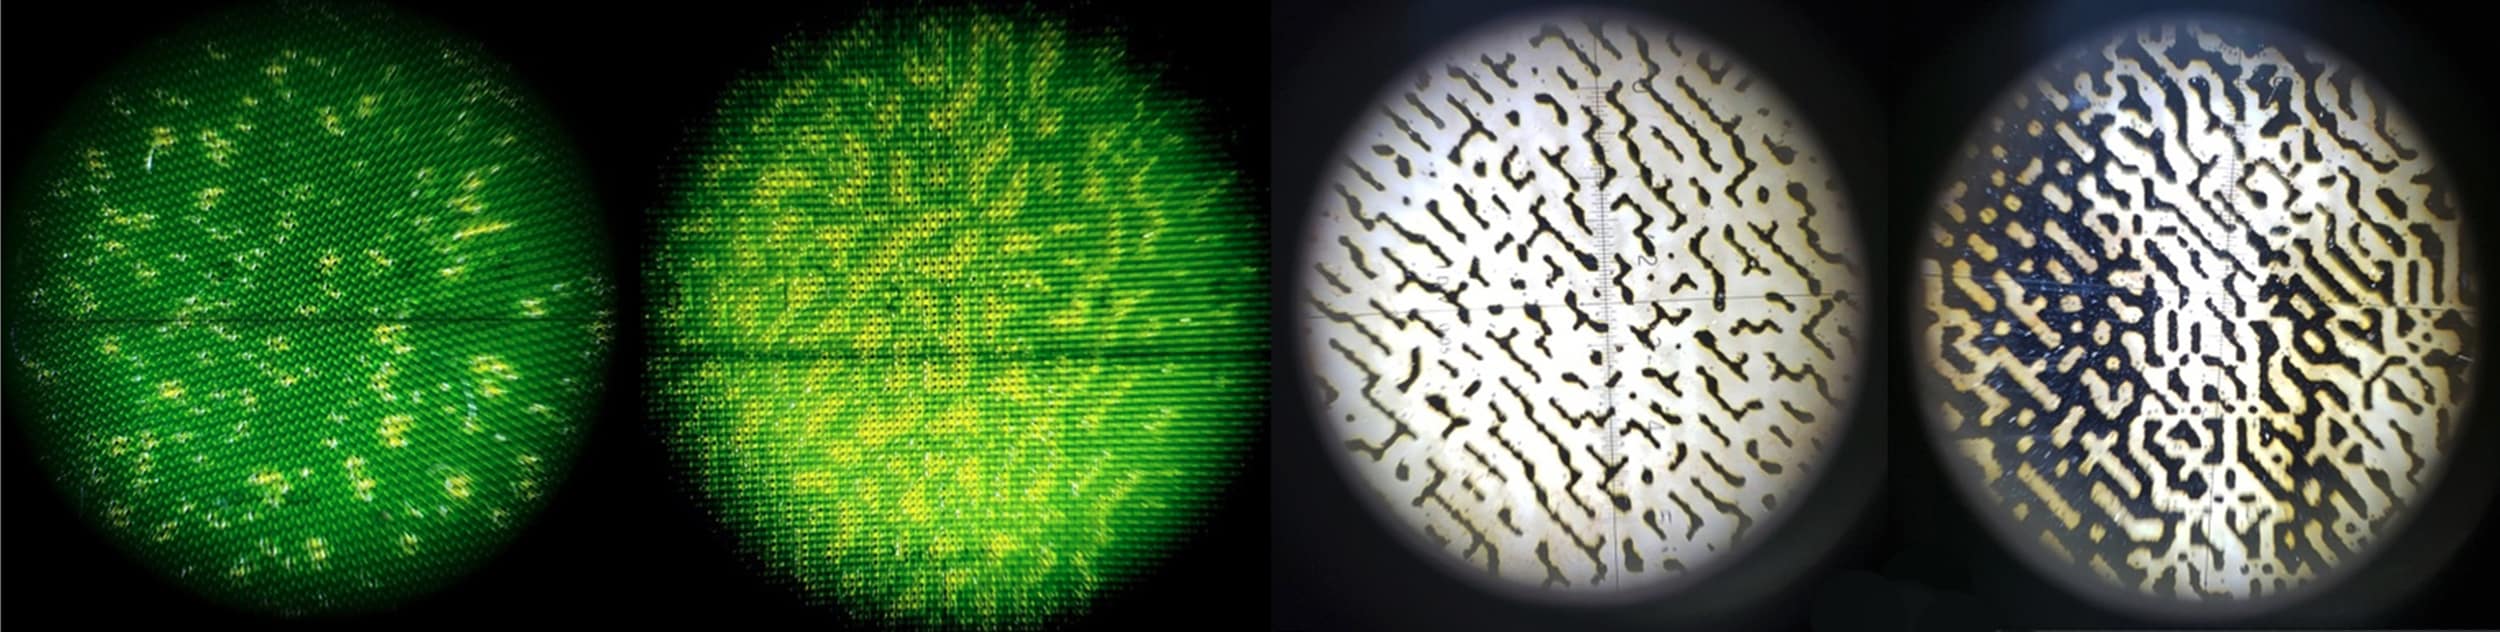
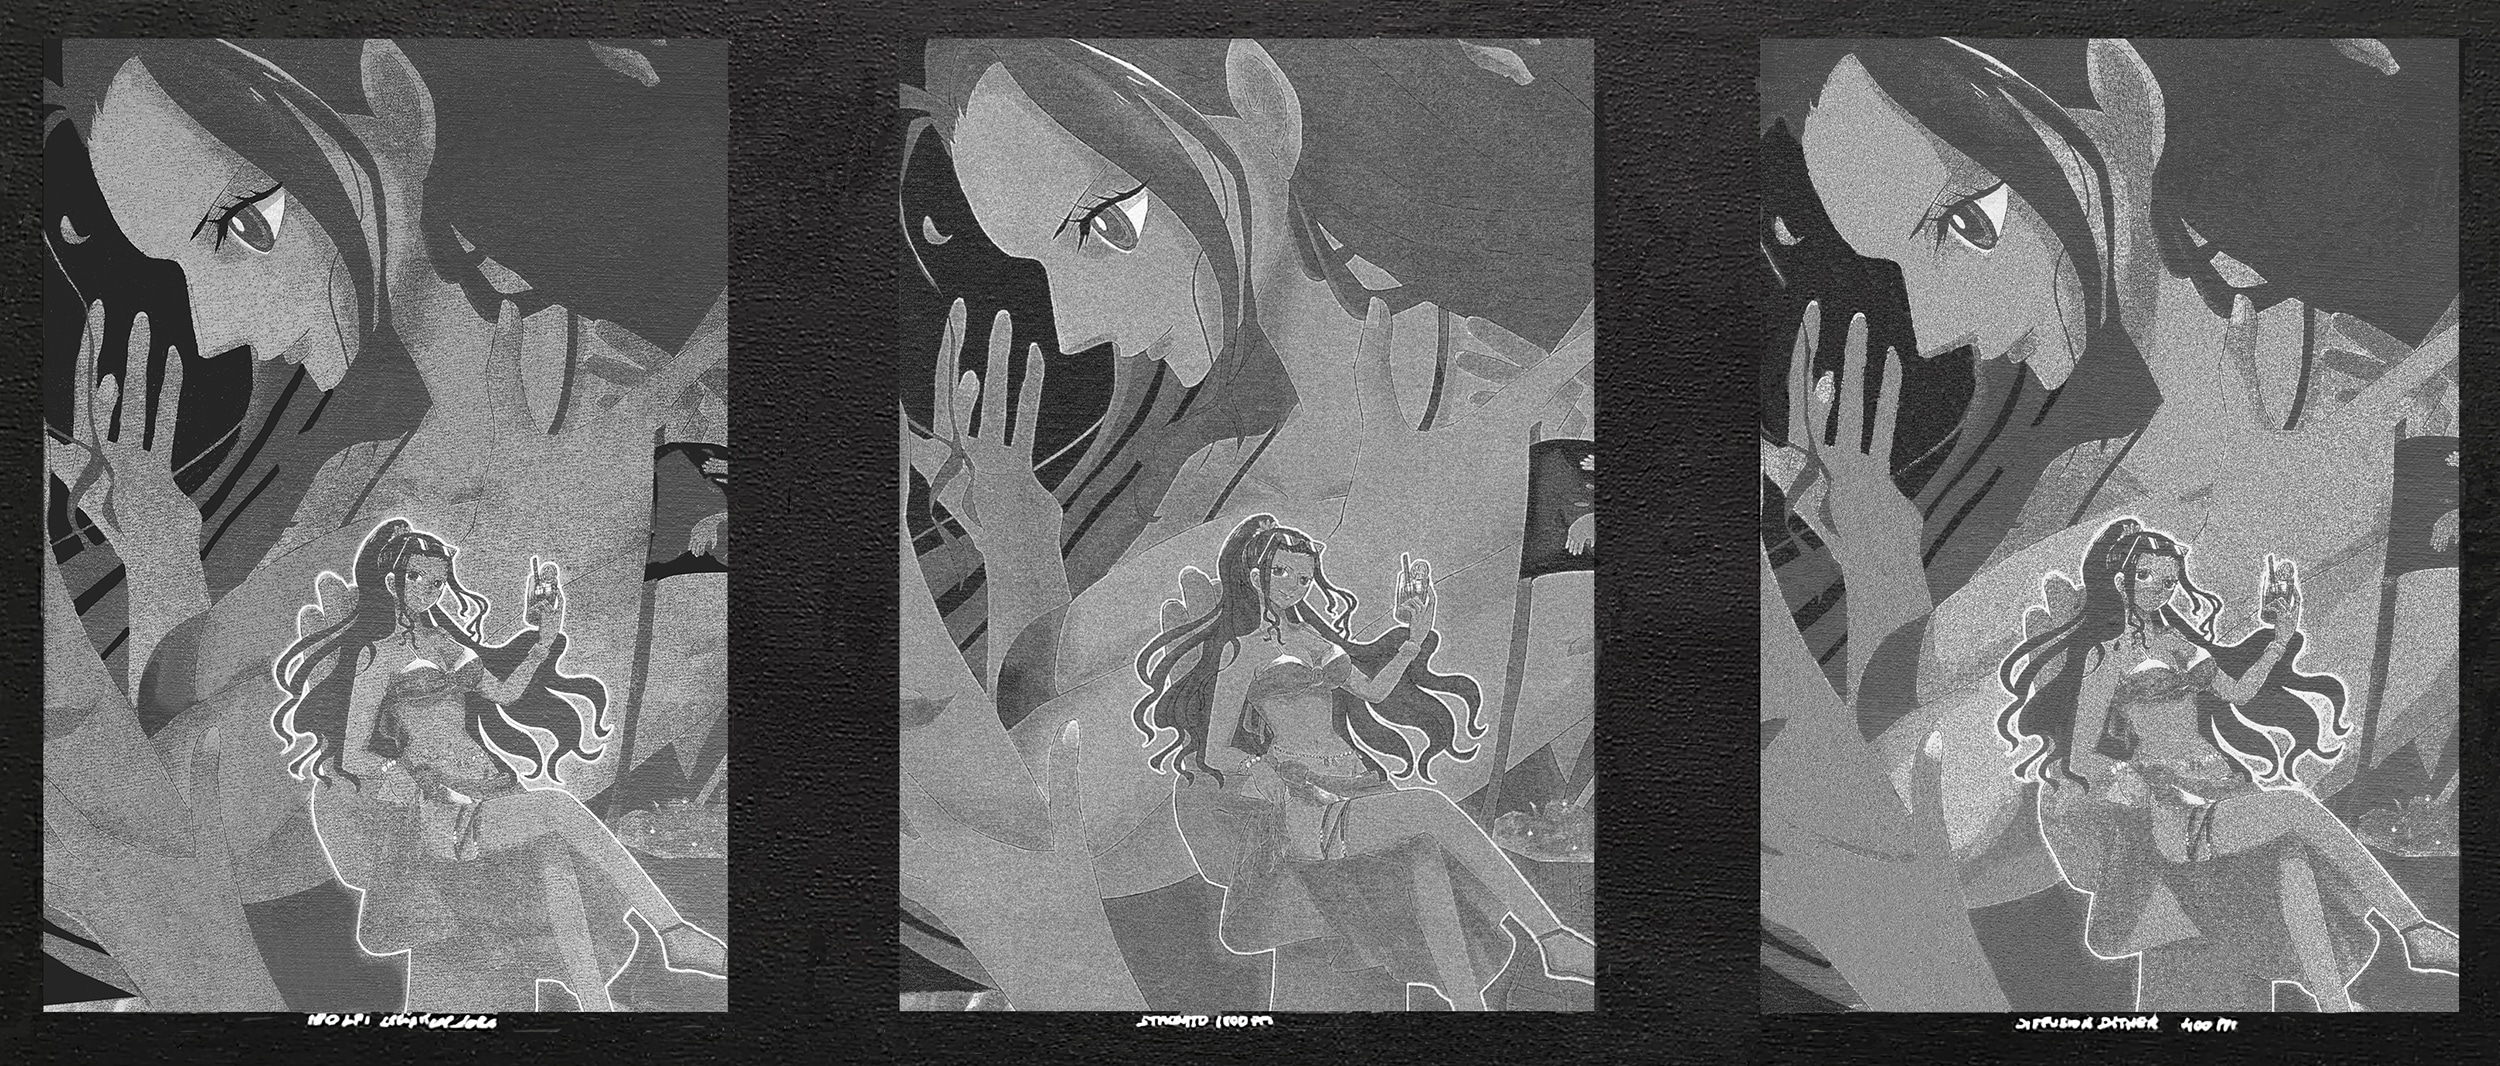
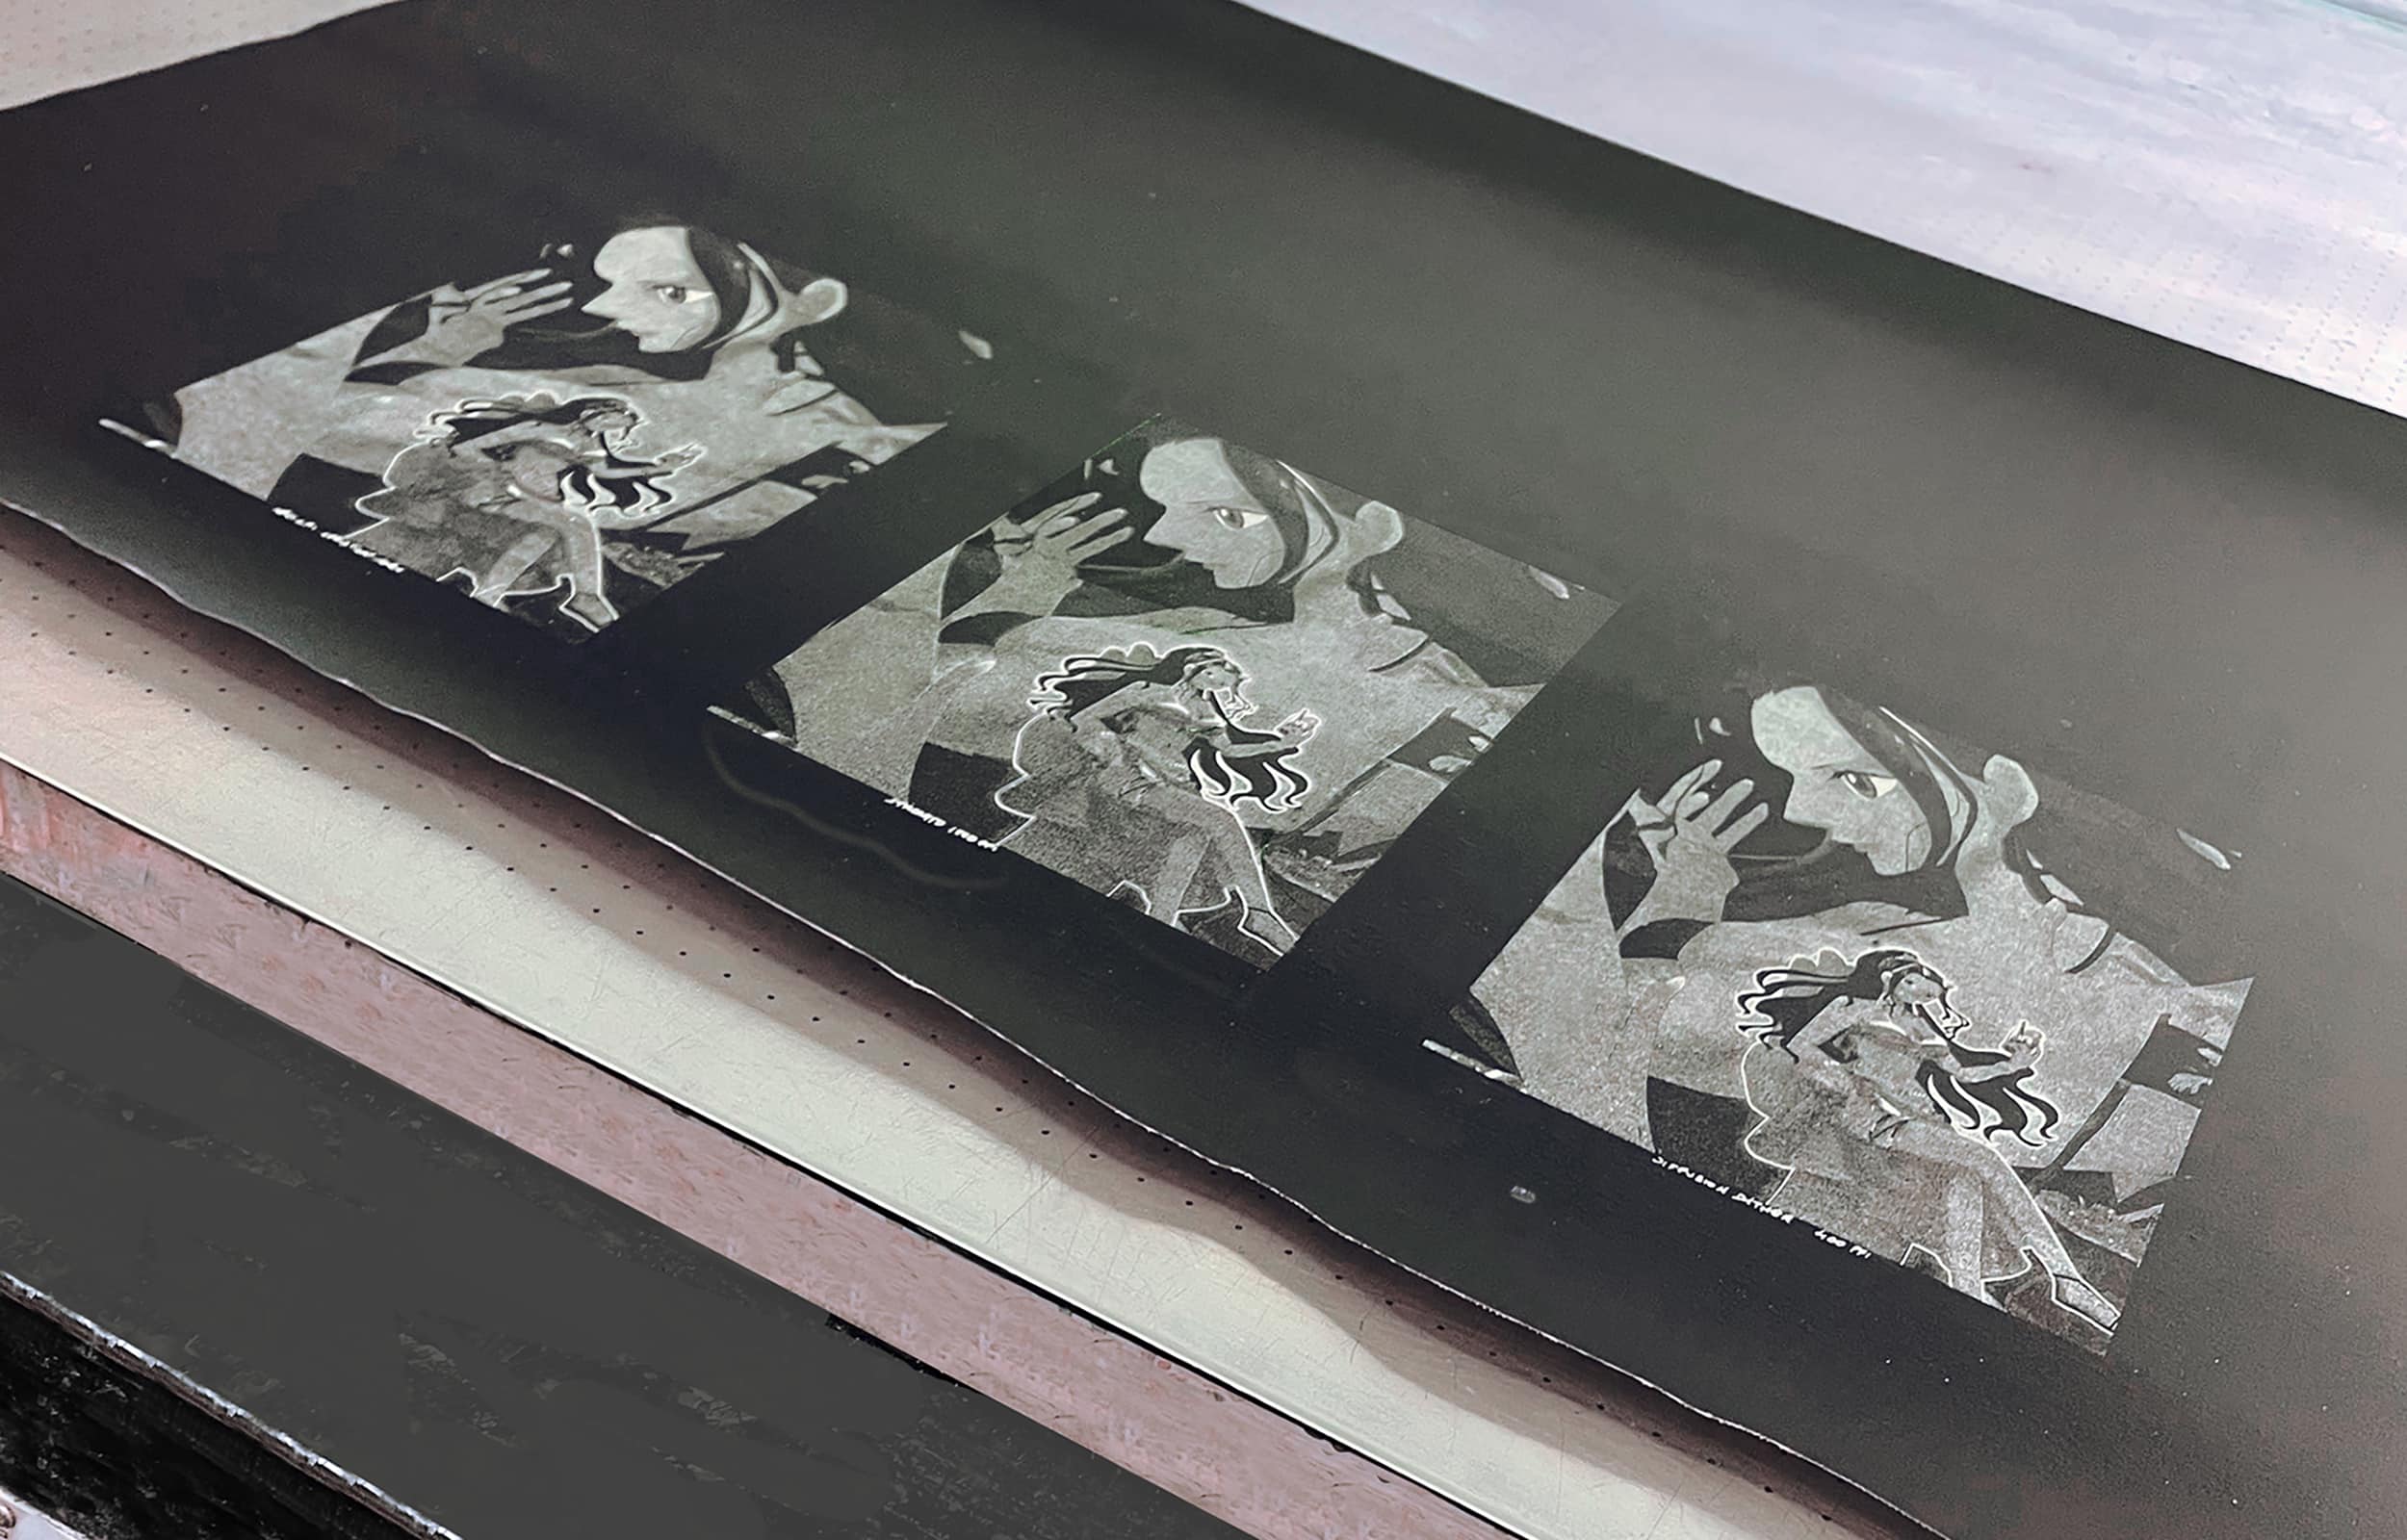
Below is the result of the dot image obtained when exposed to black ink film, yellow mesh 140T. It’s very bad.
Exposure tests can be tedious and difficult, but they are necessary to nail down the process.
I brought this problem to Michel, and he also said he saw it 20 years ago, but so far no one had researched it with him.
He advised me to delve more deeply into the physical theories of “Quantum of Light” and “Quantum Optics.”
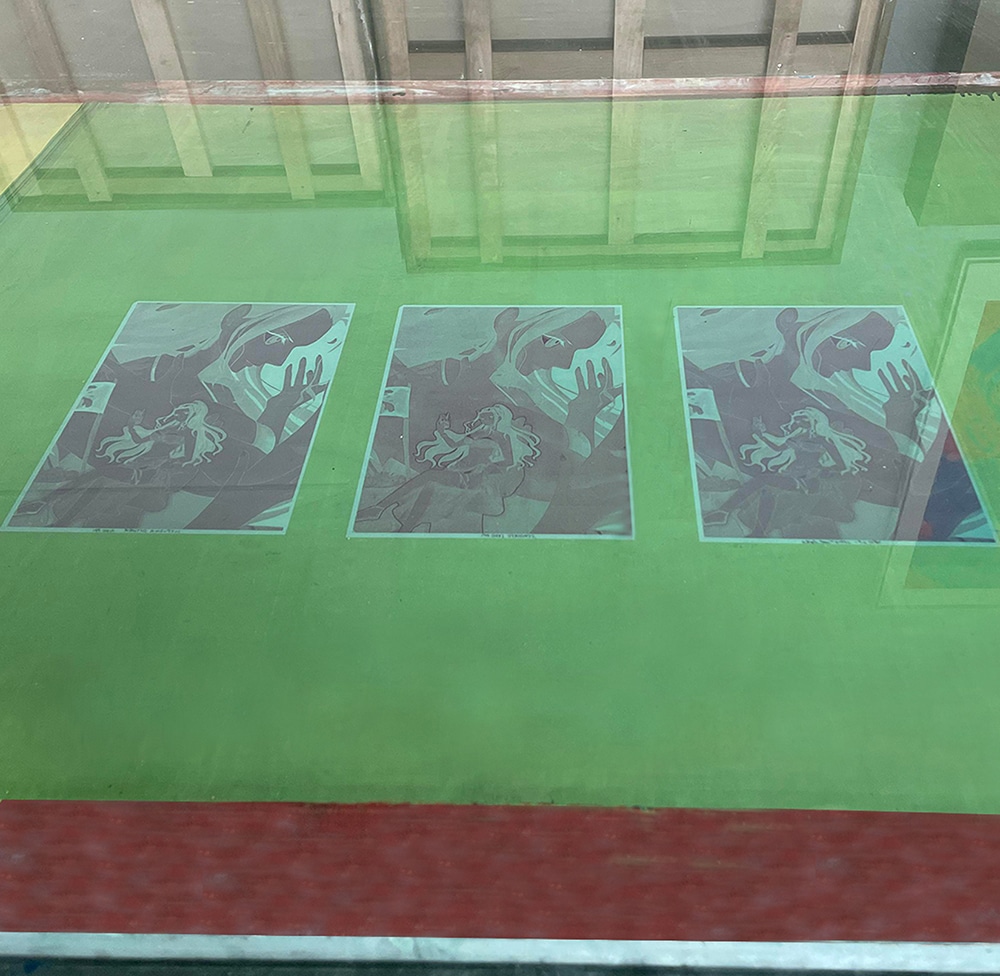
After learning more about the above, I have deeply researched this problem. I went through many steps of discussion, experimentation, and collection of different results. We have now successfully applied the exposure technique with red ink film.
And this is the result we got on the mesh (with blue emulsion and white 140T mesh to test effectiveness, but we recommend yellow mesh for best results).
Advertisement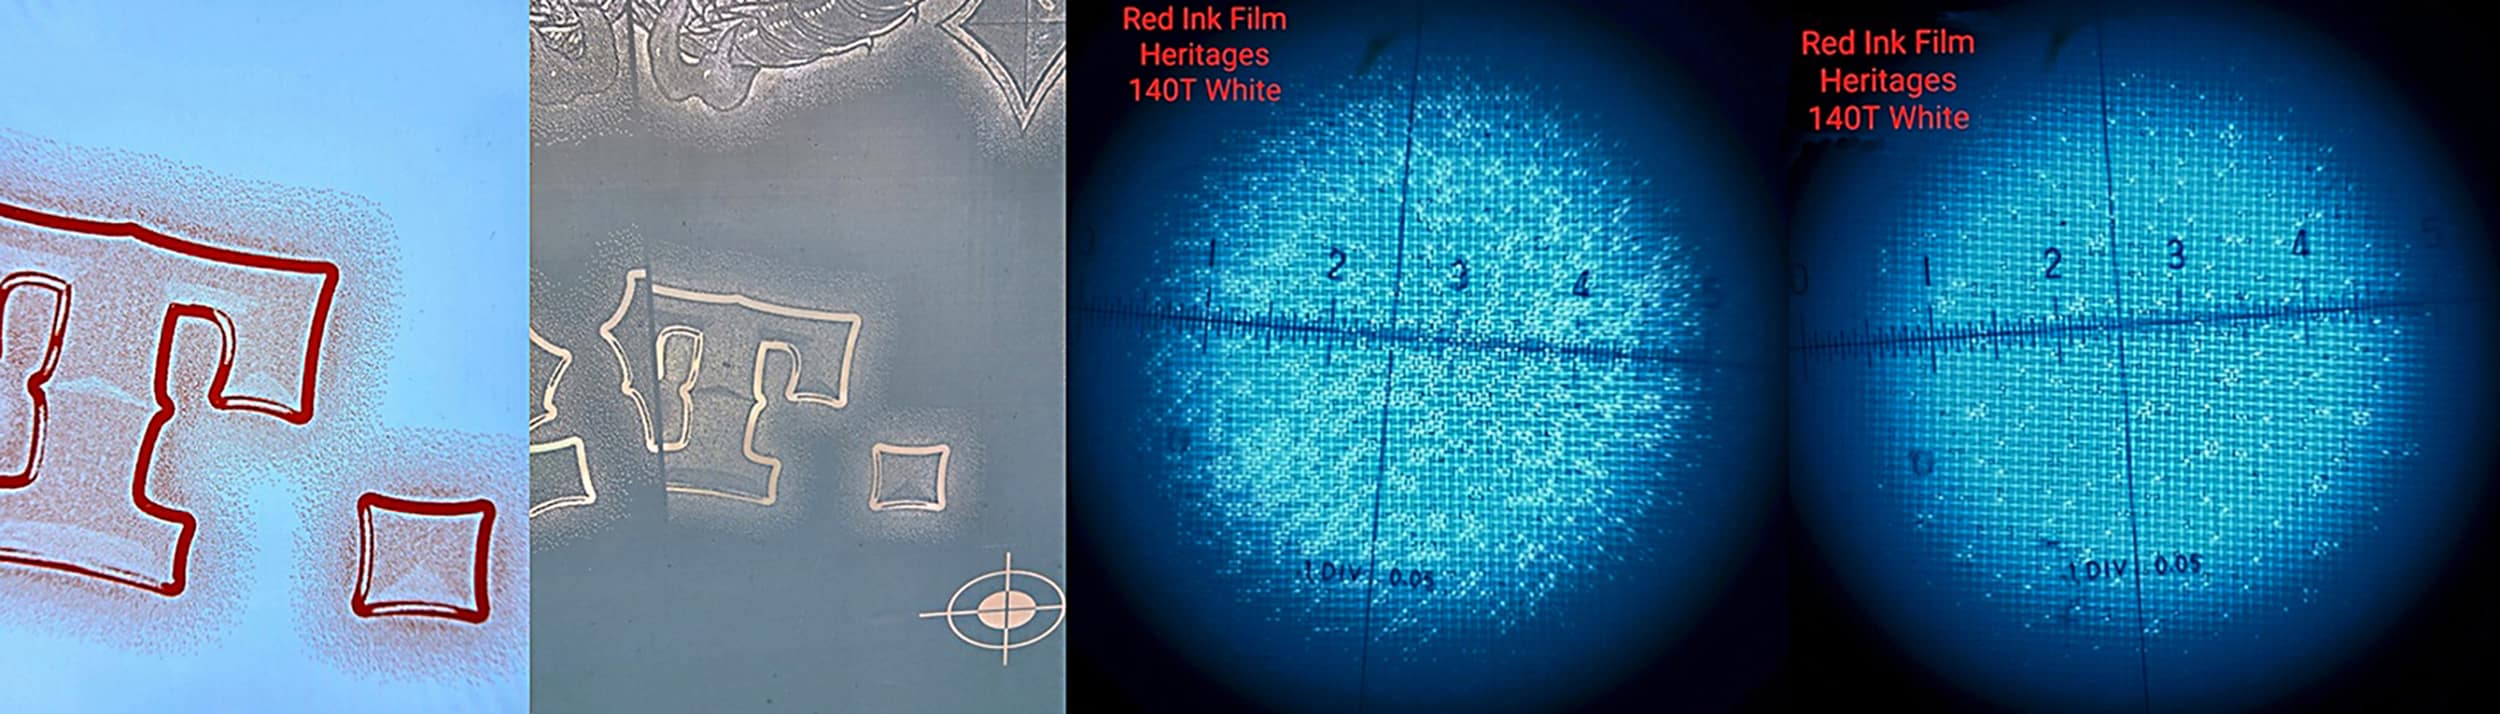
Print works with red ink film (made by Quyen). Rip Heritages VietNam FM Staccato 360LPI (developed by Quyen), plastisol on cotton.
COMPLEMENTARY PROOFING
MICHEL CAZA
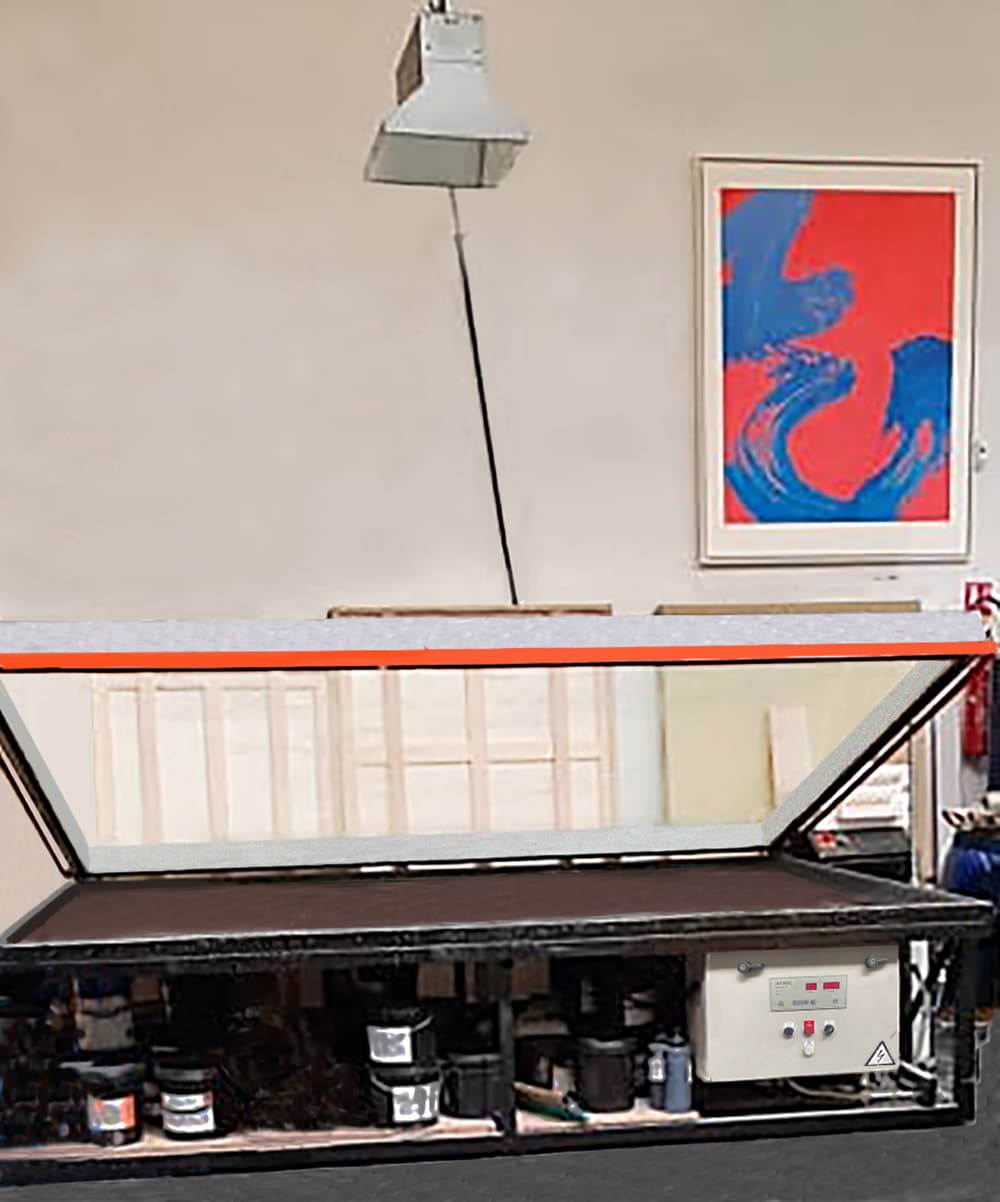
In the studio of my friend Fabienne Verdier, I wanted to see how the red films would behave under the exposure of the screen with a 5 KW metal halide lamp at 2.5 meters and with a different emulsion, the Dirasol 915, with, like Quyen, a single round-trip layer on the support side of the screen: exposure of 50 pulses (45 seconds) on
yellow 140 T fabric.
Everything went according to our plan, including a quick print on black painter’s canvas. I chose an opaque white, a 75° shore squeegee at 45° on a semi- automatic press.

HOW TO
PROCEED
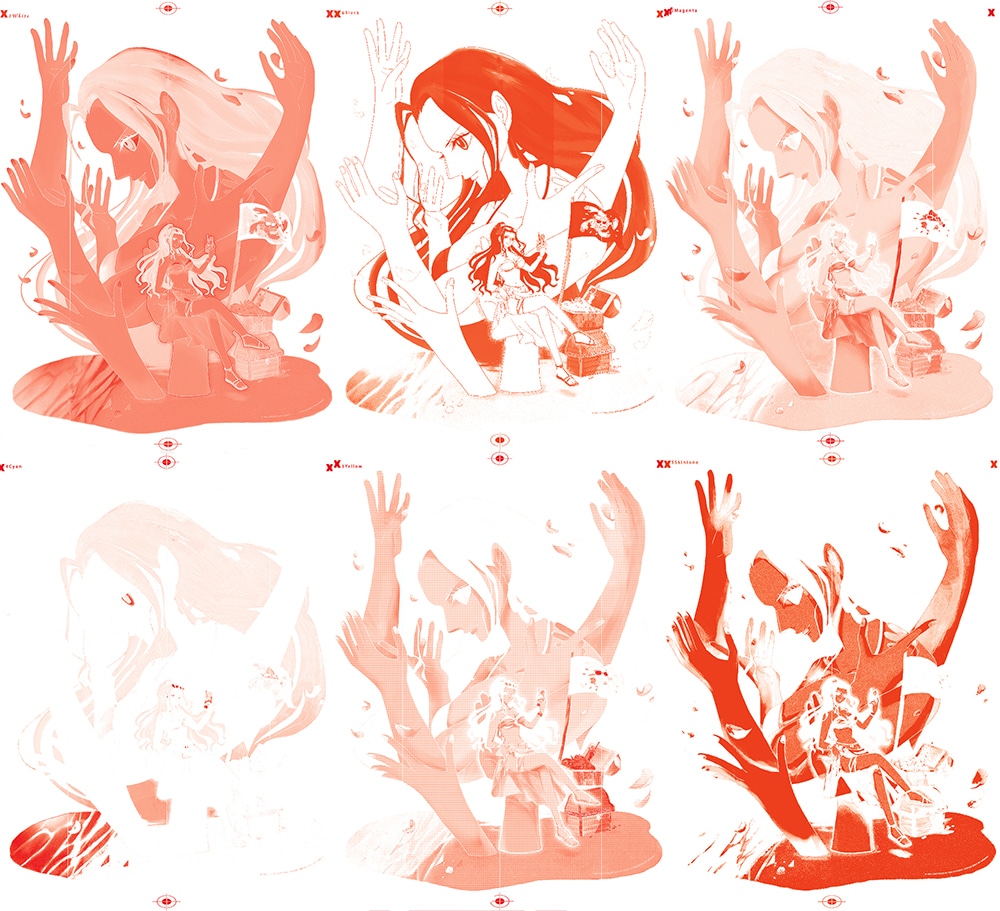
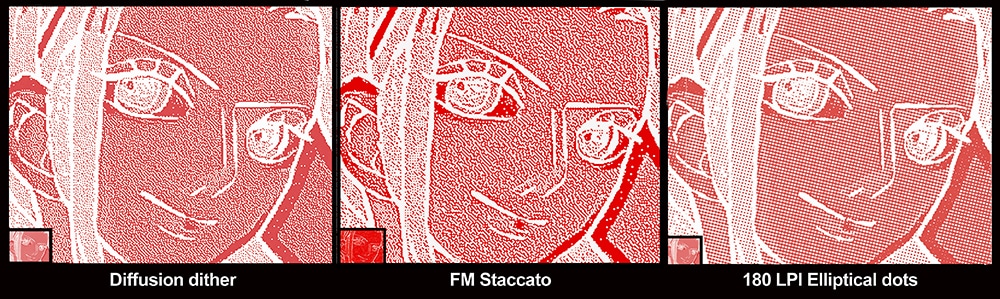
It’s very simple, printing in 180 LPI four-color process (AM), or in diffusion dither, or in FM ≈ KCMY + White + skin color.
- Open the file
- If necessary, correct the curves to obtain the correct ICC profile for all the colors.
- Select file at 720 PPI for white (on T-shirts or black paper)
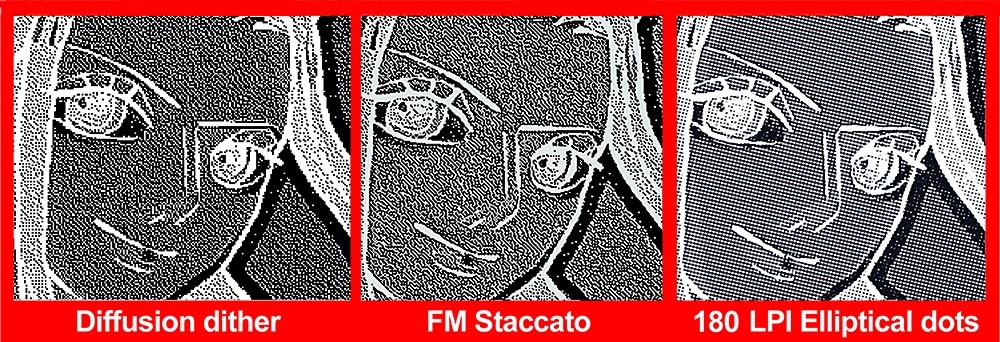
- Choose the mode = Bitmap: resolution 1800 PPI – halftones: 180 LPI – 15° angle – ellipticals dots.
- Switch to grayscale
- Switch to CMYK
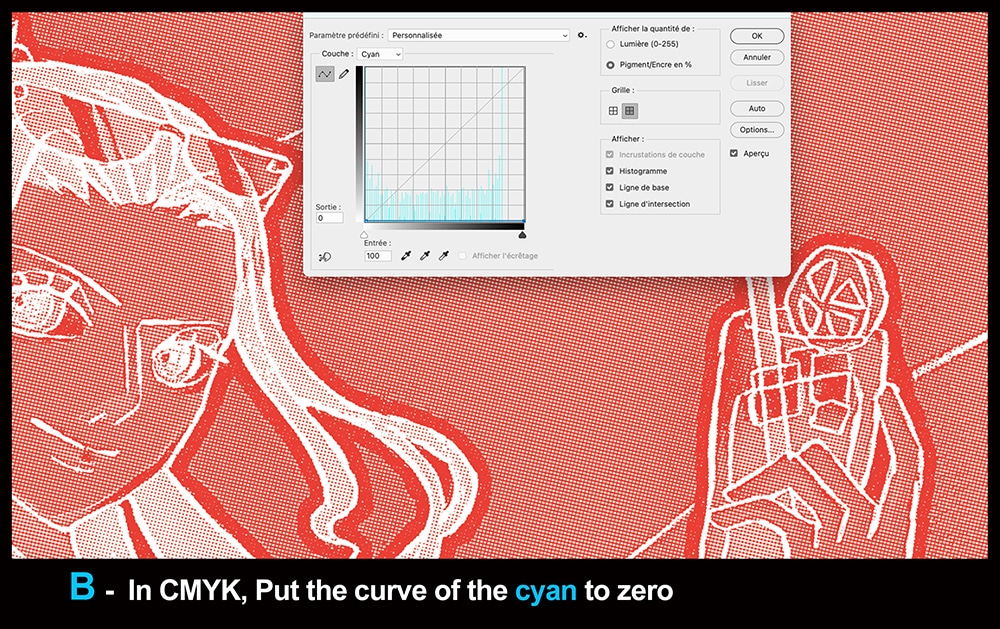
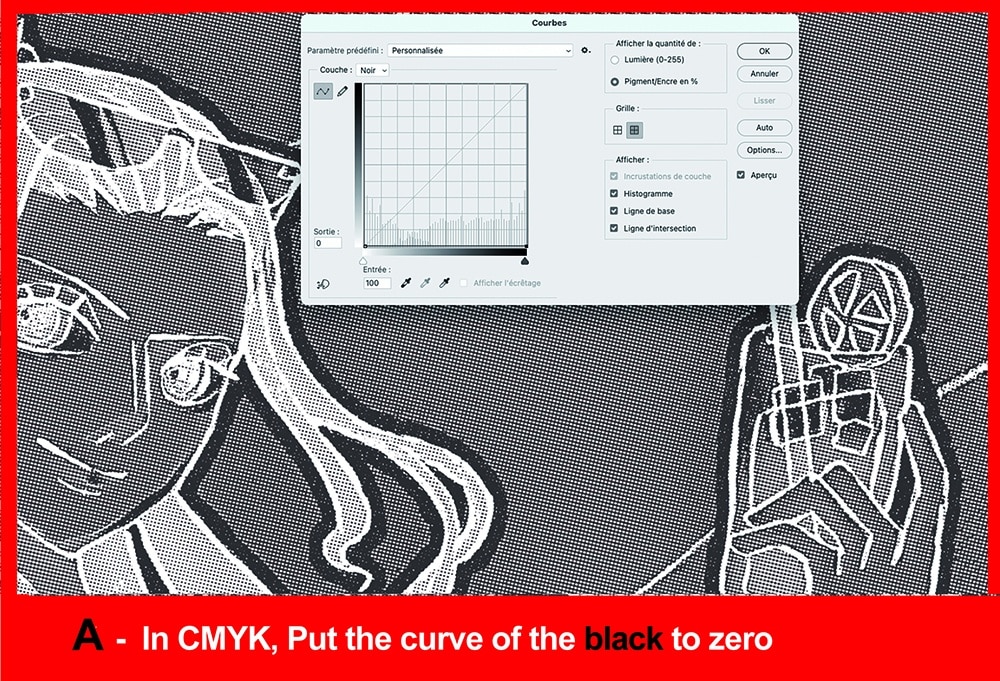
- In layers, remove cyan and black. This is the simplest method, but if you want to increase the density of magenta and yellow, you can use the curves by setting the cyan and black to zero and bringing the “inputs” of magenta and yellow at 80 percent and 50 percent respectively.
- So, we simply keep the magenta and yellow layers.
- Print red/orange with your inkjet press on transparent film.
- These operations will be repeated for CMYK colors and skin tone with the following angles: K 45°, M 75°, C 15°, and flesh 15°. (We use this angle of 15° for white and flesh simply because in this image the cyan is very insignificant so less risk of moiré.) We can proceed exactly according to the same scheme to obtain films in diffusion dither:
-
- Bitmap 400 PPI – dither diffusion – resolution: 1800 PPI.
and for : - an FM dot, the “Staccato” – resolution: 1800 PPI.
- Bitmap 400 PPI – dither diffusion – resolution: 1800 PPI.
-
Now, we no longer use black for our inkjet films, whether they are line or halftones, including for the finest halftones. Red films are our preference.
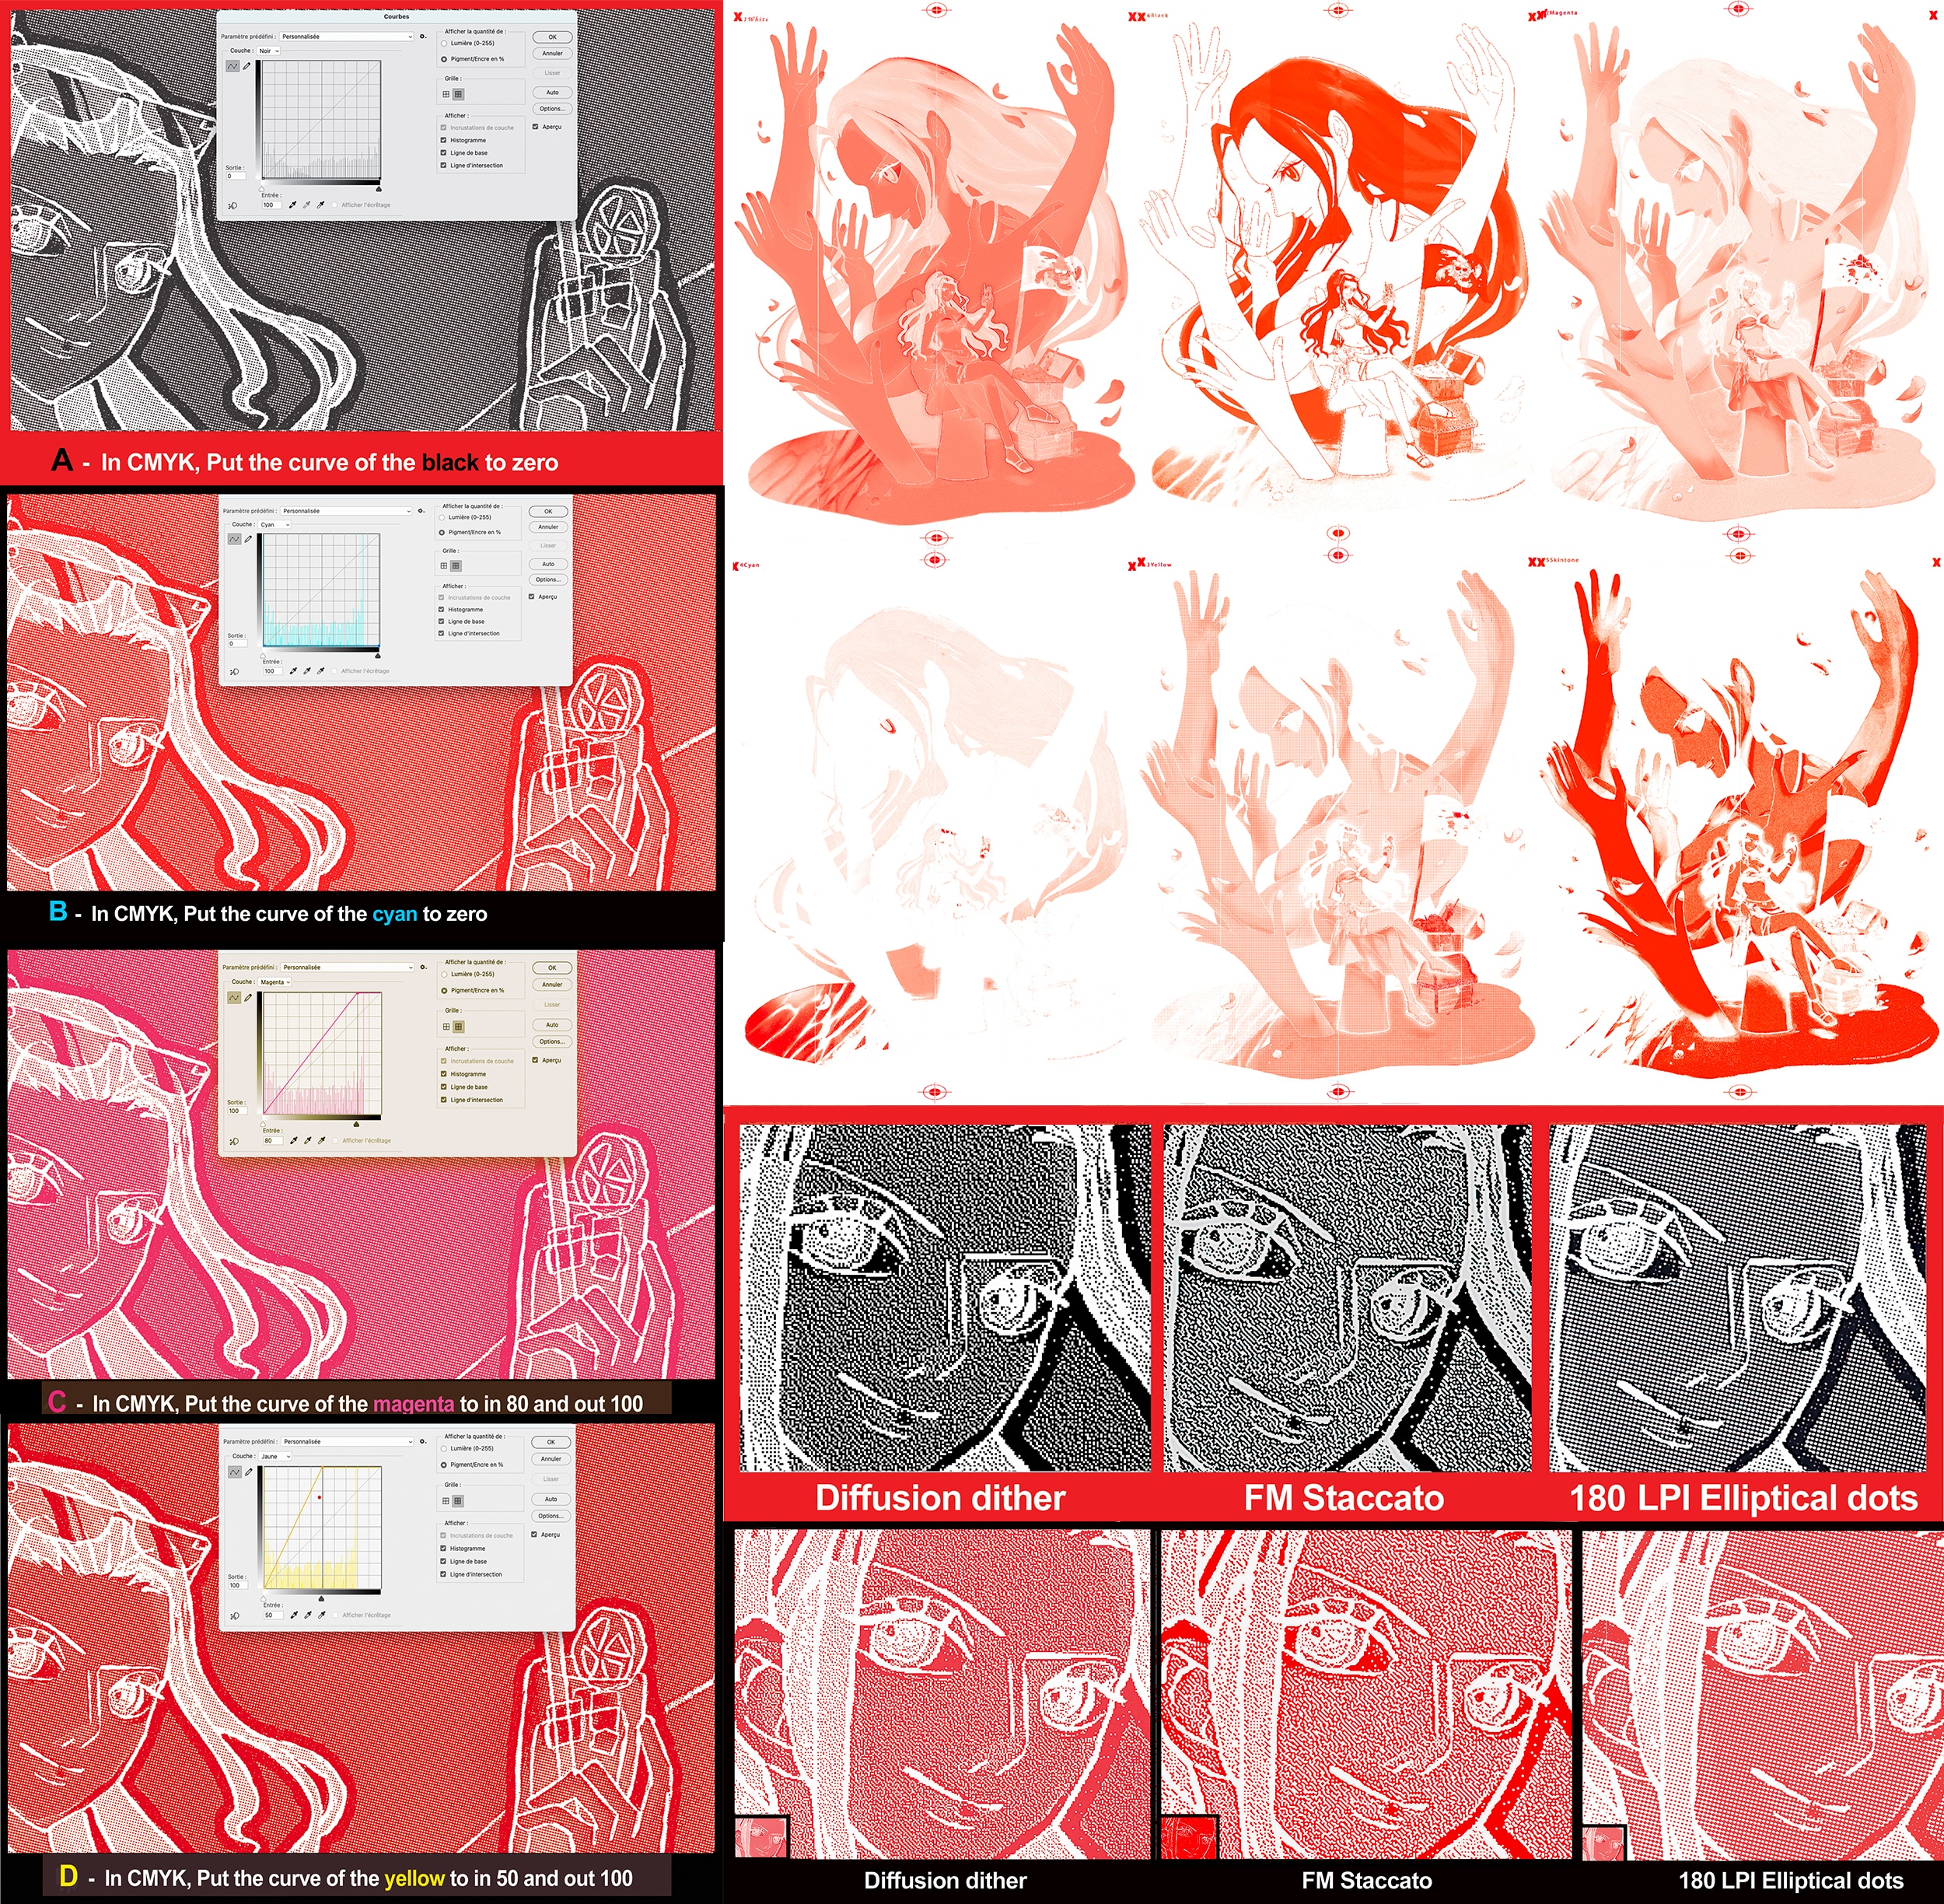
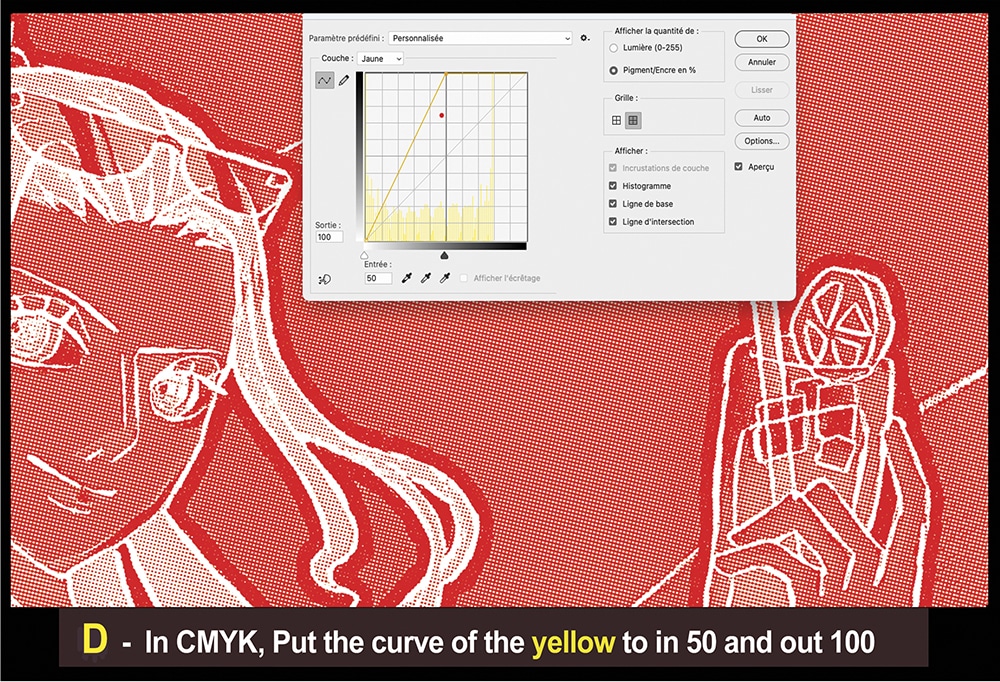
A. In CMYK, put the curve of the black to zero. B. In CMYK, put the curve of the cyan to zero. C. In CMYK, put the curve of the magenta to in 80 and out 100. D. In CMYK, put the curve of the yellow to in 50 and out 100.
PHOTO GALLERY (21 IMAGES)


Let’s Talk About It
Creating a More Diverse and Inclusive Screen Printing Industry
LET’S TALK About It: Part 3 discusses how four screen printers have employed people with disabilities, why you should consider doing the same, the resources that are available, and more. Watch the live webinar, held August 16, moderated by Adrienne Palmer, editor-in-chief, Screen Printing magazine, with panelists Ali Banholzer, Amber Massey, Ryan Moor, and Jed Seifert. The multi-part series is hosted exclusively by ROQ.US and U.N.I.T.E Together. Let’s Talk About It: Part 1 focused on Black, female screen printers and can be watched here; Part 2 focused on the LGBTQ+ community and can be watched here.


The Profit Impact of a Market Dominating Position

Inkcups Announces New CEO and Leadership Restructure

Hope Harbor to Receive Donation from BlueCotton’s 2024 Mary Ruth King Award Recipient

Bulletins
Get the most important news and business ideas from Screen Printing magazine's news bulletin.
-

 Case Studies2 months ago
High-Density Inks Help Specialty Printing Take Center Stage
-

 Art, Ad, or Alchemy2 months ago
F&I Printing Is Everywhere!
-

 Andy MacDougall2 months ago
Functional and Industrial Printing is EVERYWHERE!
-

 Columns3 weeks ago
8 Marketing Mistakes Not to Make When Promoting Your Screen Printing Services Online
-

 Editor's Note2 weeks ago
Livin’ the High Life
-

 Marshall Atkinson2 weeks ago
How to Create a Winning Culture in Your Screen-Printing Business
-

 Thomas Trimingham2 months ago
“Magic” Marketing for Screen Printing Shops
-

 News & Trends2 months ago
What Are ZALPHAS and How Can You Serve Them in Your Print Business?