Inks & Coatings
Published
22 years agoon
Thanks to formable, stretchable plastics, our lives have been enriched by such products as Silly Putty and Creepy Crawlers. Who hasn’t marveled at images that become hideously distorted as they are pulled in all directions. And how many siblings have tortured each other with plastic spiders, earthworms, and tarantulas pulled fresh from the oven?
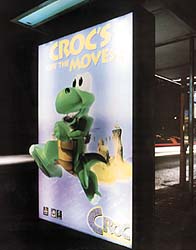
Thanks to formable, stretchable plastics, our lives have been enriched by such products as Silly Putty and Creepy Crawlers. Who hasn’t marveled at images that become hideously distorted as they are pulled in all directions. And how many siblings have tortured each other with plastic spiders, earthworms, and tarantulas pulled fresh from the oven? Because of today’s thermoplastic substrates and the inks printed on them, some screen printers are able to turn flat, thermoplastic substrates into three-dimensional products such as sport helmets, vending machine panels, interior and exterior signage, and realistic P-O-P displays. The market for thermoformed graphics is growing and becoming so sophisticated that the images are jumping seven, eight, and nine inches off the sheet. So if you’re waiting at a bus shelter in England and glance over your shoulder to see a crocodile lunging in your direction (at left)–relax. It’s just an example of thermoformed graphics, an exciting, rewarding, and very challenging screen-printing application. As adults, we can still amuse ourselves mangling and heating those plastic toys, but any screen printer who has wrestled with the distortion and shaping challenges of thermoforming images will tell you that shrinking plastics and misshapen images are definitely not child’s play. One of the biggest obstacles in the thermoforming process is making every element of the image end up where it belongs after the flat sheet is molded into a finished sign, display, sport helmet, or vending-machine panel. But before we discuss these and other hurdles, let’s talk about the thermoforming process. What is thermoforming? Thermoforming transforms a sheet of flat, thermoplastic material into a three-dimensional part, using heat and pressure. The definition can encompass heat-folding and heat-bending, but for this discussion, we will focus on applications that use vacuum pressure and thermal molding tools. Some forms are shallow, such as Halloween masks, and others are severe, such as those found in exterior signage and some P-O-P displays and sport helmets. The depth of the form is called the "draw," and draws can range anywhere from a fraction of an inch all the way up to 8-9 in. A printed and formed part can easily replace embossed signage. It’s lightweight, less costly to produce and transport, easier to handle, and if done right is just as durable as the product it replaces. From novelty items and sporting goods to signs and displays of all types, thermoforming is being produced with popular thermoplastic substrates, including polystyrene, HIPS (high-impact polystyrene), PVC, PETG, acrylic, ABS, and polycarbonate, which is the dominant substrate for in-mold decorated thermoformed parts. The process is used with both first- and second-surface printing. For example, high-impact polystyrene, a popular P-O-P substrate, is not totally transparent and is first-surface printed before forming. Jobs that utilize polycarbonate, such as in-mold decorating, are usually printed second surface. Second-surface printing is the trickier option, as it brings the cured ink layer in direct contact with the forces of the thermoforming equipment. This equipment delivers levels of heat and pressure that place tremendous demands on the printed image, which must not only look good, but retain its color density and adhesion while being contorted around bends, angles and curves. The artwork presents special challenges, as you might expect. Substrate quality and consistency are more critical than in flat-part production. Factor in the various mold designs required by your customers, and the number of variables in this process becomes nearly infinite. Undoubtedly, the artists who painstakingly drew up the first geographically-correct world map were shocked to see that, printed flat, it appeared as if one could almost jump across the water from Greenland to Canada. Artwork for thermoforming works the same way, and is referred to as distortion art for distortion printing. As mentioned earlier, the art must be distorted so that all the elements are in correct placement after forming. To accomplish this, the printer starts by printing a numbered grid onto a piece of the exact material that will be used in the production run. Optimally, the substrate should be from the very batch that will be used in production. Next, the artwork is printed onto the grid in the desired location relative to the mold pattern that will be applied later. The part is dried or cured, and finally, it is thermoformed and cooled. What remains is a molded part that maps the movement of the image during forming. The numbered coordinates on the grid are then used by the artist to adjust and reconfigure the artwork so that it has the desired appearance after forming; it is all but impossible to produce the art correctly on the first try. Bron Wolff, production manager of Joliet Pattern (Joliet, IL), knows the difficulty of this process all too well. "If you’re lucky, you can do it in maybe three tries," he says. And Scott Nelson, plant manager of PD Technical Services, Inc. (New Berlin, WI), agrees: "On the first pass, you let the artwork fall where it may and work from there, but it usually takes two to three tries." This is the perfect application for a CAD program, but at this point, none are available, although there are whispers of programs in development. Jumping ahead to the thermoforming area, we now have a flat, printed part ready to be molded into a bicycle helmet or vending machine panel. Next, the sheet is clamped into the thermoforming machine, where it is exposed to an array of "zoned" heating elements that bring the piece to the desired temperature levels. Once the part reaches the "thermoforming [temperature] window," it softens and is placed in contact with the molding tool. For shallow draws, a male mold might be used, pushing the mold up and into the plastic. Deep-draw parts might use a female mold in which vacuum pressure is used to pull the warmed plastic down into the mold. After molding, the part is cooled, released from the mold, and sent to final finishing operations such as diecutting or routing. Parts that are second-surface printed require special care. Since the printed ink layer comes into contact with the heaters, there is a risk that the ink can delaminate when the part is removed from the mold. This problem can be addressed by adjusting the heat zones in the thermoforming equipment, using a mold-release spray, or drying/curing the ink a bit more than you normally would. Between the art department and your thermoforming equipment, however, are some of the most critical parts of the entire process. Screen printing for thermoforming requires an in-depth knowledge of materials–inks and substrates in particular. In part two of this piece, we’ll look at them both, keying in on the variables that are specific to the thermoforming process.


Subscribe

Magazine
Get the most important news
and business ideas from Screenprinting Magazine.
Most Popular
-

 Art, Ad, or Alchemy1 month ago
F&I Printing Is Everywhere!
-

 Case Studies1 month ago
High-Density Inks Help Specialty Printing Take Center Stage
-

 Andy MacDougall1 month ago
Functional and Industrial Printing is EVERYWHERE!
-

 Columns2 weeks ago
8 Marketing Mistakes Not to Make When Promoting Your Screen Printing Services Online
-

 Editor's Note2 weeks ago
Livin’ the High Life
-

 Thomas Trimingham2 months ago
“Magic” Marketing for Screen Printing Shops
-

 Marshall Atkinson2 weeks ago
How to Create a Winning Culture in Your Screen-Printing Business
-

 News & Trends1 month ago
What Are ZALPHAS and How Can You Serve Them in Your Print Business?