Graphics Printing
Published
13 years agoon
Do it right the first time.” How many times have you heard this saying? I remember my dad saying this to me on numerous occasions. It was usually followed by instructions to do something over because I had tried to do whatever chore he had assigned quickly so I could get back to the fun stuff. Eventually, I learned that if I took a little extra time and did my best the first time, my dad would be happy and I’d have more time to do what I wanted.
Do it right the first time.” How many times have you heard this saying? I remember my dad saying this to me on numerous occasions. It was usually followed by instructions to do something over because I had tried to do whatever chore he had assigned quickly so I could get back to the fun stuff. Eventually, I learned that if I took a little extra time and did my best the first time, my dad would be happy and I’d have more time to do what I wanted.
In this article, I present the right way to produce vinyl graphics, beginning with selecting the right material and ending with a proper installation. By following these guidelines, your customer will walk away happy with the work you have provided and, hopefully, the customer will return to your shop again with repeat business.
Selecting the right material
When a customer comes into your shop and asks you to produce graphics, do you just choose the first roll of media that you see and start printing? I doubt it. There is a process to go through before printing begins. The first step in producing high-quality graphics is to choose the best material for the job. To choose the best material, ask your customers a series of questions so you can get an idea of their expectations. The questions are designed to facilitate accurate quotations and detailed production specifications and to provide your customers with the most suitable product for their graphic applications.
As you go through these questions and their answers, remember to refer to the media manufacturer’s technical data sheets for product specifications and instructions for using the product. I recommend that you create your own specific material-selection checklist. For starters, begin by considering the following questions.
What is the expected durability of the graphic and the project? How long does it need to last? Getting an idea of a customer’s expectations for the life of the graphic is helpful in specifying the exact product to meet performance expectations. It’s also an opportunity for you to make certain the customer’s expectations are realistic. Cast films typically have the longest lifespan. Cast films can last ten years or more for cut graphics used in signage. Screen-printed graphics on cast film generally last six up to seven years. Digitally printed graphics typically last up to five years when they are laminated or clear coated. Life of calendered film is usually one to six years with digitally printed calendered films having a maximum durability of five years.
Is an overlaminate needed? Digital printing is a bit different from screen printing or cut-signage technologies in that an overlaminate is generally required to extend the graphic’s life beyond two to three years. The inks typically will last that long outdoors on their own; however, they have poor chemical and abrasion resistance. An overlaminate is required for graphics that need to last longer.
Not using a laminate is one of the easiest and most obvious methods for cost cutting. Be careful here. Even if the graphic only needs to last one or two years, a laminate may still be a good idea because of its ability to protect the ink from chemicals or from being scratched. If you are pushed by your customer to go this route, proceed with caution and make certain the customer understands what may happen to the print if it goes unprotected. If you are using UV printing technology, the graphic may not be at as high of a risk.
What is the desired gloss level or finish? The finish of the graphic is usually dictated by the gloss of the overlaminate being used. Media manufacturers offer a variety of choices. The finishes range from very glossy to a semi gloss or luster finish to a matte look. The gloss level of the laminate can have a significant impact on your final graphic. Gloss laminates bring out the vibrancy of the colors in a graphic while matte laminates cause the colors to be muted. Matte laminates also significantly reduce glare. The satin and luster laminates are somewhere in the middle. They provide a nice sheen to a graphic but help reduce glare from overhead lighting.
What are the budget guidelines? Budget can play a significant role in choosing the best material. However, keep in mind that quality shouldn’t be sacrificed for price. For example, if a customer’s budget is not enough for a full vehicle wrap using premium cast films, switching to a less expensive calendered film may not be the best solution. It may make more sense to show the customer alternatives such as a partial wrap. This way they can still use a premium product with a longer life and have high-impact graphics.
To what surface are the graphics being applied? This question is very important because the adhesion of the vinyl and adhesive being used for a graphic will vary with each substrate. It is important to check the data sheet or check with the product manufacturer to ensure that what you want to use will adhere as expected. There are some surfaces that manufacturers simply do not recommend for vinyl application. These include tin, copper, unpainted fiberboard, and unpainted wood. Other surfaces may require special preparation, such as galvanized steel, stainless steel, aluminum, polycarbonate, etc. Be sure to check the media manufacturer’s instructions for guidance.
What are the texture, shape, and surface chemistry of the substrate? Highly conformable cast films are a natural choice for fleet applications with uneven surfaces such as rivets and corrugations. These films conform easily over the rivets and will stay put for a long period of time. Using a less expensive calendered film can be risky, even for short term, as the film will likely lift around the rivets, leaving it susceptible to cracking or tearing. Cast films are an ideal choice for vehicles too, even if the vehicle will be rewrapped every year or two. Cast films will conform to the irregular shape of today’s vehicles and stay put for a paint-like finish.
You may encounter highly textured surfaces. These surfaces can be a challenge for film adhesion. A few media manufacturers have recently launched films specifically for these types of surfaces. The application can be time consuming, but the end results are excellent. Installation involves using heat and a rivet brush or roller (some even have a special tool) to push the film down into the valleys of the surface. High-performance cast films are typically used for this type of application.
What type of paint is used? What is the condition of the paint? Paint finish (gloss, luster, or matte) is an important factor in wall graphics. Most media manufacturers do not recommend applying wall graphics to matte paint because of adhesion problems. The performance of the graphic is only as good as the application surface. If the paint or surface is not in good condition, issues will develop later. This applies to any application surface.
Where will the graphic installation take place? Ideally, graphics would always be installed indoors in a dust-free and temperature-controlled climate at around 70°F. In the real world, though, this is not possible. Sometimes graphics must be installed outdoors in a less than desirable climate. Consult the media manufacturer’s guidelines for installing graphics to determine what the absolute minimum and maximum temperatures are so that you can try to fit into that window. If you are in a hot climate, try doing installations early in the morning before the heat rolls in. For example, a company in Las Vegas has a third shift that does all of the installations at night when the temperatures are bearable. If the temperature is borderline cold, you can try to warm the surface with a heat gun.
Must the graphic be removable at the end of its life? If you are wrapping a vehicle, semi, or box truck, the answer is almost always yes. Typically, the premium cast films designed for wrapping also use a special adhesive that allows the graphics to remove cleanly, with very little adhesive left behind, after five years. Consult your media manufacturer before wrapping to make sure the product you plan on using has this feature. Permanent and removable adhesives are available for other types of applications.
Producing the job
Before getting started, make certain you are following the manufacturer’s recommendations. For screen printing, you will need to select an ink that is compatible with the media you have chosen. One step that seems to be missed frequently is checking ink adhesion. This is typically a scratch test performed using a crosshatch tool and tape. The ink is abraded and tape is applied then snapped off to evaluate adhesion.
Another set of guidelines applies to digital printing. If you are printing digital UV, start with a scratch test to make absolutely sure the ink is sticking to your substrate. If you encounter ink-adhesion issues, you may need to adjust your printer’s settings or use a different substrate.
You should know right away whether inks will adhere when printing with solvent—including mild and eco-solvent—or latex formulations. Most vinyl films are inherently printable; however, media manufacturers often optimize their media for digital printing to ensure consistency. Contact your media supplier or printer manufacturer to obtain the proper ICC profiles for the film, ink, and RIP combination you want to use. This step creates the foundation to creating a quality print based on recommended settings.
The ink must have enough time to dry when printing solvents before you apply the overlaminate or do any contour cutting. If the solvents are not allowed to escape the printed graphic and you apply a laminate, the solvent will become trapped. This can cause issues for the installer because the film will be very soft and difficult to handle and apply. Trapped solvent can also cause removal or overall performance issues later.
How long should you let the print dry before laminating? Ideally, at least 24 hours. At the very minimum, try to let it sit overnight. I have heard some recommendations of up to 72 hours, which may be necessary for prints that are highly saturated with ink. Drying prints should not be wound tightly on the core because air will not flow through. If your shop does not have enough room to lay the prints out flat, try to wind the image loosely on the core (Figure 1). Some shops have created their own custom dryer boxes with fans for pushing the air across the prints (Figure 2). This will definitely help drive the solvents away from the print.
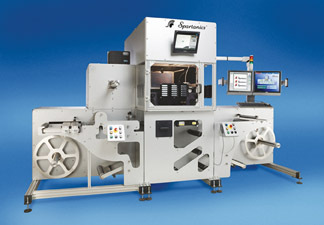
Apply the overlaminate once the print is completely dry. When you laminate, make sure there isn’t too much tension on the overlaminate as that can cause the film to want to pull back after it is installed. This is especially important if you happen to be using a thermal laminator. If heat is present, the film will be very soft and easy to stretch. The easiest way to laminate is in roll format. The laminator can be webbed up with the laminate on top and the printed roll on bottom. The laminated graphics can be fed onto a large table where trimming can then be done (Figure 3).
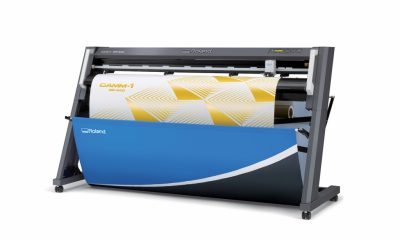
For the most part, vehicle-graphic panels are trimmed by hand. Contour pieces are occasionally cut on a plotter. Make certain you have a sharp knife to do the trimming. I recommend using the same type of knife, with the break-away blades, used during installation. This will ensure you always have a sharp edge. When trimming, it is important to check that information stays with each panel. Some companies leave the printed information at the bottom of the panel on the print. This will get trimmed away by the installer. The other option is to transfer this information to the back side of the graphic. This information is important and will be used later by the installer.
In addition to the location information being supplied on each panel, it is a good idea to provide the installer with a schematic so he can see what the finished graphics are supposed to look like (Figure 4). The installer will use this schematic to figure out where key parts of the graphic go on the vehicle so that information is not lost in wheel wells, windows, or protruding parts of the vehicle. If the graphics must be transported to a remote location for installation, the schematic should be included on the outer wrap of the graphics package. Some installers will also request that you e-mail them a copy in advance so they are sure to have this schematic available at the time of the installation. When packaging the graphics for transport, wind the prints face out with a minimum inner diameter of 3 in. Winding the prints around an empty core is a good way to ensure they are not wound too tight.
Installing the graphics
The last step is the installation. Good preparation and following the manufacturer’s instructions can make or break the job at this point. I have seen many great graphics ruined by a poor installation. Take the time to properly prepare and clean the application surface. Do not use any cleaners with ammonia in them as these will affect the adhesive. You will find that most manufacturers recommend using isopropyl alcohol, which is readily available at local hardware or drug stores. I highly recommend that you do a final wipe with isopropyl alcohol to further ensure that all contaminants are removed before installing the graphic.
Before actually starting your install, it is always a good idea to lay out your prints to be sure that all of the panels were shipped and that graphics will to fit properly. It is always possible that somewhere along the way someone measured incorrectly or that the vehicle isn’t the same as originally planned. If anything like this happens, you will know up front and be able to make the necessary adjustments—or get new graphics if necessary—before you apply the first panel.
Take your time during the install. You could be the best installer in the world, but if you begin to rush, you can—and likely will—make mistakes. If you are applying graphics with application tape, go back and re-squeegee all of those graphics once the tape is removed. Post-heat any areas where you might have stretched the vinyl during installation. Most manufacturers require this step, but few installers actually follow it. I suggest going to your local tool-supply store and investing in a $20 infrared thermometer to ensure you are actually heating the media to the recommended minimum temperature. Also, go over all of the edges of the graphic by squeegeeing and then sealing them with heat. This will aid in edge sealing and preventing unwanted edge lifting.
The happy customer
If you take your time by doing your homework up front, choosing the best material for the job, and then producing and installing the graphics according to the manufacturer’s directions, you will save yourself lots of time and money in the long run by only doing the job once. Make it right and you will also have a very happy client who will likely turn into a repeat customer.


Subscribe

Magazine
Get the most important news
and business ideas from Screenprinting Magazine.
Most Popular
-

 Case Studies2 months ago
High-Density Inks Help Specialty Printing Take Center Stage
-

 Art, Ad, or Alchemy2 months ago
F&I Printing Is Everywhere!
-

 Andy MacDougall2 months ago
Functional and Industrial Printing is EVERYWHERE!
-

 Columns3 weeks ago
8 Marketing Mistakes Not to Make When Promoting Your Screen Printing Services Online
-

 Editor's Note3 weeks ago
Livin’ the High Life
-

 Marshall Atkinson3 weeks ago
How to Create a Winning Culture in Your Screen-Printing Business
-

 Thomas Trimingham2 months ago
“Magic” Marketing for Screen Printing Shops
-

 Case Studies3 weeks ago
Screen Printing for Texture and Depth