
Reaching Old Heights
With high-density inks enjoying a resurgence in popularity, specialty printing once again takes center stage.
CALL ME OLD SCHOOL — printing special effects basics still are the same. I’ve been in the industry for more than 46 years now. We call it garment decorating now, but when I started it was just plain screen printing.
First, a retrospective and a few personal experiences about my trials with printing with these favorites. I have many memories about the past things we did to get the presses rolling. I remember one incident where we burned one of the screens for a 6-color job crooked by accident. To be able to use the screen, we cut off and trimmed one of the corners of the old wooden frames to fit it into the Precision oval presses. Unfortunately, this happened more than I would like to admit.
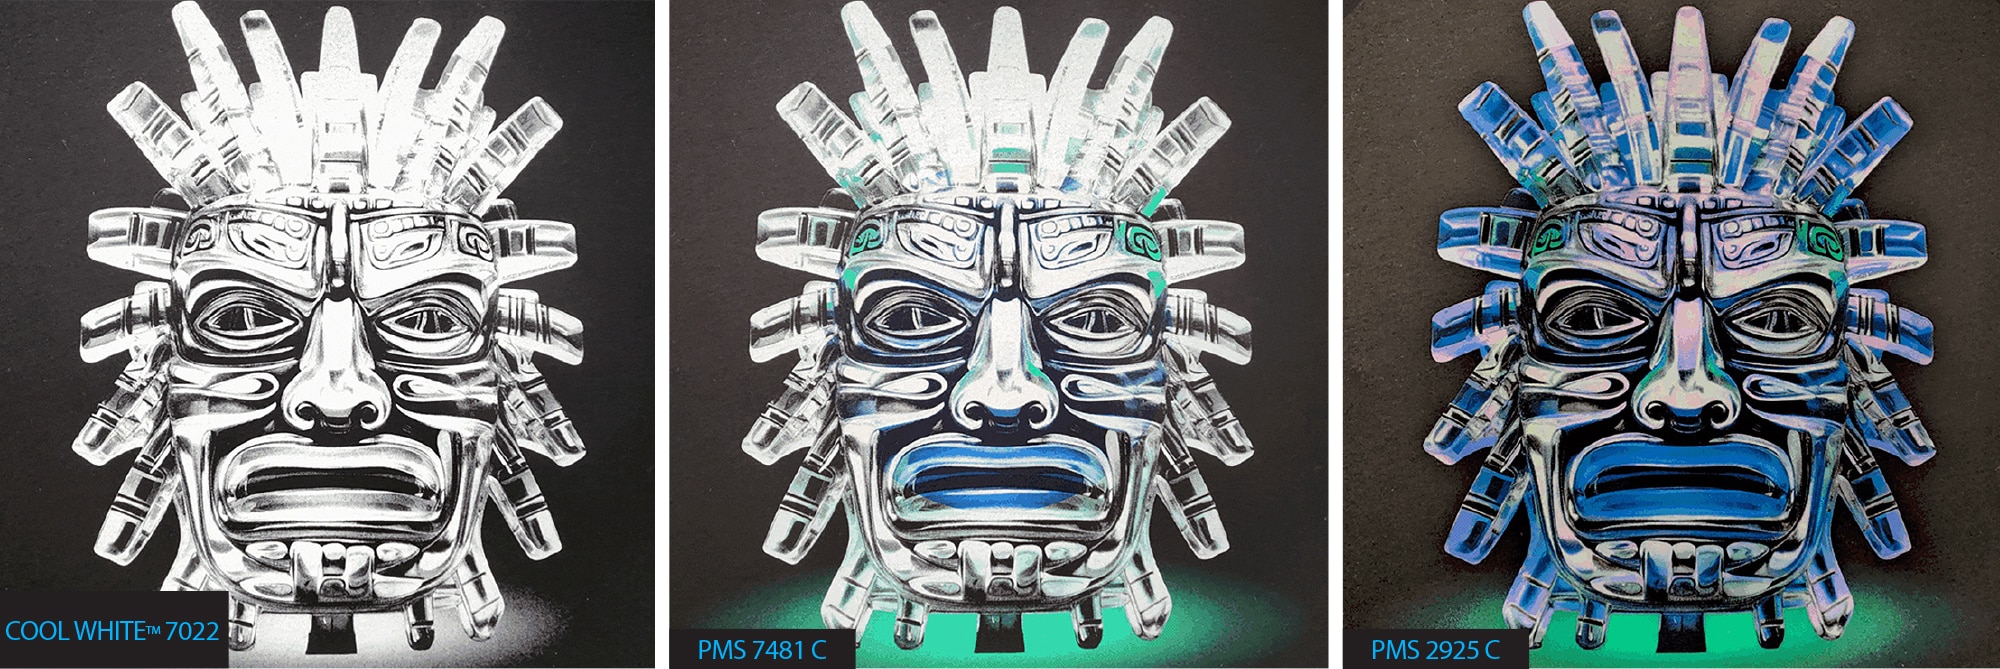
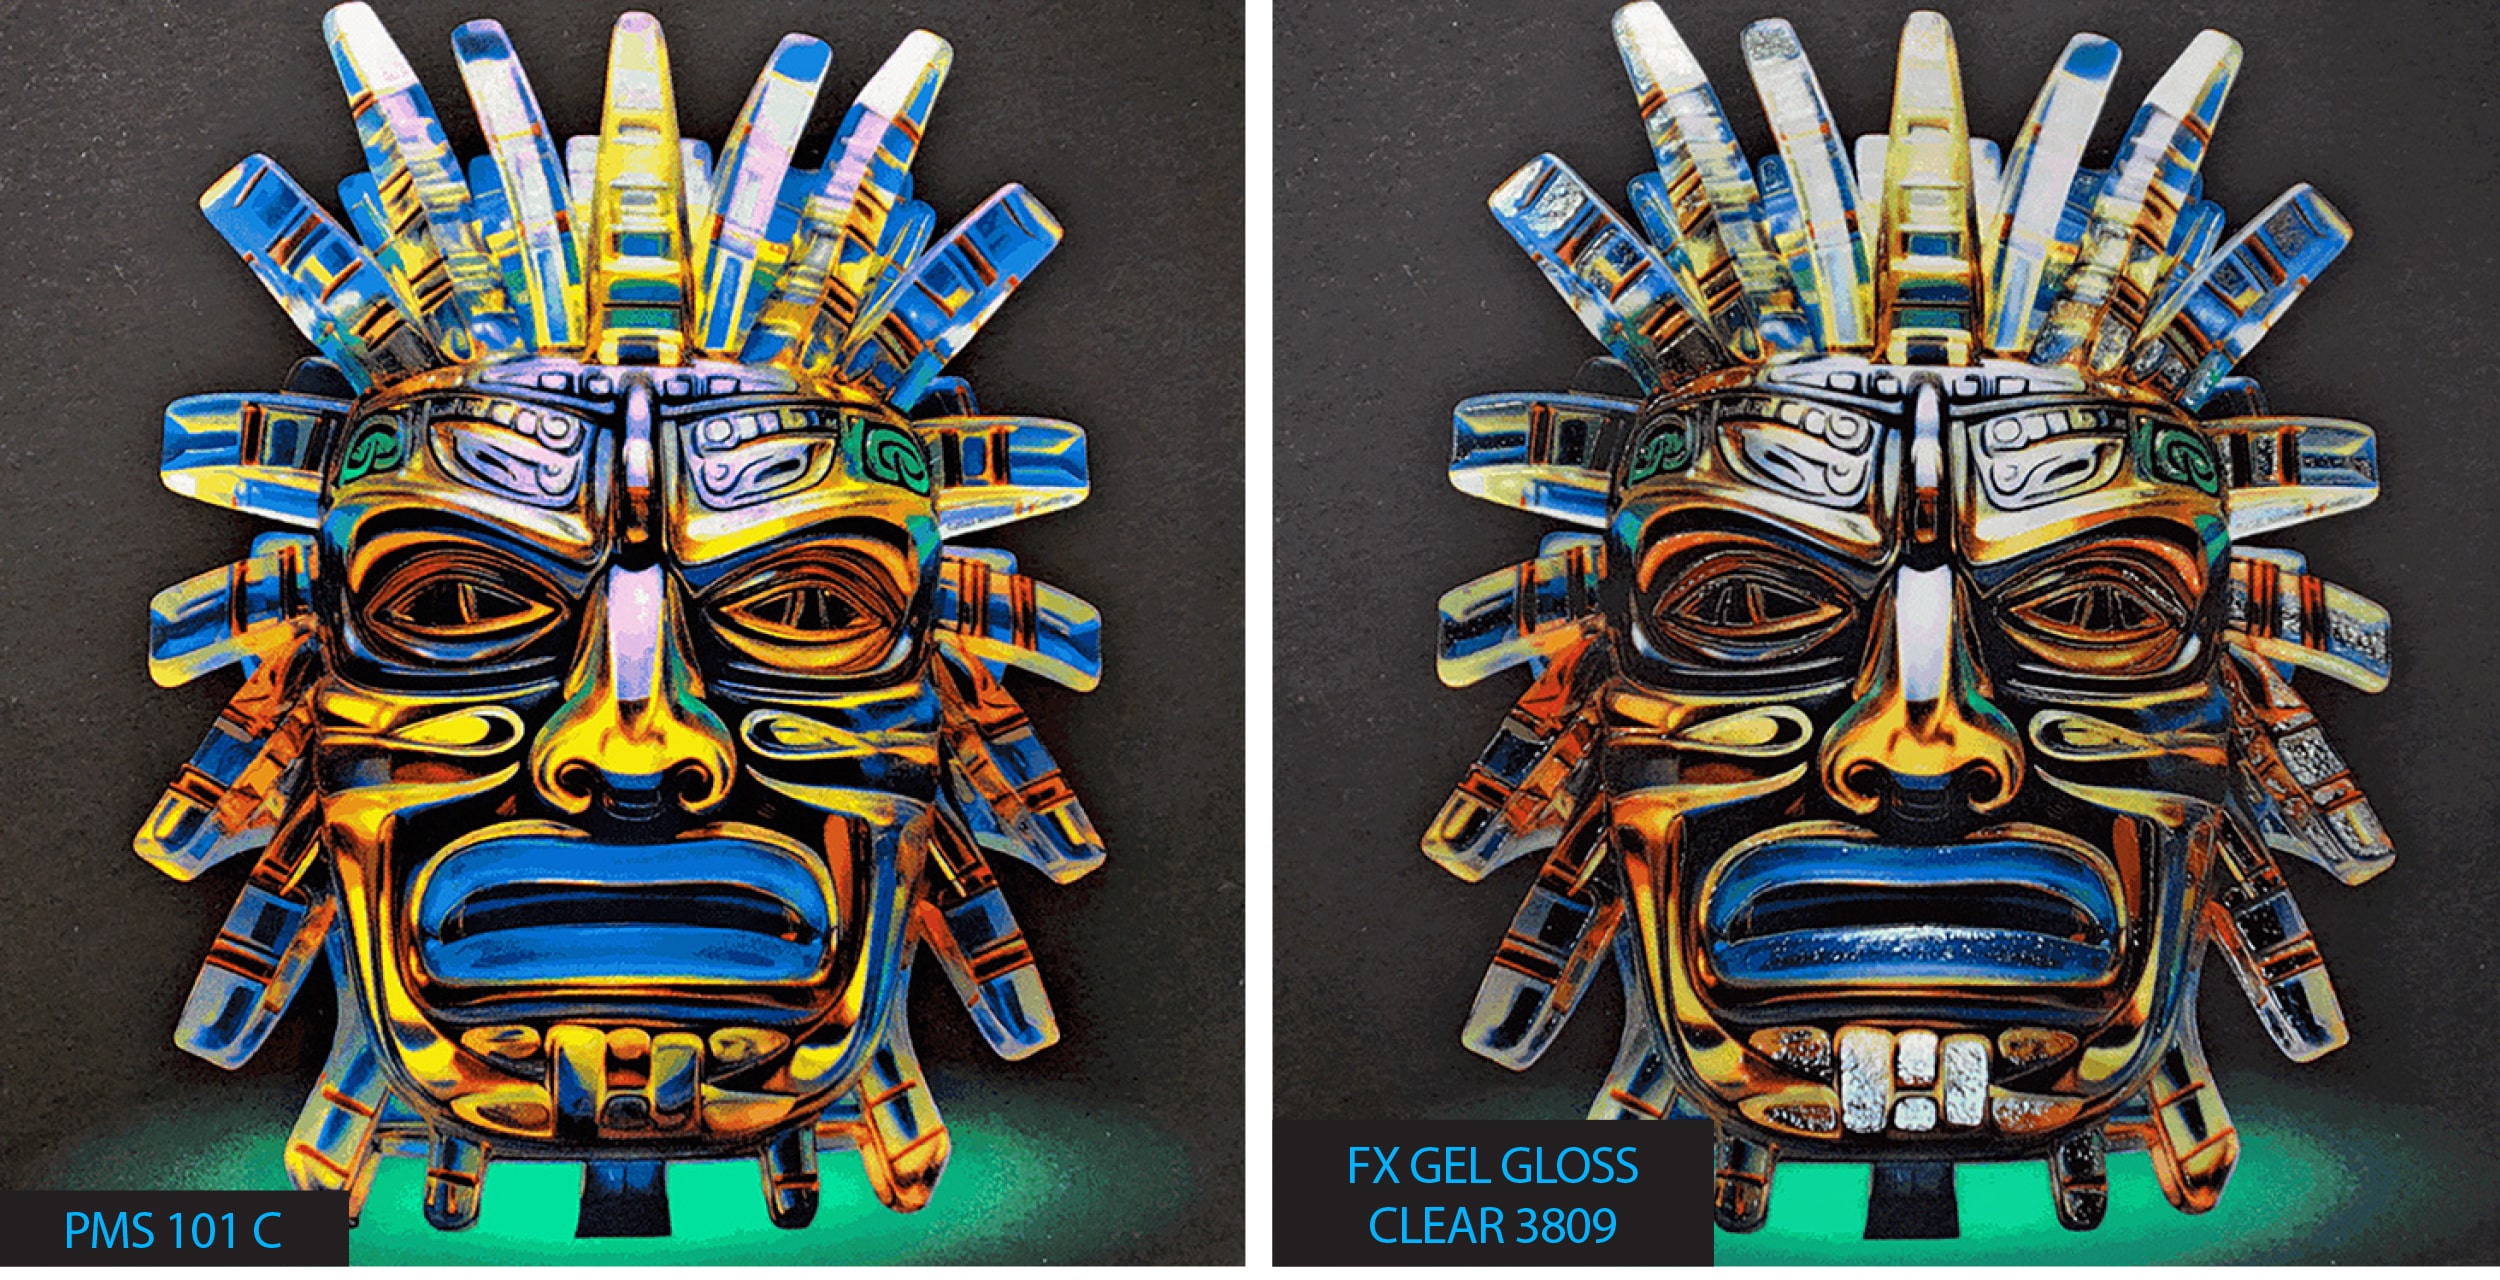
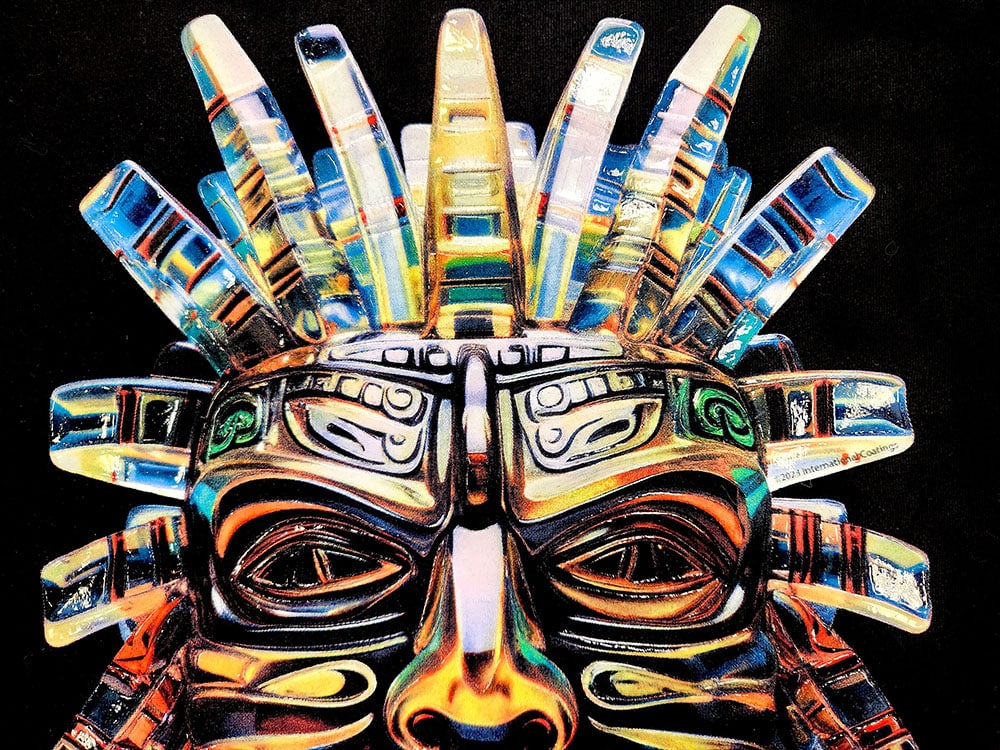
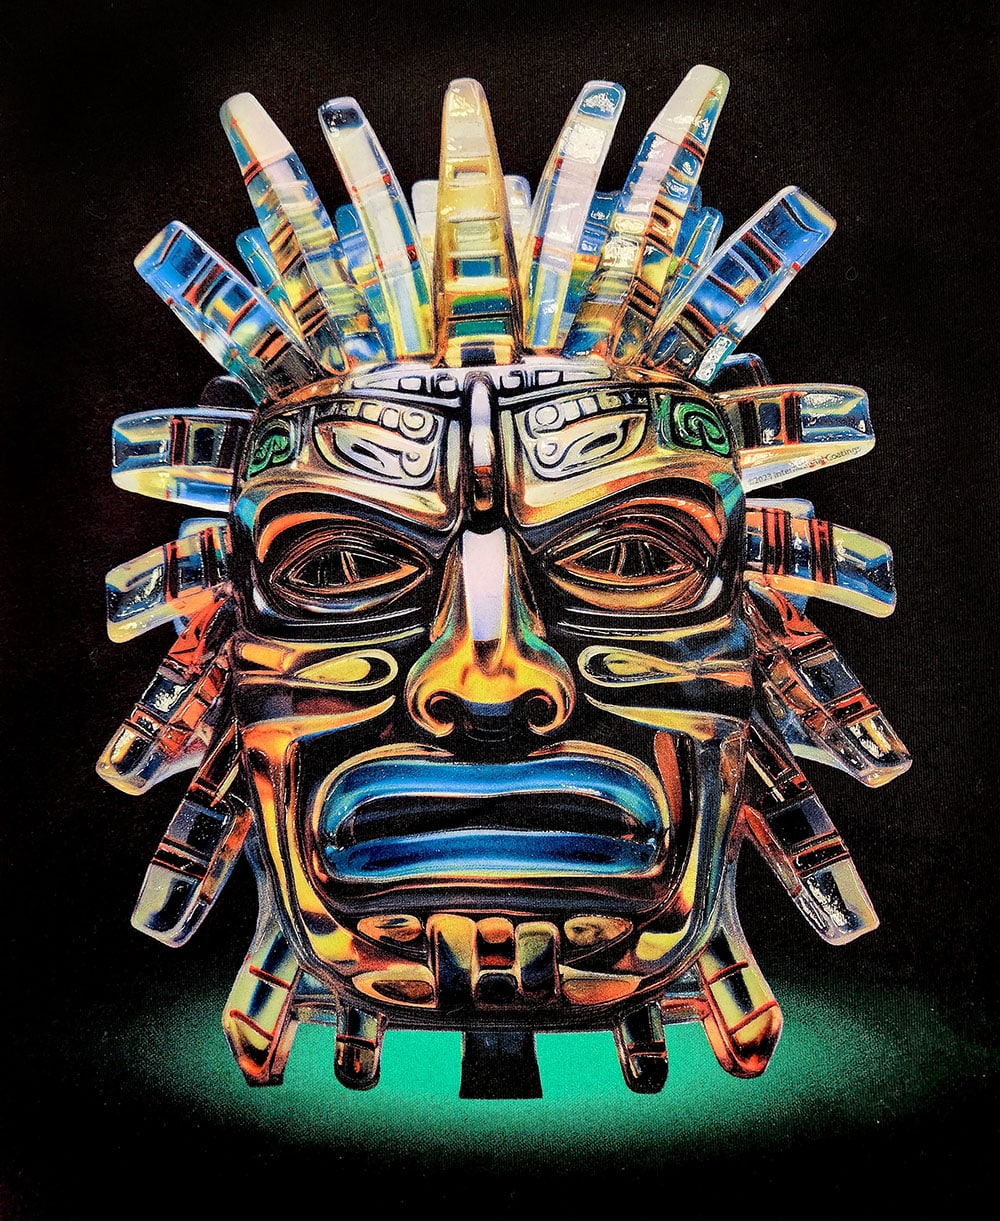
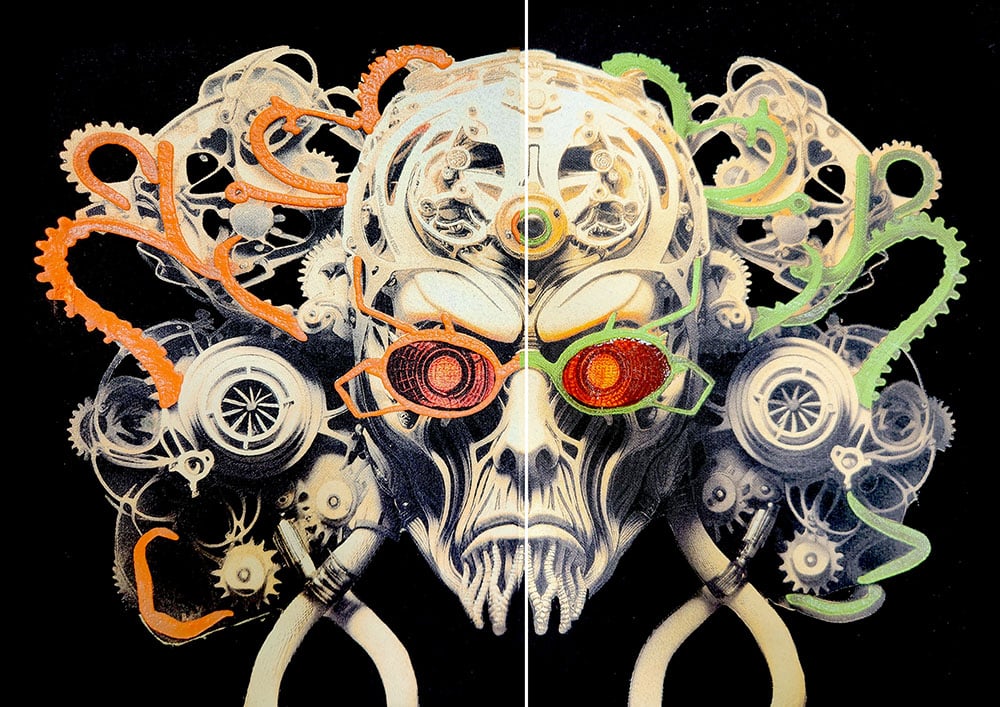
When creating the “Crystal Mask” design, the printer used this set of files of each screen used, with the color call outs.
I remember using real film that you had to create using a large 20-foot horizontal camera and using real chemical baths to develop the film. Or scraping the bottom of all but the first screen to remove the pasty buildup on the bottom of the screens after every 200 to 300 prints. This was the norm before inks were developed that did not build up.
Flat prints without texture also were most popular back then. Glitter or glow-in-the-dark inks were about as special as it got.
Then around 1985, I was using a water-based puff product that was new to the market, or at least new to me. It was called J&S Puff Stuff and it was the first time I had seen anything dimensional for screen printing. Being that it was water-based and not plastisol, it took some time to figure out how to maintain the screens. The water-based ink was destroying them. Mind you, we were using old school diazo emulsion, but the screens needed to be chemically hardened to withstand the aggressive water-based inks and volume printing.
Then, a momentous screen-printing event happened in 1986. I remembered this vividly because that’s when I first laid eyes on a flash unit. This changed the screen-printing world tremendously. No longer did we have to rely solely on the opacity of each individual color to achieve a bright design on black shirts. This single “innovation” changed everything. Now you didn’t have to load up your ink colors with white opaque pigments to create opacity but that also muted the vibrancy. You could have purer colors that miraculously created less buildup. It meant that 4-color process printing on black garments became a reality.
It affected everything from art to separations to screen mesh selections to having to deal with one less color and having a better white. I know there are going to be some who remember the timing differently, but this is how I remember it.
HD MAKES AN ENTRANCE
An important innovation occurred around 1988 when I saw what we now call high density ink. It was a print that came from somewhere in Asia and we were trying to reproduce it for our largest customer. It was a raised image with sharper edges that was unlike anything we had seen. It wasn’t puff; it was thick and sharp. There was even some “body” to it.
We tried to duplicate it, but we just couldn’t figure it out. We blamed it on table printing, which can print a single color as many times as you want to achieve the thickness. Here, we didn’t have that luxury. You only had one or possibly two strokes to try and get the same height. To be honest, we really didn’t know how they did it back then; whereas now, it’s just like printing regular ink — something that’s familiar with slight modifications.
I remember working with Murakami on thick emulsion at the time. There was a learning curve. Thick emulsion in the sheet form had been around for a long time, generally for use in the circuit board industry. I’m not talking about the thin, indirect emulsion in the 20-40 micron range. I mean in the 200-400+ micron range. Once these thick films were introduced into the textile screen-printing world, specialty printing exploded.
Advertisement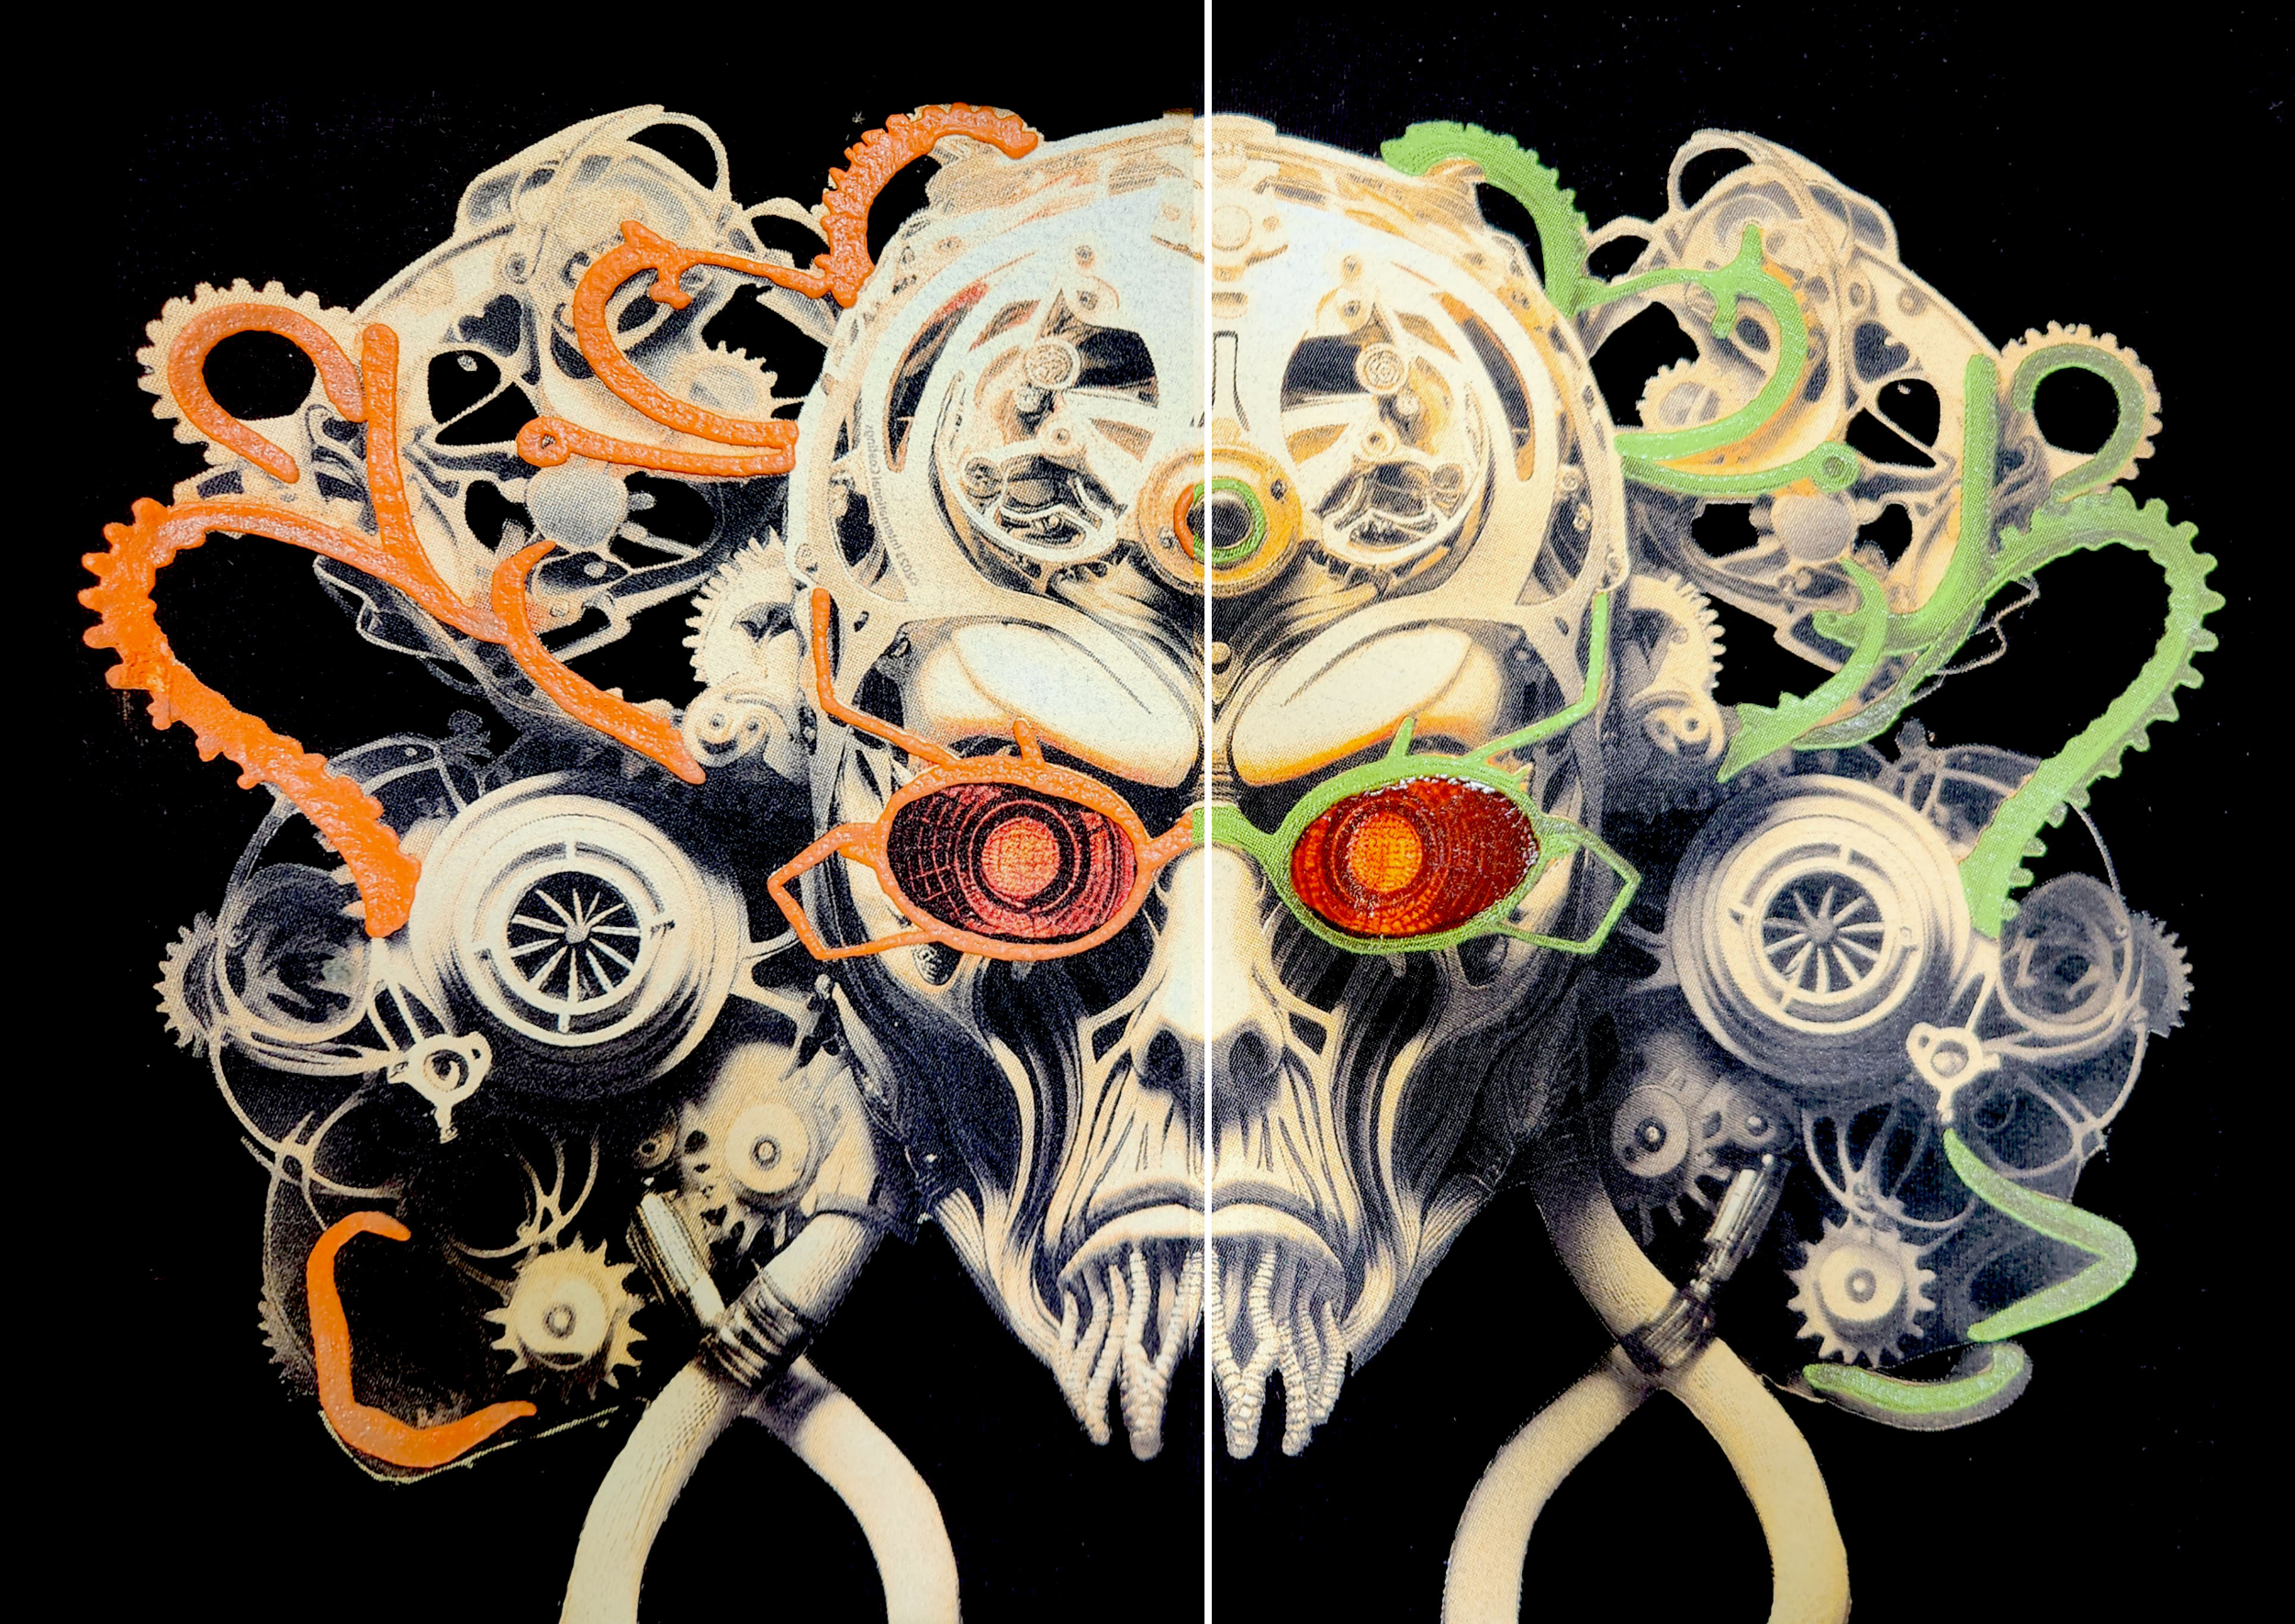
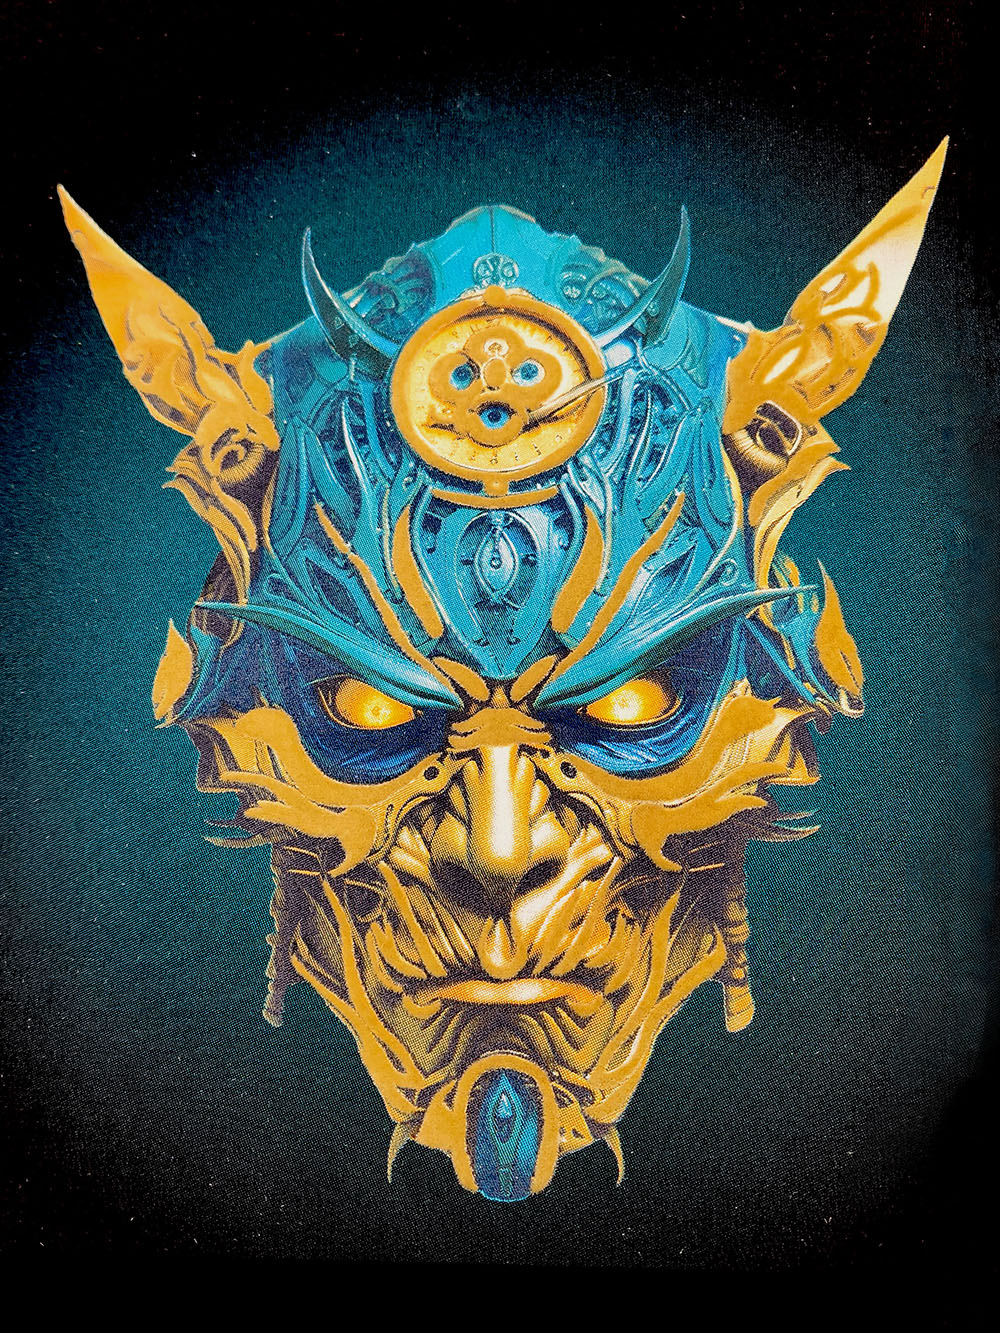
This collage shows the design was started by using an orange color for the special effect, in this case the ICC BlowOut Base 3810 that gives a spongy, puffy effect. The color was then changed green and the eyes darkened to a deeper red.
SPECIALTY INK PRINTING
When I talk to screen printers, many have dabbled in some specialty ink printing such as using puff, glitters, shimmers, and glow-in-the dark. Yet, they shy away from HD and gel gloss inks. Often, they feel that their shop is not skilled enough to handle such prints, or that it takes too much time and effort to create the screens.
I’ll walk you through the steps. If you master these, printing with any ink will be a breeze. If you’ve read my previous articles, I’ll sound like a broken record: Film, Mesh, Emulsion, Squeegee, Cure. These are the tools of the trade. Yet, these also can determine how well your prints come out regardless of whether they are flat or embellished.
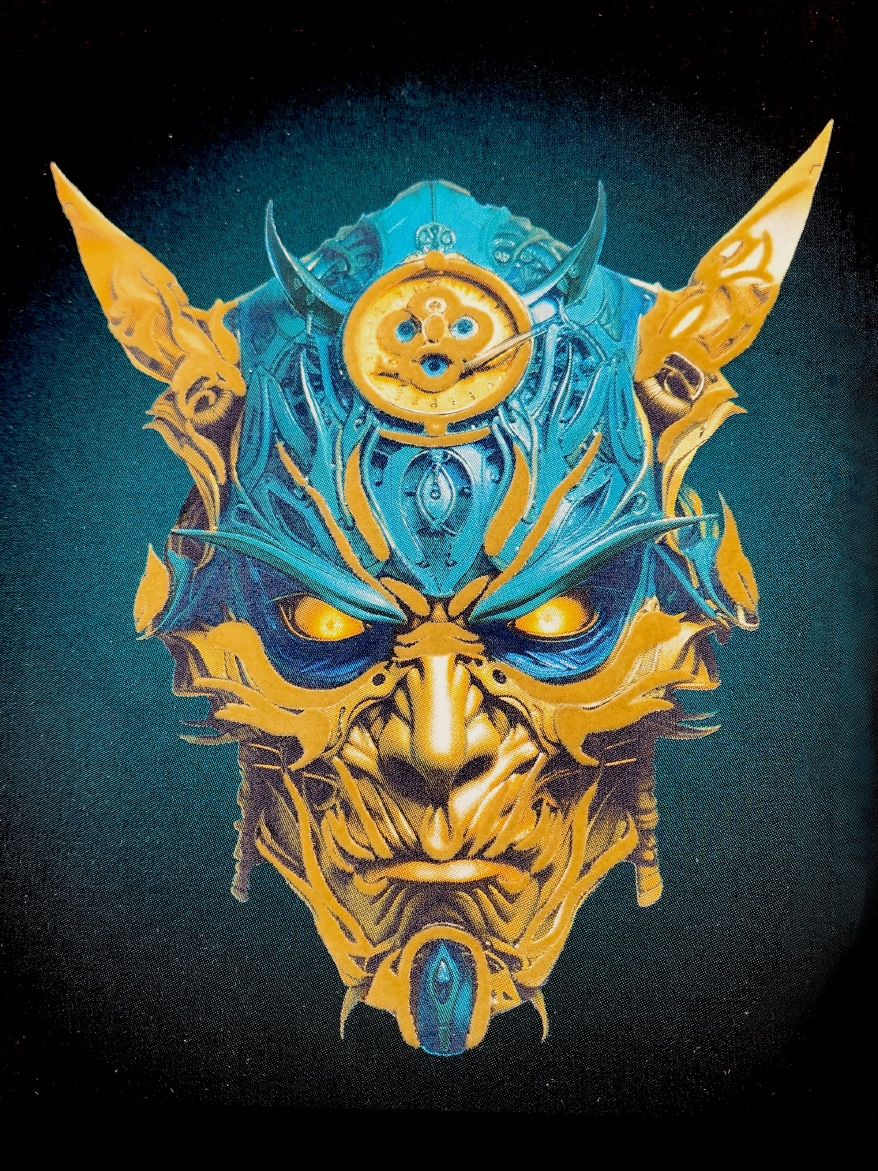
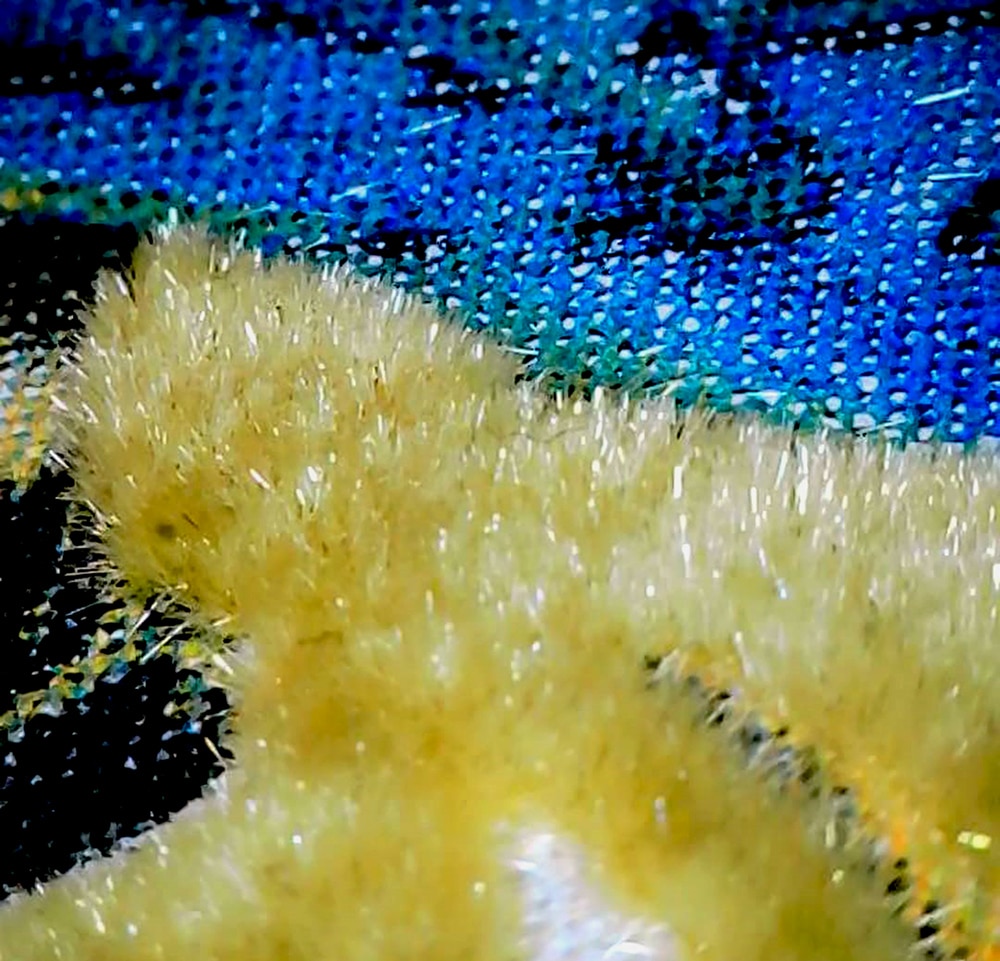
Flock was used to enhance the lines on the Goblin’s face. ICC’s FX Gel Gloss 3809 was used to create this design. This close-up shows the flock fibers on Goblin’s face. All photos courtesy of International Coatings (ICC).
- Film. Remember, quality film is excruciatingly important. It can make or break you or, give you headaches, or make your day. Remember this: The black positive area should be as dark and opaque as possible so that all the light exposing the emulsion is filtered or preferably blocked by the film-positive portion.
If you are using an inkjet printer to print the film, make sure you read the manufacturer’s instructions on how to get the most ink onto the film. Bottom line, the more opaque your film is, the better your prints will come out. - Mesh. Think of the mesh thread as a wire to slice clay with. The tighter the mesh, the easier the task and the sharper and cleaner the cut. I’ve dealt with cheap screens and dull squeegees for half of my career and have experienced the clear differences of how all the components interact with one other to achieve a quality print.
Be sure that your mesh is tight. A loose mesh can ruin your registration when printing with multiple screens. The tighter your mesh, the easier your life will be.
When printing special effects inks, be aware of the mesh size requirements for the different inks. Obviously, glitter inks require low mesh counts to allow the glitter flakes to pass. A medium-sized mesh, such as 110, can accommodate a variety of specialty inks, including gel gloss or HD inks. Check the ink’s product data sheet to see the recommended mesh size. Also, keep in mind that not all mesh is the same or created using the same threads. Some are made with thicker threads, making them more durable. But the downside is that less ink will pass through them, making specialty printing more difficult. - Emulsion. In general, without enough emulsion, you are not achieving your best print. Emulsion’s function is not merely to stop the ink from passing through the mesh. It should create a simple form of gasket to not only place the ink onto the garment, but to create and maintain the shape of the design.
Emulsion should keep the design from “growing” or “gaining” in size. Just because you are using a low mesh count doesn’t mean you should expect to see a saw tooth on the edges of the printed image. Such may happen if the emulsion coat is not thick enough. The lower the mesh the more of an “edge” of emulsion you should feel around the image.
The thicker emulsion coating helps bridge the gaps between the threads within the mesh and stops the ink from squeezing by. The finer the mesh, the less thick the emulsion needs to be to bridge that gap.
To print certain dimensional inks where you want to obtain a raised texture, you need a thick emulsion coating. You can achieve that by coating the screen over and over or by applying a capillary film. In general, use a 400-micron thickness for applying gel gloss or HD inks. You do need opaque films to be able to expose these thicker emulsions. Not having opaque films is the No. 1 reason people have difficulty in making a quality screen. - Squeegees. Which squeegee is for what ink in the FX world? Before I get to that, let’s talk about the importance of the proper squeegee durometer and sharpness. In general, when printing specialty inks, a softer squeegee in the 60 to 65 durometer range is best.
There are times when a harder squeegee may be better, but that is why it’s important to have a full selection available to you. At times, you may need to make small adjustments, such as depositing less or more ink.
Squeegees are not expensive, so feel free to grab a good selection to make sure the right durometer is available when needed. Trying out different hardnesses is the only way to find out what they can do to help you achieve the best quality and the fastest productivity. Make sure you have one of each selection of squeegee type for each of the screens you are printing. You may even try different squeegee shapes for a funky look. There have been times when we even used wallpaper brushes as a squeegee to achieve a unique look.
Pulling a squeegee is the correct way to print. Period. Yes, you can push if you must, but it is not the way the process was designed to work. Not one automatic printing machine in the world “pushes” the squeegee. The only reason you may have to push a squeegee is when you are slightly out of register and pushing may bring it into registration. - curing. In general, the longer you can keep your prints in the dryer at the recommended cure temperature, the better your print experience will be. Plastisol inks need to reach a minimum of the individual inks’ recommended curing temperature for at least one minute for the components to bond/fuse. I mention “recommended temperature” because there now are variable cure temperatures for many inks.
Some are “low cure” while others are “standard cure” or anything in between. Be wary of the term “low cure” as some manufacturers claim to be low cure but then suggest a much longer dwell time in the oven and this simply can be misleading. Everyone should know by now that the standard dwell time in a dryer is approximately 60 seconds and not 120+ seconds.
When it comes to special effects inks, the thicker the ink layer, the longer the cure time or the higher the temperature. For gel gloss, HD, and puff inks, for example, we cure the print at 350°F (177°C). The increased temperature gives the gel gloss ink a nice “doming” effect and allows the puff to achieve a nice loft.
There are a couple ways to test whether your print has fully cured. One way is to stretch the print and look for any cracks. Fully cured plastisol inks have a built-in stretch, so should not crack. If your print cracks, you simply can run it through the dryer again at the recommended temp and time to assure full cure. Trust me, I don’t think an ink manufacturer packages their product without testing first, so if your cured inks are cracking, you either need to add more heat, more time, or both.
The other method to test is to wash the garment. Fully cured prints should not come off in the wash. Curing your inks correctly can mean less returns or embarrassments.

THE FUN PART
Once you have mastery over the individual tools of screen printing, you’re ready to have some fun. Don’t get me wrong, translating an image to a print is not always straightforward when it involves multiple screens and colors. Just because it looks great on the computer screen and the PMS colors called out by the separator look good doesn’t mean it will translate the same way to the shirt.
My team and I printed multiple test samples with variations of colors to arrive at our final display prints. Fortunately, we do have the luxury of access to various specialty inks and colors. But the ground rules apply. We used all our knowledge and tricks to create the best prints. So don’t be afraid to try different squeegees, inks, colors, special effects, or mixing an HD clear or gel gloss with a shimmer or color, for example.
Do try out special effects inks you’ve never tried before. Try flock, or caviar beads. Foils, glitters, shimmers, reflective, spongy type inks, and so many more.
I liken screen printing to a race car, where all the components must work at their best — independently and in unison. Hundreds of items must be at their best to be competitive. And you’ll end up with the best prints your shop can offer.
PHOTO GALLERY (5 IMAGES)
📷 Courtesy of International Coatings (ICC)
Let’s Talk About It
Creating a More Diverse and Inclusive Screen Printing Industry
LET’S TALK About It: Part 3 discusses how four screen printers have employed people with disabilities, why you should consider doing the same, the resources that are available, and more. Watch the live webinar, held August 16, moderated by Adrienne Palmer, editor-in-chief, Screen Printing magazine, with panelists Ali Banholzer, Amber Massey, Ryan Moor, and Jed Seifert. The multi-part series is hosted exclusively by ROQ.US and U.N.I.T.E Together. Let’s Talk About It: Part 1 focused on Black, female screen printers and can be watched here; Part 2 focused on the LGBTQ+ community and can be watched here.


Arcus Printers Barracuda Conveyor Flatbed Cutter

The Profit Impact of a Market Dominating Position

Inkcups Announces New CEO and Leadership Restructure


Bulletins
Get the most important news and business ideas from Screen Printing magazine's news bulletin.
-

 Art, Ad, or Alchemy2 months ago
F&I Printing Is Everywhere!
-

 Andy MacDougall2 months ago
Functional and Industrial Printing is EVERYWHERE!
-

 Columns3 weeks ago
8 Marketing Mistakes Not to Make When Promoting Your Screen Printing Services Online
-

 Editor's Note3 weeks ago
Livin’ the High Life
-

 Marshall Atkinson3 weeks ago
How to Create a Winning Culture in Your Screen-Printing Business
-

 Thomas Trimingham2 months ago
“Magic” Marketing for Screen Printing Shops
-

 Case Studies3 weeks ago
Screen Printing for Texture and Depth
-

 News & Trends2 months ago
What Are ZALPHAS and How Can You Serve Them in Your Print Business?