Articles
Published
19 years agoon
In wide-format UV inkjet printers, screen shops have found an ideal companion for their screen-printing lines that allows them to profit from shorter run lengths and continue to enjoy the versatility and deliver the performance that only UV inks can provide. Today the collection of UV inkjets includes models for printing on thick and rigid materials, combination systems for both flatbed and roll-to-roll printing, and a new class of printers that is dedicated solely to flexible, roll-fed media. Regardless of the configuration of these devices, all of them share the distinguishing feature of printing with UV inks, which are cured with specially designed lamp assemblies housed in the machines’ printhead carriages.
Most graphics printers are familiar with the nuances of UV-curing equipment for the screen-printing side of their businesses. The number of articles that have appeared over the years in this and other industry publications concerning the monitoring and maintenance of UV-curing systems reflects the importance of this processing step and the challenges users can face in ensuring their curing units perform correctly.
To this point, however, the topic of curing-system upkeep has not been addressed for the inkjet market. With UV-curing systems now playing such an integral role in the printing workflow and graphic quality of inkjet graphics, it’s appropriate that they receive the same attention as their screen-printing counterparts.
A brief overview of inkjet UV-curing technology
UV-curing assemblies are mounted to the inkjet’s printhead carriage. Some inkjets have one curing assembly, while others have two. Inkjets with one curing assembly (a typical assembly consists of a single lamp and reflector) print in a unidirectional fashion, and the assembly is mounted on the trailing edge of the printhead to cure inks immediately after they’re jetted onto the substrate. Systems that have two sets of curing lamps position them on both sides of the printhead carriage. Such systems can run in bi-directional mode, with each lamp activated only when it’s on the trailing edge of the printhead.
On some dual-lamp inkjets, however, lamps also can be activated to cure on the leading edge so that ink that is laid down is cured only after the carriage returns, not immediately upon deposition. The time between ink deposition and curing can affect the visual characteristics of the final print, which is why curing on the leading edge is referred to as “glossy” mode on some printer models, and curing on the trailing edge is termed “matte” mode. According to Mike Wozny, product manager for Meredith, NH-based VUTEk, the change in surface appearance results because there’s a little more ink spread when curing on the leading edge.
The function of the UV lamp is the same regardless of whether a machine cures on the leading or trailing edge of the printhead. Its job, as Wozny puts it, is to enable the curing process to begin. “Generally speaking, it can take up to 72 hours for the entire curing process,” he says, referring to the continued crosslinking that occurs in UV inks after initial exposure to UV light. “But prints that come off the machine can be touched—they’re cured to the point where they can be handled.”
Maintenance and troubleshooting
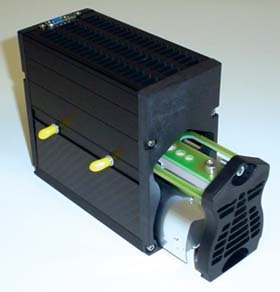
Inks and media aren’t the only consumables associated with UV inkjet printers. Parts of the UV-curing assemblies—UV lamps, reflectors, and air filters—require periodic cleaning and replacement. Each manufacturer has a schedule for you to follow. Some may specify a reflector change at each lamp change; others may tell you to change the reflector every other time you change the lamp. Some printers use an all-in-one cartridge system that contains both the lamp and reflector (Figure 1). With such systems, users can remove the cartridge and insert a new one into the assembly housing when the lamp is no longer suitable for curing.
Most manufacturers say that a lamp’s average life span is 1000 hours, plus or minus 200 hours. Some substrates require 100% output from the lamps for printed images to cure properly, and frequent job runs on such materials may reduce the effective life of the UV lamps. Conversely, high-volume work with less demanding substrates, such as fabrics and papers, can prolong the usefulness of the curing lamps because they may not require that the lamps be operated at full power.
“Lamps have a certain life to give the required dose levels,” says Heather Kendle, director of marketing for Inca Digital Printers, Cambridge, UK. “Lamps beyond this life will deliver a reduced dose, as will those with a dirty lens.”
Wozny explains that lamps may seem to be functioning correctly after 1000 hours because deterioration occurs gradually. “Getting people to change them after 1000 hours is a big challenge,” he says.
Lamps will ultimately fail if they’re not replaced. A hazy or cloudy area in the center of the lamp is sure sign of complete failure (Figure 2). So how can you detect a decline in curing-system performance before total lamp failure? According to John Gambon, Rho product manager for Rochester, NY-based Durst U.S., the most basic route many users take is to handle the prints.
“If a print comes out properly cured, it has a nice, hard, plastic-like surface,” he says. “When lamps start to reach the end of their life, you tend to feel a little difference. Since the print is UV-cured, usually those prints will just come out and be exposed to ambient UV light, continue to cure, and be okay.”
Unlike screen-printing UV-curing systems, on which lamp output can be easily measured with a radiometer, inkjet curing systems don’t lend themselves to radiometry. In many cases, there simply isn’t room for a measurement probe to be inserted between the printhead assembly and substrate path. Additionally, most UV inkjets are designed so that the curing lamps only achieve full operating power when the printheads are activated.
If you want a more objective method of measuring your inkjet’s curing-system performance, one option is to use adhesive-backed labels that react to UV exposure by changing color (Figure 3). Available from UV Process Supply, Chicago, IL, such labels can be affixed to substrates and run through the printer at various stages of lamp life, beginning when lamps are new and repeated periodically thereafter until lamp output becomes unsuitable. Note the hours of lamp use that have passed with each test patch and save them for reference. Later, when you want to test another lamp’s output, you simply run a new patch through the system and compare its color with those of your original samples to determine approximately how many hours of lamp life have expired.
Quantifying lamp output may be unnecessary if you simply monitor hours of lamp operation and stick to the manufacturer’s lamp-replacement guidelines. But you still need to take steps to optimize lamp life. One way is to make sure the lamps are idle when the printer is not in use. The printer’s operating software, which allows you to vary curing-lamp intensity to best match the substrate with which you’re working, may enable you to select the time of inactivity that must elapse before the printer automatically powers down its curing system (also known as sleep mode).
Precise workflow management is another way to make lamps last longer. Tony Veatch, product manager for South Windsor, CT-based Gerber Scientific Products, explains that keeping the lamps powered up and in use once they’re activated is more effective in terms of longevity than switching them on and off throughout the day.
“Every strike of the lamp degrades it faster than just pure runtime,” he says. “If you want to get the longest lamp life, you need to queue your jobs in your RIP to make sure the printer is constantly fed.”
Heat generated in the UV-curing assembly is managed by air flow generated by fans or blowers. Keeping the lamps cool helps to prolong their life. In some cases, filters are included to prevent airborne contaminants from entering the curing assembly as it’s cooled. These filters must be cleaned regularly and replaced periodically, because dust buildup will reduce the system’s ability to keep the assembly cool. Finally, the quartz plate that protects the curing assembly must be tended to routinely (Figure 4). Ink overspray, dust, and other substances will otherwise accumulate on the plate and cause UV light to actually reflect back into the assembly, creating excessive amounts of heat. The curing units in every model of inkjet printer have their own proprietary designs, so users must buy replacement lamps, reflectors, and filters from the original equipment manufacturers.
Worker protection
Containing the UV light produced by the curing assemblies also is a consideration. Exposure to UV light can be hazardous to the press operators, which is why UV inkjet printers contain various shielding systems and other safety measures. One such device is a normally closed shutter mechanism that is activated by the printing process. “Whenever the ink is being jetted through the nozzles over the print area, the shutter opens and the lamp goes to the required curing level,” says Toba Garten, product manager in marketing for printer manufacturer Scitex Vision, Netanya, Israel.
Flatbed UV inkjets are known for their flexibility in accommodating thick substrates. Garten explains that there is a necessary gap between the print bridge and the vacuum table to accept such materials. However, the printers generally are equipped with brush curtains or similar contraptions on either side of the print engine to contain the UV light.
Other types of safety considerations include shutoffs on a printer’s access points. Such shutoff switches only allow activation of the UV lamps when certain parts of the printer, such as sliding doors and front covers, are tightly closed. This makes the curing assembly inaccessible while the machine is in use.
One of the major benefits of using UV inkjets is that their ink systems are free of solvents. However, some users may be sensitive to monomers and other chemical compounds in the inks that can undergo polymerization, as well as to ozone, which is a byproduct of the use of UV lamps. Installing an air-filtration system nearby or a localized exhaust that vents to the outside can help reduce exposure to these chemicals. Some manufacturers call for the installation of a dedicated exhaust system to support high-speed printing by extracting air that has passed through the printer to cool its curing components. Depending on the printer, you might be able to either connect ducts to the exhaust system or install a ventilation hood directly above the printer.
The easy cure
UV inkjet printers can enable you to produce prototypes for longer runs on your screen presses and bolster your bottom line by handling your shop’s low-volume work. Taking care of your printer’s curing system is neither difficult nor time consuming, but proper monitoring and maintenance must be priorities if you want to realize the full benefits of this technology.


Subscribe

Magazine
Get the most important news
and business ideas from Screenprinting Magazine.
Most Popular
-

 Case Studies2 months ago
High-Density Inks Help Specialty Printing Take Center Stage
-

 Art, Ad, or Alchemy2 months ago
F&I Printing Is Everywhere!
-

 Andy MacDougall2 months ago
Functional and Industrial Printing is EVERYWHERE!
-

 Columns3 weeks ago
8 Marketing Mistakes Not to Make When Promoting Your Screen Printing Services Online
-

 Editor's Note3 weeks ago
Livin’ the High Life
-

 Marshall Atkinson3 weeks ago
How to Create a Winning Culture in Your Screen-Printing Business
-

 Thomas Trimingham2 months ago
“Magic” Marketing for Screen Printing Shops
-

 News & Trends2 months ago
What Are ZALPHAS and How Can You Serve Them in Your Print Business?