Graphics Printing
Published
12 years agoon
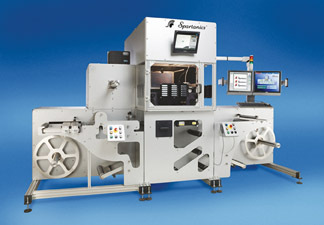
Finishing tables are capable of feeding printed sheets and picking up and stacking the finished pieces.
Finishing tables are capable of feeding printed sheets and picking up and stacking the finished pieces.
As screen-printing companies explore and purchase digital roll-to-roll and flatbed inkjet printers, they are discovering that one other piece of hardware is needed to make their production operations truly efficient: a digital finishing table. Of course, by installing a flatbed printer, the chore of manually mounting artwork onto a substrate is avoided. Printing directly on foam boards, plastics, wood, and other materials has been made easy with digital printers. But, why rely on outsourcing or manually cutting materials by hand? If any graphics need to be cut in anything but a straight line, things get difficult very quickly.
At the most basic level of course, digital finishing systems are used for any printed graphics that are not complete at the final stage until they are cut, one way or another. P-O-P displays, decals, car wraps, and cling materials are just a few that are created from screen printing. Digital presses are tied to finishing systems for P-O-P, signs and displays, among others.
Even industrial or functional printed graphics can benefit from the use of a finishing system. A good example is overlays—control panels that require holes cut through them for switches and other devices.
Finishing tables are used on a wide range of materials, such as vinyl, paper, and cling material. Tables also cut rigid materials like PVC board or polystyrene, plexi, and wood. Most companies look for a cost-effective multipurpose cutting and routing machine—one that can route, cut, crease and score on one machine. Through cuts, kiss cuts, and oscillating cuts are the most widespread.
You can’t do that
While extremely versatile, finishing tables are not a be-all end-all. There is a limit to the materials than can be used on them. Working with ceramics or glass can cause chipping, which is not surprising with a true knife and drilling technology. Lasers are a better choice for these substrates. It’s also difficult to mold metals into a shape. For example, thicker, heavier aluminum sheets cannot be creased to make it easier to fold them. These are materials that are better left to specialists. More unusual work needs the help of others.
Cutting tables are also not helpful for large volumes of work. While they are fine for a few thousand pieces, they are not going to cut 50,000 adhesive-backed vinyl decals. Keep that for diecutting. And, 3- to 5-m grand-format printed graphics for billboards and building wraps can be cut by inexpensive, XY-cut devices. However, if the artwork has any contours, there are some bigger challenges.
There are some industrial projects that may not lend themselves to work on digital finishing tables. While tables are very accurate, there are no tolerances to cut holes into circuit boards with small holes for components. Here, a laser would be more helpful. As mentioned earlier, finishing tables are certainly appropriate for industrial projects such as control panels.
What’s new with tables?
Basic table technology is pretty mature for most applications. Speed is always being improved, in small increments, to try to keep up with the increased productivity of printers.
This leaves the challenge to finishing table vendors to think hard and introduce new and different tools. It’s not easy. Table manufacturers have implemented most of the finishing operations needed. There is a tool for just about anything, from cutting to routing. One of the more interesting new tools is a v-notch cutting tool, for miter cuts in thick materials such as triple wall corrugated and papercore boards.
Tables are also getting proficient at allowing the user to change tools. Changing a milling bit, for instance, can be done in seconds (including bit calibration). Many systems recognize the tool units automatically, through electronic identifiers.
No need to place and pick up
With the introduction of faster large-format digital printers, there is a strong demand for a higher capacity automatic finishing solution for printed packaging and display materials. If table speeds are increasing in smaller increments, how do you deal with the workload? The real change in speed comes from automation. Higher volume projects benefit from automated material handling.
Some of the more sophisticated machines offer the ability to automatically load, cut, unload, and neatly stack large printed sheets of paperboards, foam board and many other materials. Users can now offer their customers on-demand production with just-in time-delivery. The machines can run without the continuous supervision of an operator, thus saving considerable labor costs.
Getting a better look and
cut at the graphics
So where is the rest of the real improvement in finishing tables? It’s in the supporting software applications and workflow automation.
Finishing mistakes are costly. It means that printed pieces—many times quite expensive—must be tossed away. How many times has a print shop had front to back misregistration? Or, how can it be assured that any misregistration due to print or media registration is compensated for, when it gets to the cutting table? A good workflow will provide coordination between the artwork and the printer and cutting tools. All of this is done with a coordinated communication effort between what the printer prints and what the cutter cuts.
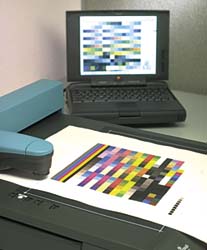
Vision control is necessary for digital finishing systems, because all printed materials contain some size, rotation and scaling distortions that can produce inaccurate digital die cutting, if not corrected—even more crucial with difficult, contour cuts. A good cutting table offers distortion compensation enabling digital cutting systems to produce error free results.
Vision control systems seem to get better every year. A camera reads register marks on each individual image placed on the finishing system, for extremely accurate registration that compensates for local or overall distortion of the material, even handling non-linear distortions. Some systems even have the ability to register sheets with the print side facing down, most useful for processing corrugated board.
Where’s the bottleneck?
While not completely germane to tables, we would be remiss without discussing workflow software. Print providers are seeing more and more files, requesting shorter and shorter runs, yet with quicker response. To stay profitable, you need to ‘feed the beast’ (the press or printer). Digital printers are becoming more productive. Where cutters used to be the bottleneck, it is often no longer the case. The next step will be prepress. A print provider must look at the big picture if they purchase a cutter solely for productivity. Often, after the installation, they find that the prepress software is now the bottleneck. Many shops are not always aware of dedicated workflow tools from design to print to cut, to reduce file preparation and operator time and eliminate waste.
Preflighting is the logical starting point for a true workflow. A good preflighting system will detect errors, generate a professional report, and enable error fixing right within the PDF file.
Of course, if you are going to make cuts, you need to give instructions to the cutting table. Coordination of the cutting and graphics workflow is vital. If you don’t print a job right, you can’t cut it correctly. Making sure cutting instructions and registration marks are coordinated between the graphics and cutting instructions is paramount to producing jobs well. A print provider who can design to print to cut most effectively can complete jobs—sometimes two to four times as many.
In the simplest form, a cutting path is generated in Adobe Illustrator. However, if the cutting system is more complex, you can do a lot more in the workflow. The biggest challenge is adding a cutting path if none is present or of poor quality. One thing that many people don’t think about is adding bleeds to the edges of the artwork. You don’t want the color of the substrate to show if there is any distortion in the print. And, you cannot expect your client to tile a job or prepare irregular shapes properly.
A good layout program will help save expensive substrate material costs, because it efficiently gangs artwork together to get the most use of each sheet and reduce waste. A good system can take rectangular shapes, irregular shapes, double sided jobs, and oversized jobs, and come up with the most cost efficient layout. In fact, nesting is often done in such a way that good-sized pieces of boards are saved to be used for future jobs. Fewer boards are printed if artwork is placed on them efficiently.
Second, the software will work seamlessly with the vision control system on the finishing table, ensuring that even contour pieces placed off-kilter on a table are cut cleanly.
Add another dimension
The real challenge is what is your business model? How do you make money? Are you involved in projects that encompass everything, from design to print to cut? Where do you meet your customer and offer value?
Much of the P-O-P/display industry sells its projects by the square foot. You print a job, perhaps make a square or rectangular cut, and sell it as a commodity. However, the more complex a project becomes—the more a print provider meets the customer higher up in the value chain—the more value that can be added to the cost of a project. No longer are you selling by the square foot, but by the unit piece.
The challenge for a printer is not necessarily to broaden the range of substrates, but adding a dimension—the third dimension. Using a finishing table and the right software allows a screen or digital print provider the opportunity to receive higher margins for project work.
A 3D display isn’t a few dollars a square foot, but perhaps $50 each. It’s the perfect opportunity to escape the cost per square foot pricing model.
The finishing table facilitates the transition but the owner’s creativity can bring higher margins. Installing a cutting device should just be a start. There is no talent required to cut straight lines, nor is that much talent needed to program contour cuts. The real challenge is to be creative with the design of 3D projects.
What are some of the things you could produce? Just a few ideas are boxes, podiums, stands, chairs and tables. Start thinking about marketing communications and events and the materials that could be produced to support them. With a digital service, you can produce materials very quickly. Imagine an open house, kickoff meeting, or trade show. Instead of a flat wall sign, create something that stands with feet. How about boxes that contain hand-out materials from the event? You can build a podium from a paper core board product and add your logo. All you need is a start with structural templates, and then get into the design work.
Designing structure
into 3D projects
For 3D projects, there are typically two types of design software: one for graphics (typically Adobe Illustrator), and one for structure. These design software solutions can significantly help sign and display shops do an exceptional job creating structures for 3D displays. For starters, some solutions have created P-O-P display standards to their style catalogs. Users browsing a P-O-P library can find parametric design templates from which to either design P-O-P displays in minutes—with the freedom to resize or redesign components or stimulate the creative design process.
Structural software also offers tools to ensure designs do, indeed, work. Some tools allow for the simple assembly and (3D virtual) visualization of connected folds and parts. V-notches can be easily visualized as angle cuts. Designers can work with curved folds and cuts by allowing them to visualize designs with curved creases as part of its 3D module. Using 3D visuals, tab and slot assembly tools can help to assemble components of a display with just a few clicks. Some design solutions will even create automated bill of material reports for the accounting department.
Get it finished right
So, without a finishing table, your work is limited in range, shape and substrates. They are just tougher to work with. And, it is harder to consider working with three-dimensional P-O-P or displays. You are limited to flat, two-dimensional work.
With a finishing table, your range of projects expands. You can continue to work with 2D graphics. You are able to design and create 3D structural graphics, P-O-P, and displays. And, you can also help with packaging and boxes.
All print providers print. And, one way or another, they cut. Thus, the challenge is to evolve your business model to make money rather than to squeeze away by very tight, competitive pricing—and risk tougher times.
Bill Hartman, VP Business Development, Esko digital finishing, has more than 40 years of experience in sales, marketing, and business development. He is currently responsible for North American sign and display channel partner relationships and marketing programs. In 2006, he started as a consultant for MGE, acquired by Esko in 2008. Previously, Bill was a co-founder and VP of sales and marketing of Reed Business Systems Consulting (RBSC), an SAP Enterprise Software Solution National Implementation Partner.


Subscribe

Magazine
Get the most important news
and business ideas from Screenprinting Magazine.
Most Popular
-

 Case Studies2 months ago
High-Density Inks Help Specialty Printing Take Center Stage
-

 Art, Ad, or Alchemy2 months ago
F&I Printing Is Everywhere!
-

 Andy MacDougall2 months ago
Functional and Industrial Printing is EVERYWHERE!
-

 Columns4 weeks ago
8 Marketing Mistakes Not to Make When Promoting Your Screen Printing Services Online
-

 Editor's Note3 weeks ago
Livin’ the High Life
-

 Marshall Atkinson3 weeks ago
How to Create a Winning Culture in Your Screen-Printing Business
-

 Case Studies4 weeks ago
Screen Printing for Texture and Depth
-

 News & Trends2 months ago
What Are ZALPHAS and How Can You Serve Them in Your Print Business?