Australian Shop Creates the Ultimate Screen Making Department
PSI Screenprinting shares its seven-step journey to realizing a dream.
“We need more space!”
AS A SHOP OWNER, I’m sure you and your team have felt this frustration at some point.
Sometimes there’s only so much you can do with the space you have. Decisions you made when you were just starting out may have worked then, but now they’re hampering your ability to grow and expand.
Last year we were finally able to take on the lease to the factory beside us. After more than 10 years of working out of a screen room barely larger than a cupboard, we had the opportunity to design our dream screen making department optimized for quality and efficiency.
The existing space (or lack thereof) didn’t inspire or facilitate the level of professionalism and efficiency we knew we were capable of. So, we set about designing and fitting out what we internally dubbed our #UltimateScreenRoom.
I thought I’d detail our process so you can get a head start on yours! These tips are specific to our screen department design and layout, but are applicable to any space when adding new equipment or re-designing a layout.
STEP 1
THE “HAVES”
Detail what you’ve got
Our first step was to create a scale drawing of our entire shop layout as it was. Luckily for us, this was largely done already from our ROQ.US install a few years before.
We used Adobe Illustrator to create the layout. I created an artboard to represent the outer walls of our building where 1 meter of the building equaled 1 centimeter on the artboard. Metric, right??? It just makes sense.
We then started measuring everything in sight to create the internal layout of walls, rooms, and equipment. A laser measurement tool from your local hardware store really helps with this process. It doesn’t have to be millimeter perfect, but it does have to be pretty close. The last thing you want is something not fitting where you placed it in your layout because the measurements were off.
STEP 2
THE “HAVE NOTS”
Where will you be in one year? Three years?
I’ll be the first to admit this bit is a little tricky. It’s easy to wish you allowed space for that CTS or leased the building beside you in hindsight. But if you have a limited budget and space constraints, sometimes it’s hard to include the extra space for that bit of gear you might need in two years.
Go to a tradeshow and talk with your current vendors to find out what’s new and what will increase your efficiency when you hit a certain number of screens per day.
Once you have an idea of the equipment you might want in that timeframe, add them to your digital layout above, just off to the side and perhaps in a bright color so you can easily distinguish them from your existing equipment.
Now, when the time comes to design your new layout, you can throw those future purchases in the mix so you can future proof to a certain extent.
We failed a little on this point. The layout we created is awesome now, but if/when we need to upgrade to an automated reclaim line, we don’t have an ideal space for that six- meter-long footprint.
So, by not future planning, we may have to sacrifice some of the potential efficiency gains of automating because we must compromise on the positioning of the unit to make it fit in our space.
Watch the 7 steps toward PSI Screenprinting’s
#ULTIMATESCREENROOM
STEP 3
IT’S YOUR MOVE
Now it’s the fun bit. It’s time to start shuffling everything around.
I did this on the computer, but if you’re the type of person who likes physical objects, then print everything out and move them around in your space until you find the ideal positioning.
I already had an idea in my head of how I thought the layout would be; you probably do, too. This can be a hinderance though. Try plenty of different combinations of layouts. Get some feedback from other leaders in your business and in the industry.
Just when I think I have it nailed, my wife and business partner Jodi wants to have a look. She tells me to try it this way. I tell her “Look I got this!” Then, I try her suggestion and she says ”I told you so!”
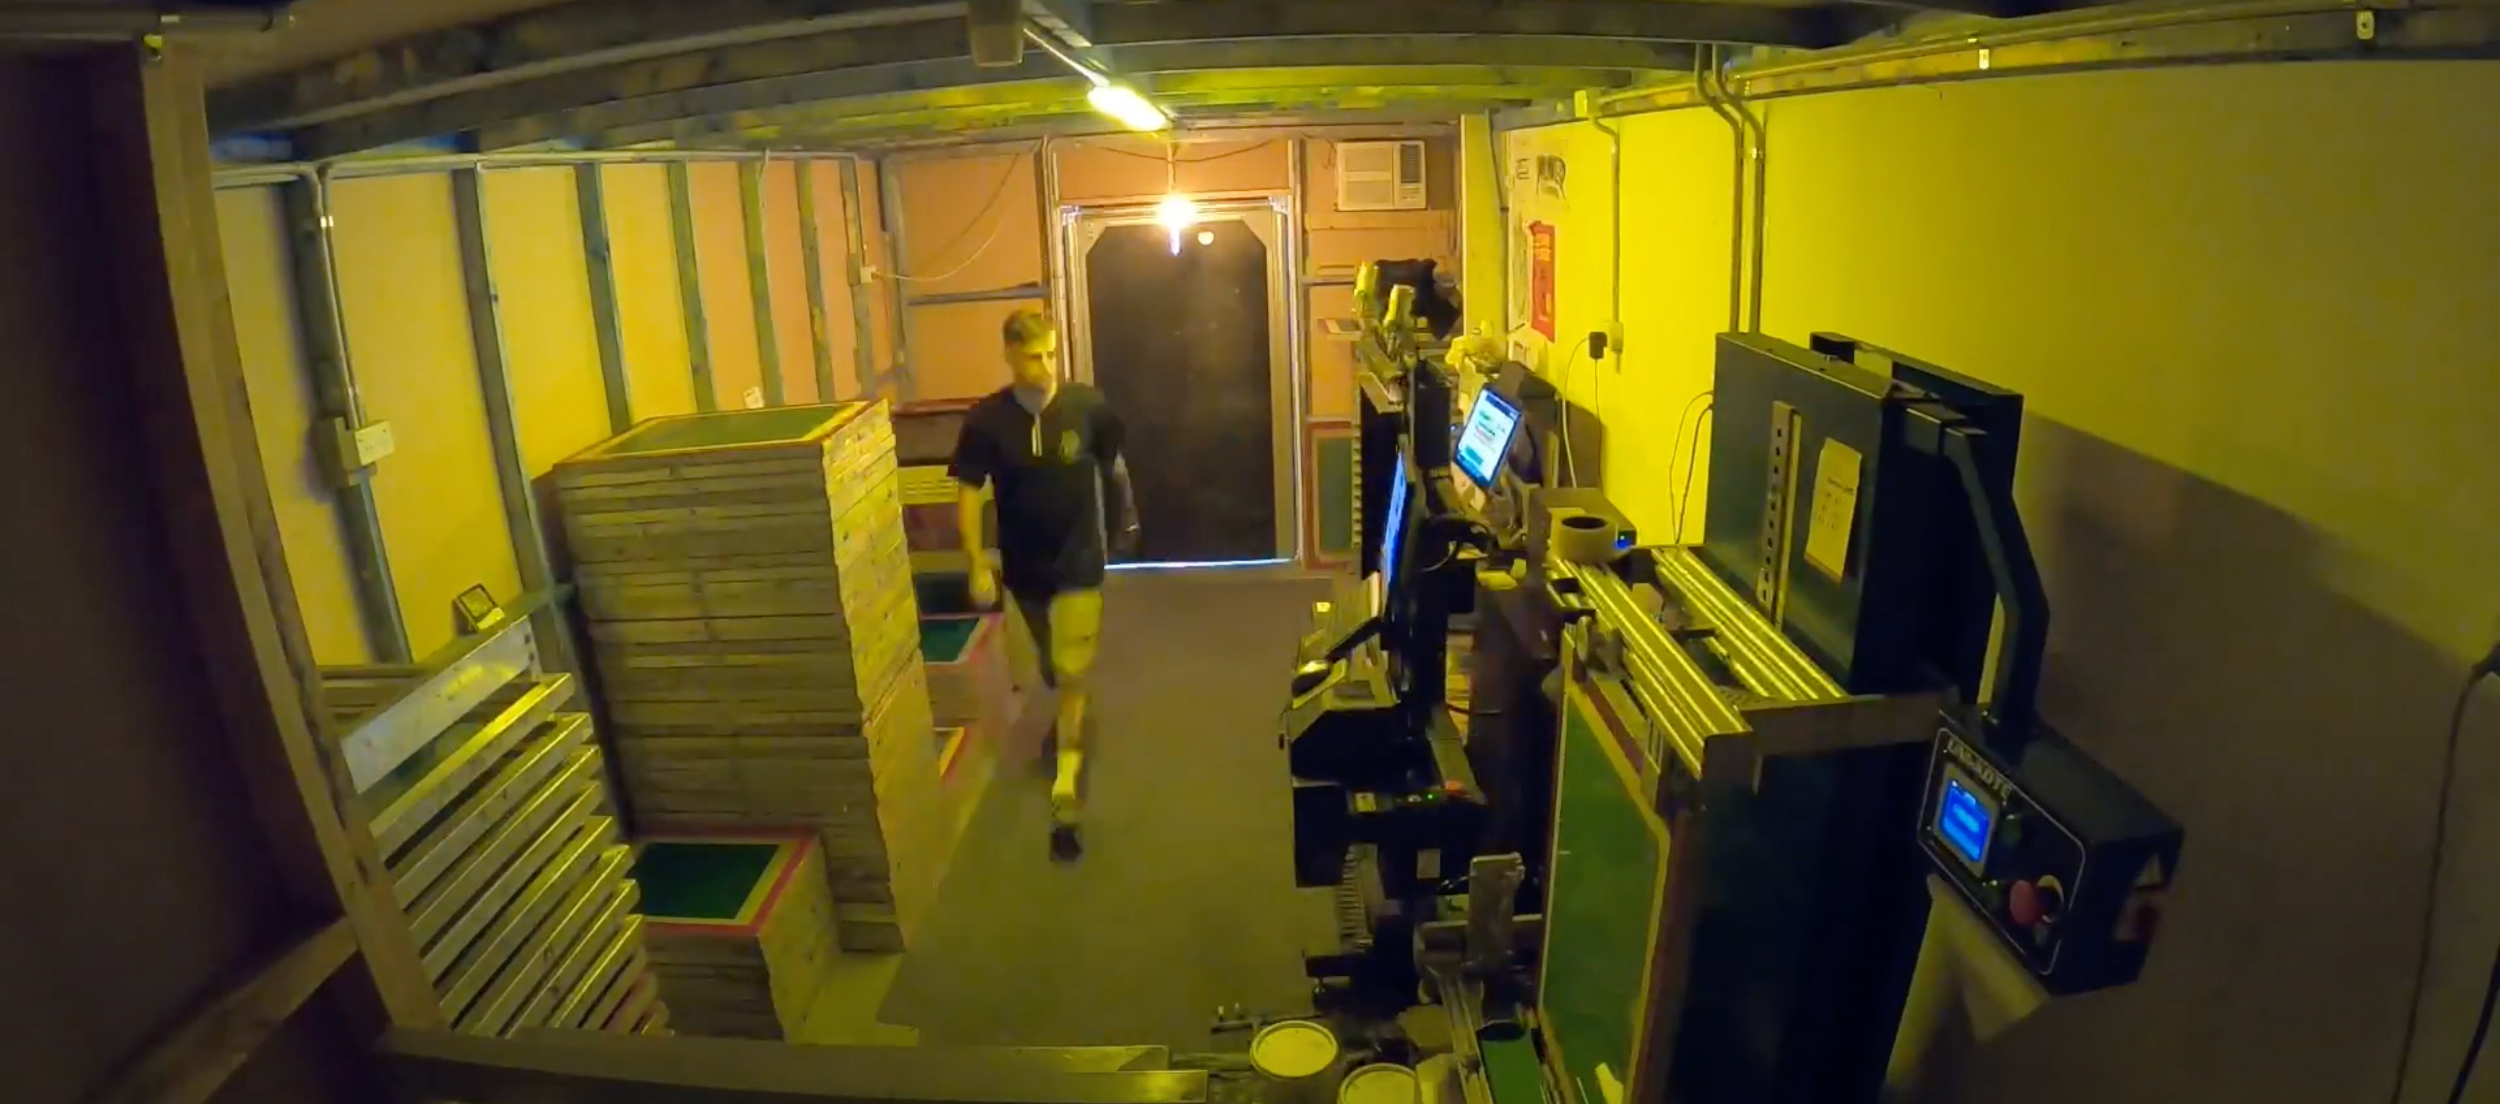
The washout booths are separated by a wall to distinguish the dirty side and the clean side.
STEP 4
LINE DANCING
Look, I don’t know anything about country music and this has nothing to do with it so, let’s move on.
It’s now time to test your layout. This is a basic method we learned from taking one of Greg Kitsons’ seminars at a tradeshow.
We took a colored marker and we drew a constant line that represented the journey of a screen in the screen making process on the layout.
An efficient layout for the screen department would result in a relatively short, smooth, circular journey.
Crossing of lines, excessive length, and doubling back all represent efficiency losses in the workflow.
If you think your line can be smoothed out or shortened a little, go back to step three and re-shuffle some pieces and test it again.
Sometimes there’s only so much you can do in the space you have, but little tweaks create little efficiency gains that add up over time.
Tip: Remember footsteps cost you far more than inks or emulsion. Minimize your steps and you’ll create efficiency gains that result in much greater savings than skimping on supplies.
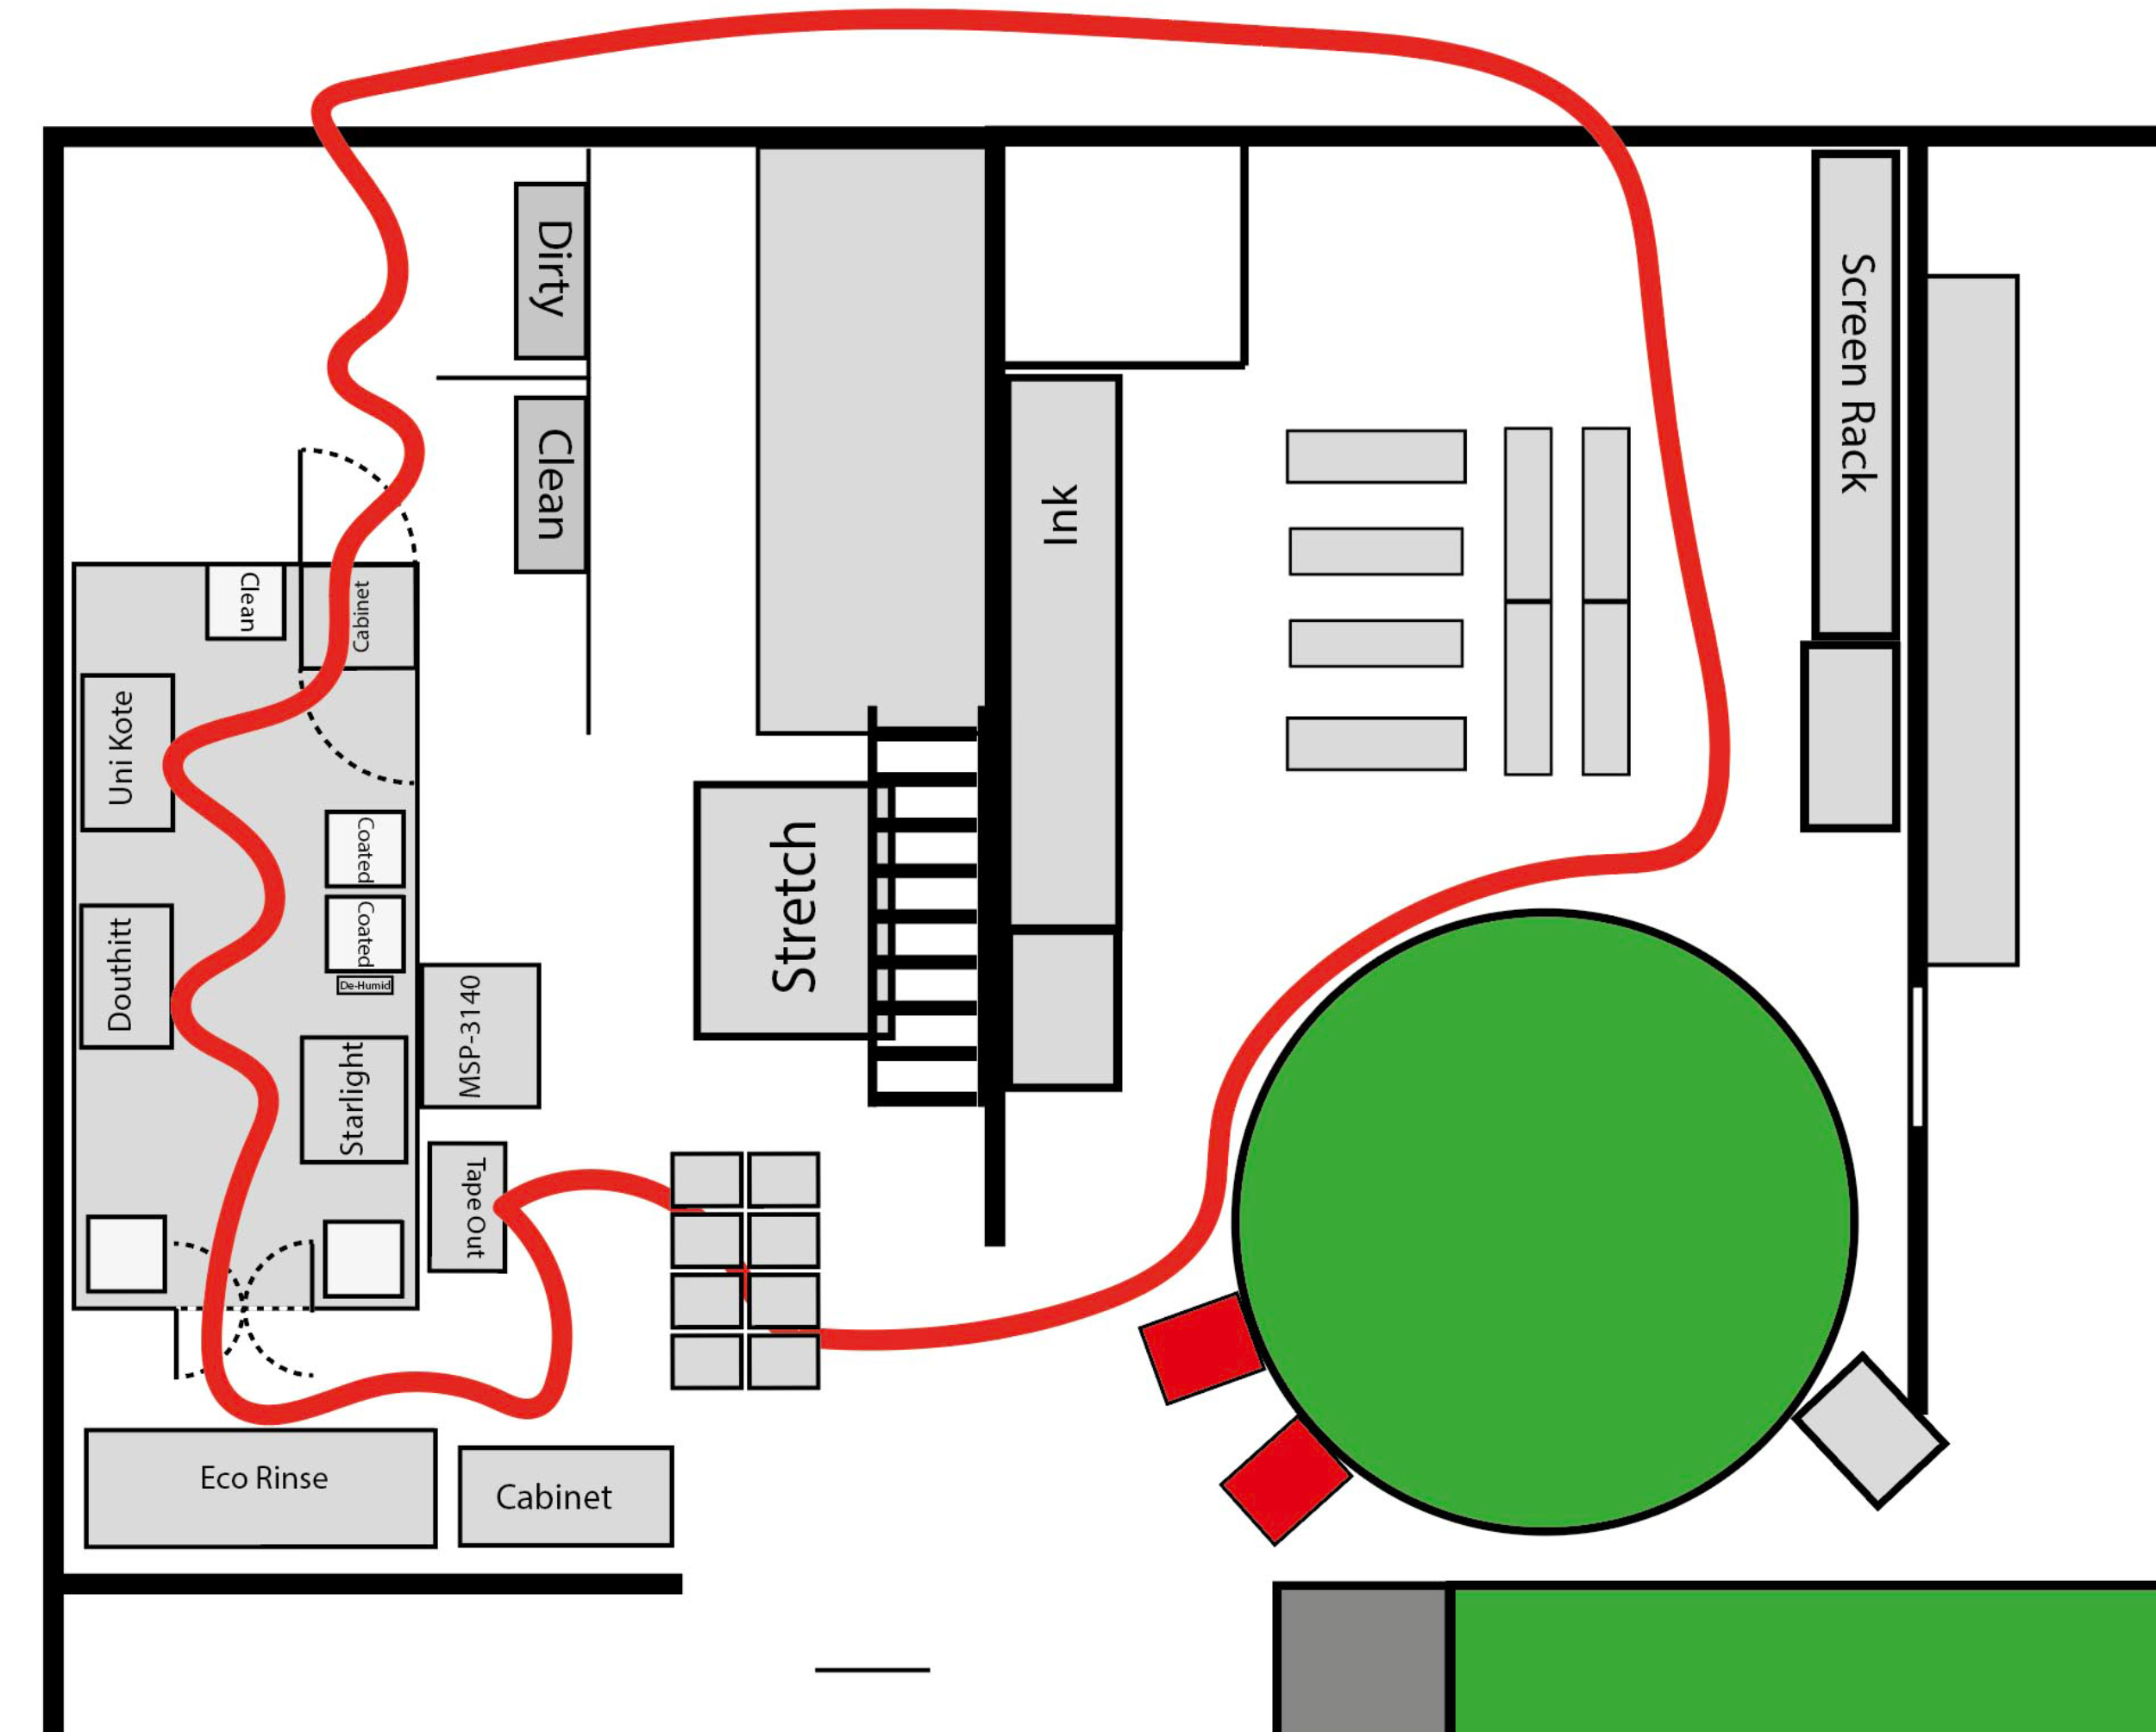
Once your layout is illustrated, draw a red line from the beginning to the end of your screen making process.
STEP 5
LAYING IT ALL
OUT THERE
Once we decided on our optimal layout digitally, it was time to transfer it to the physical space.
We cleared it all out and gave it a cleanup starting with the most immovable fixtures – the walls. Then, we used the locations and measurements from our scale drawing to mark out the corners of the walls. If you already have a suitable room, you obviously can skip this part.
Using these points, we just eyeballed the planned space before marking out walls. How does it feel in the actual space? Sometimes it can work on a 2D drawing top view, but then once you get in a 3D space you might want to tweak its position a little.
If you feel you need to tweak it a lot, then it’s probably best to go back to step 3 and reassess.
If you feel you’re on the right track, mark out the walls. We used tape, but line paint would be ok, too. Leave spaces for the doors so you can get an idea if they’re in the right positions and if they’re large enough to get your equipment through.
Next, we created scale footprint cutouts of our equipment using cardboard boxes and placed them according to our layout drawing. Anything mobile, like carts, can work, too.
This step gave us the ability to fine-tune our positioning to make our workflow as efficient as possible and confirm our spaces for storage of supplies, etc.
STEP 6
BUILD IT…
AND THEY WILL COME
We needed to construct a room, so we got a contractor in to do the basic fit out.
For the darkroom we used timber framing, lined with pre-painted, six millimeter MDF on the outside, which cost a lot less than using the cardboard equipment footprints we created earlier. We placed them in their position and wrote what services we needed on them. This made it simple for the contractors to put electric and air in the correct locations.
Outside the room, in the wet area, we created a dirty side and a clean side by using a separating wall between the two washout booths.
The clean side, for degreasing after reclaiming, feeds clean screens into the darkroom through a two-way drying cabinet. The person degreasing loads the clean screen into the rack in the cabinet from the outside and then it can be accessed through a second door on the inside of the darkroom.
The outgoing doorway is 1.2 meters (4 feet) with a split self-closing swing door. We felt this option was better than plastic strips.
STEP 7
FILL ER’ UP BABY!
The real fun part begins!
Now, we get to put all our new toys in place and watch this screen department come to life.
Our auto coater, wax CTS, LED exposure, and automatic developer all doing the hard work for us!
We added air conditioning and a big de-humidifier that we run 24/7 to keep that humidity low, which is a challenge here in the sub-tropics.
We’ve more than doubled our output with less labor.
Even if you’re not at the point of adding all of this automation to improve, your efficiency, time taken in careful planning and layout design can have huge efficiency pay offs in the long run. Remember, efficiency gains are worth many times more than savings on expenses and supplies. Time spent in increasing efficiency in your shop will result in far greater results than time spent shopping around for a better deal on your white ink.
Note: I would like to acknowledge the late Alan Buffington from Murakami Screen for inspiring our screen department layout with his sample layouts they offer for free from their website.
Let’s Talk About It
Creating a More Diverse and Inclusive Screen Printing Industry
LET’S TALK About It: Part 3 discusses how four screen printers have employed people with disabilities, why you should consider doing the same, the resources that are available, and more. Watch the live webinar, held August 16, moderated by Adrienne Palmer, editor-in-chief, Screen Printing magazine, with panelists Ali Banholzer, Amber Massey, Ryan Moor, and Jed Seifert. The multi-part series is hosted exclusively by ROQ.US and U.N.I.T.E Together. Let’s Talk About It: Part 1 focused on Black, female screen printers and can be watched here; Part 2 focused on the LGBTQ+ community and can be watched here.


Atlantis Headwear Goes Solar for Sustainable Future

Comfort Colors Announces New Proprietary Dyeing Process Called “Pigment Pure”

10 Production Scheduling Secrets That Will Have Your Team Ready to Rock


Bulletins
Get the most important news and business ideas from Screen Printing magazine's news bulletin.
-

 Case Studies2 months ago
High-Density Inks Help Specialty Printing Take Center Stage
-

 Art, Ad, or Alchemy2 months ago
F&I Printing Is Everywhere!
-

 Andy MacDougall2 months ago
Functional and Industrial Printing is EVERYWHERE!
-

 Columns4 weeks ago
8 Marketing Mistakes Not to Make When Promoting Your Screen Printing Services Online
-

 Editor's Note3 weeks ago
Livin’ the High Life
-

 Marshall Atkinson3 weeks ago
How to Create a Winning Culture in Your Screen-Printing Business
-

 Case Studies4 weeks ago
Screen Printing for Texture and Depth
-

 News & Trends2 months ago
What Are ZALPHAS and How Can You Serve Them in Your Print Business?