WHETHER YOU’RE looking to create a last-minute gift that pulls at your child’s heartstrings, or you want to create an additional revenue stream for your business, customized sneakers just might be your secret sauce. What’s even better news is that more than likely you have all the materials and tools to create your very own pair at home.
My recipe for creating your own pair of personalized shoes is relatively easy as long as you:
1. Assess Your Gots
Simply put, assessing your “gots” means taking an inventory of all the different resources you can tap into and use to make your sneakers pop. What different decoration materials do you have available? Do you have any sublimation transfers, foil, glitter, rhinestones, or screen printed transfers on hand?
Make a list of all your decoration methods and then…
2. Sketch It Out
Drawing how you want your sneaker to look is very helpful in the decoration process. You’ll want to scan the shoe and map out where everything will go. When sketching your vision it’s important that you:
- Do a brain dump. Take a few minutes to sketch the shoe and brainstorm how you will decorate it.
- Get measurements. For best results, you’ll need to get measurements of the Velcro straps, tongues, heels, and any other features on the shoe.
- Know the real estate of your shoe. It’s very important you know the ins and outs of your shoe. Take note of what’s heat resistant and what’s not. Also, note what areas of the shoe are printable and which ones are likely to melt. This will determine how you position your sneaker on the heat press.
Once you’ve assessed your inventory and brainstormed the outcome, next you:
3. Put in Work
Here’s where you’ll design, print, cut, and weed your substrates.
- Design your prints. Use free tools like Pixabay, Canva, and Cartoonize.net to design the sides and tongues of your sneakers.
- Carefully print your shoe. Apply your designs one at a time. You can print your straps first, then the sides, and lastly the tongues.
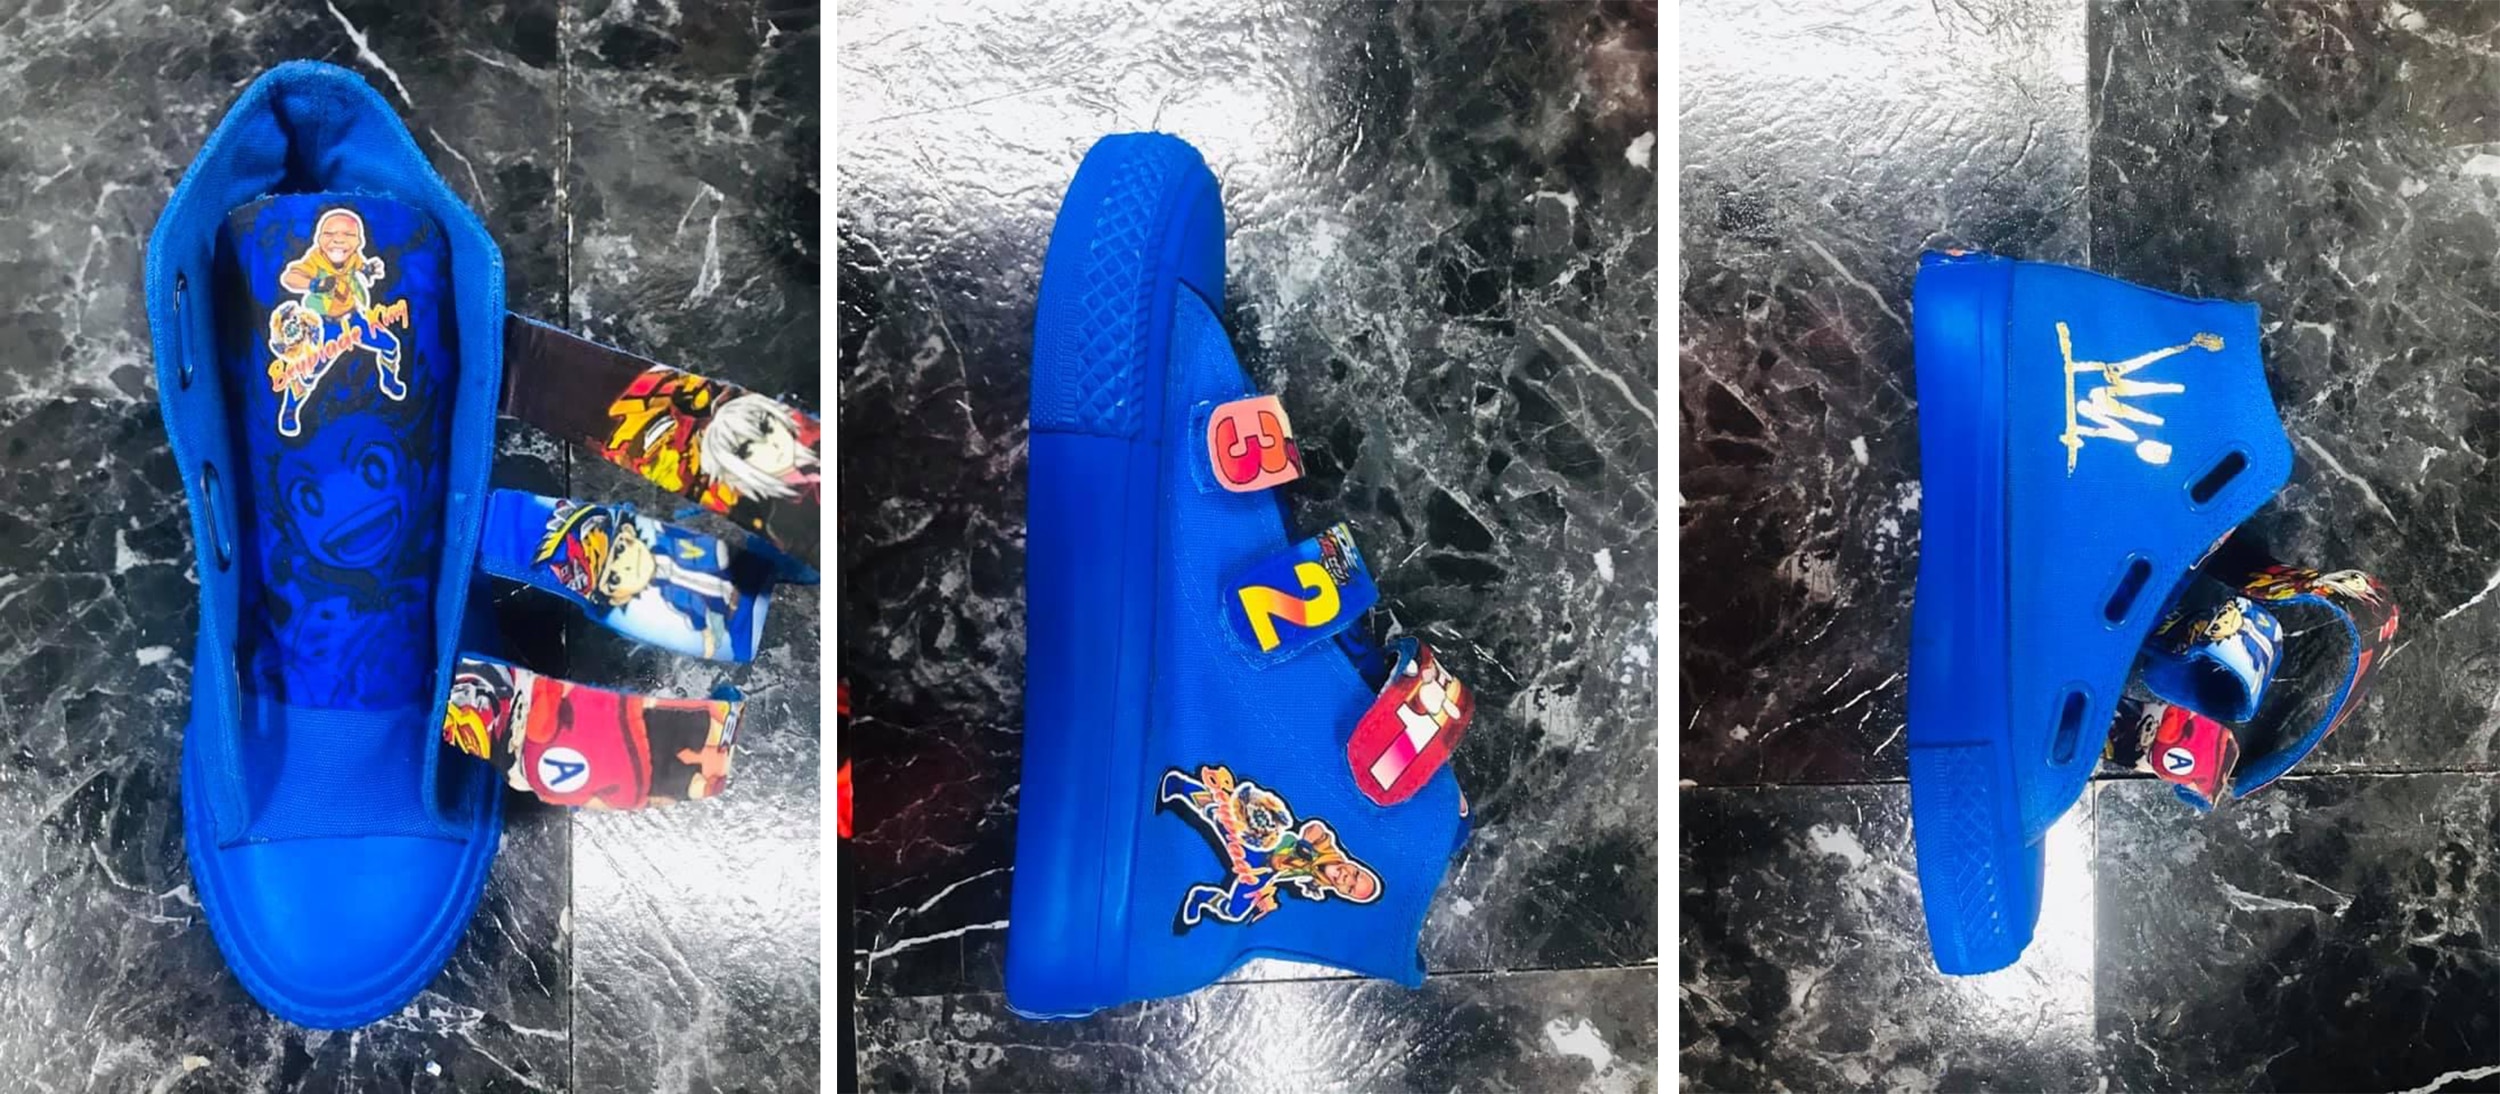
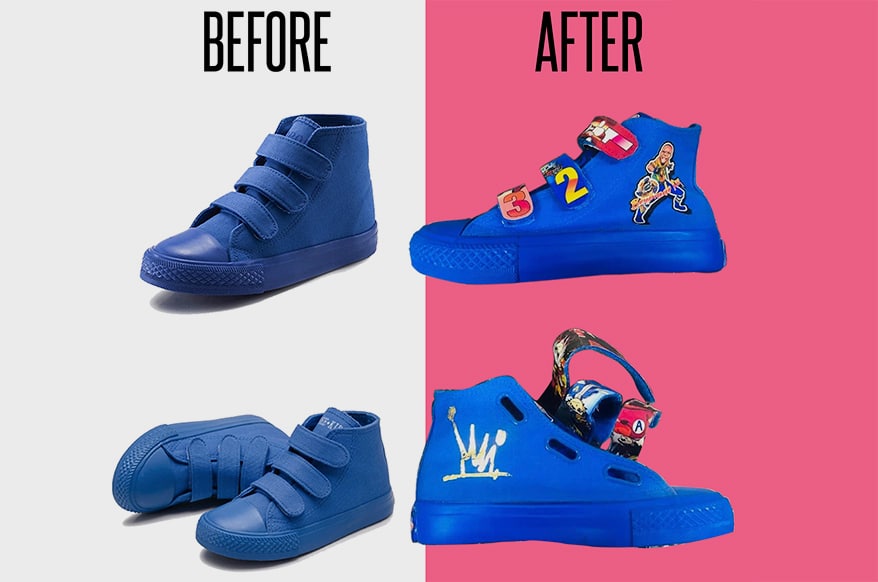
And voila, there you have one cool pair of sneakers. Here’s a quick breakdown of how I created the BB 3000s:
- I ordered the blue high-top sneakers from Amazon.
- I assessed my gots. I chose sublimatable vinyl and gold foil.
- I sketched it out. I drew how I wanted the shoes to look and measured the Velcro straps, sides, and tongues.
- I designed the substrates. Using Cartoonize and some images from Google, I created the graphics for the Velcro straps, the sides, and the tongues.
- Lastly, I printed the shoes piece by piece. I started with the straps and printed them one by one with the sublimatable vinyl. Then, I decorated the sides of the shoes one by one. On the outer side, I put my son’s personalized cartoon character and on the inner sides, I used the gold foil for the crown emblem. For the tongues, I used the sublimatable vinyl, as well. I used my 16 x 20 Digital Knight DK20S by Geo Knights to print the shoes, but you can get creative with whatever heat press you may have, even a hat press!
Now that you have the recipe, go forth and create an awesome pair of sneakers. Don’t be shy: show me what you’re working with. Email me at heartandaheatpress@gmail.com or tag me on social: twitter.com/heartheatpress, instagram.com/heartandaheatpress/, facebook.com/heartandaheatpress, Tiktok.

 Columns1 month ago
 Press Releases1 month ago
 Editor's Note1 month ago
 Marshall Atkinson1 month ago
 Press Releases4 weeks ago
 Case Studies1 month ago
 News & Trends2 months ago
 Headlines1 month ago

