Thomas Trimingham
Screen Printing Troubleshooting
Five tips to combat registration issues, bleeding, ghosting, poor coverage, and more.
WITH SO MANY variables affecting the final results, troubleshooting the screen printing process can be a challenge. The process can be hit or miss, and attempts to fix things often cause more errors. Rather than fixing what goes wrong, take preventive measures to ensure everything goes right the first time. Focus first on lead dominos – issues that can have a cascading effect on the entire process. Here are five key examples:
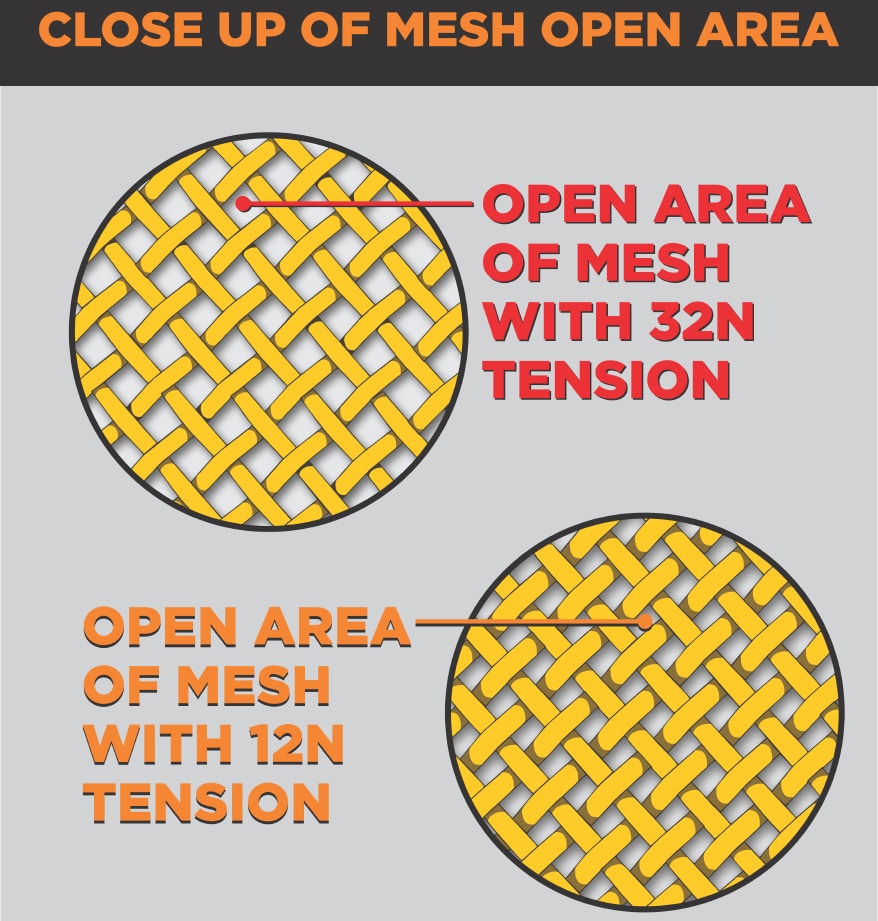
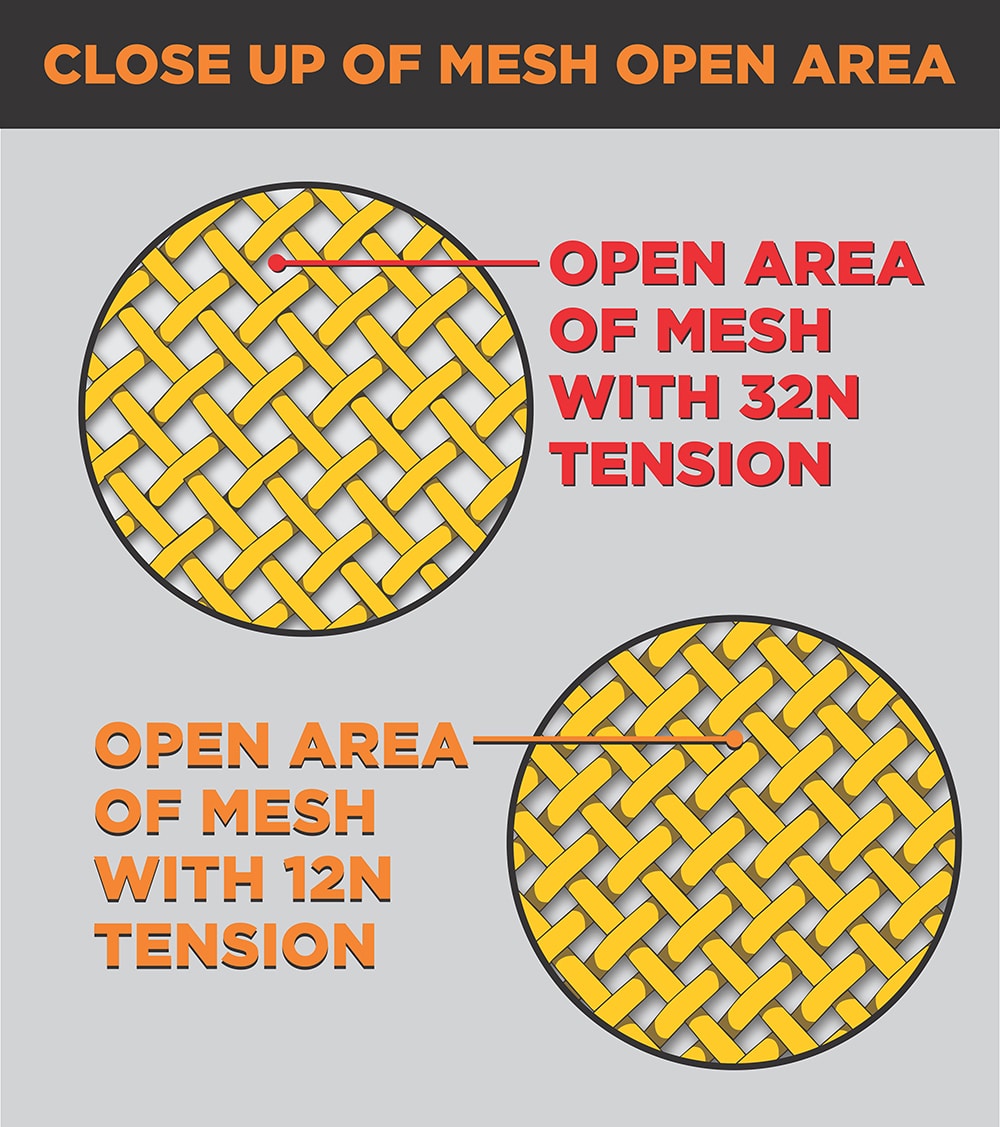
1. Screen tension: Stretching the mesh across the frames at the ideal tension provides a lesser-known benefit: The gaps between the tightened threads will be large enough to ensure ink flows easily onto the media (see Figure 1). Adjust tension before preparing your screens if possible (tension-adjustable frames such as Newman Roller frames are good for this), and test them regularly with a newton meter. Marking each frame with a sticker denoting screen tension and mesh count helps manage work and ensure detailed images can be targeted to higher-tension frames.
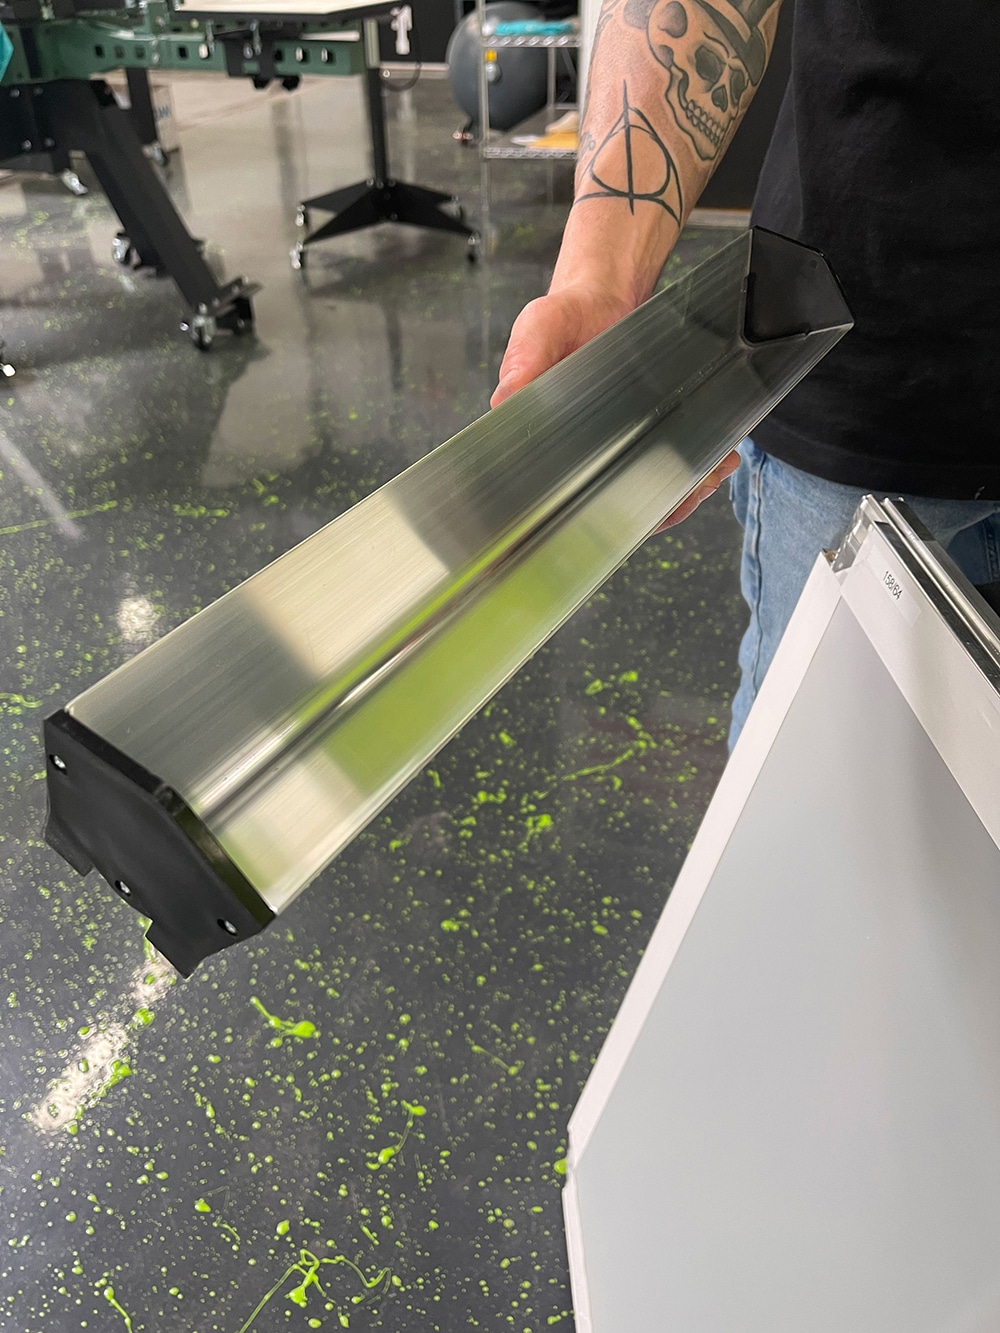
2. Emulsion coating: Managing emulsion coatings on meshes is one of the most overlooked issues in screen printing. Emulsion with the proper thickness, consistency, and smoothness is critical to creating a quality stencil. If you coat screens manually, make sure your scoop coater has a clean, level edge (see Figure 2). Develop your technique by copying the motion of an automatic screen coating machine – or buy one, if you have the means. Try different combinations of coats. Make sure to review the prints and the emulsion over mesh (EOM) recommended for the ink to ensure you have the best coat possible.
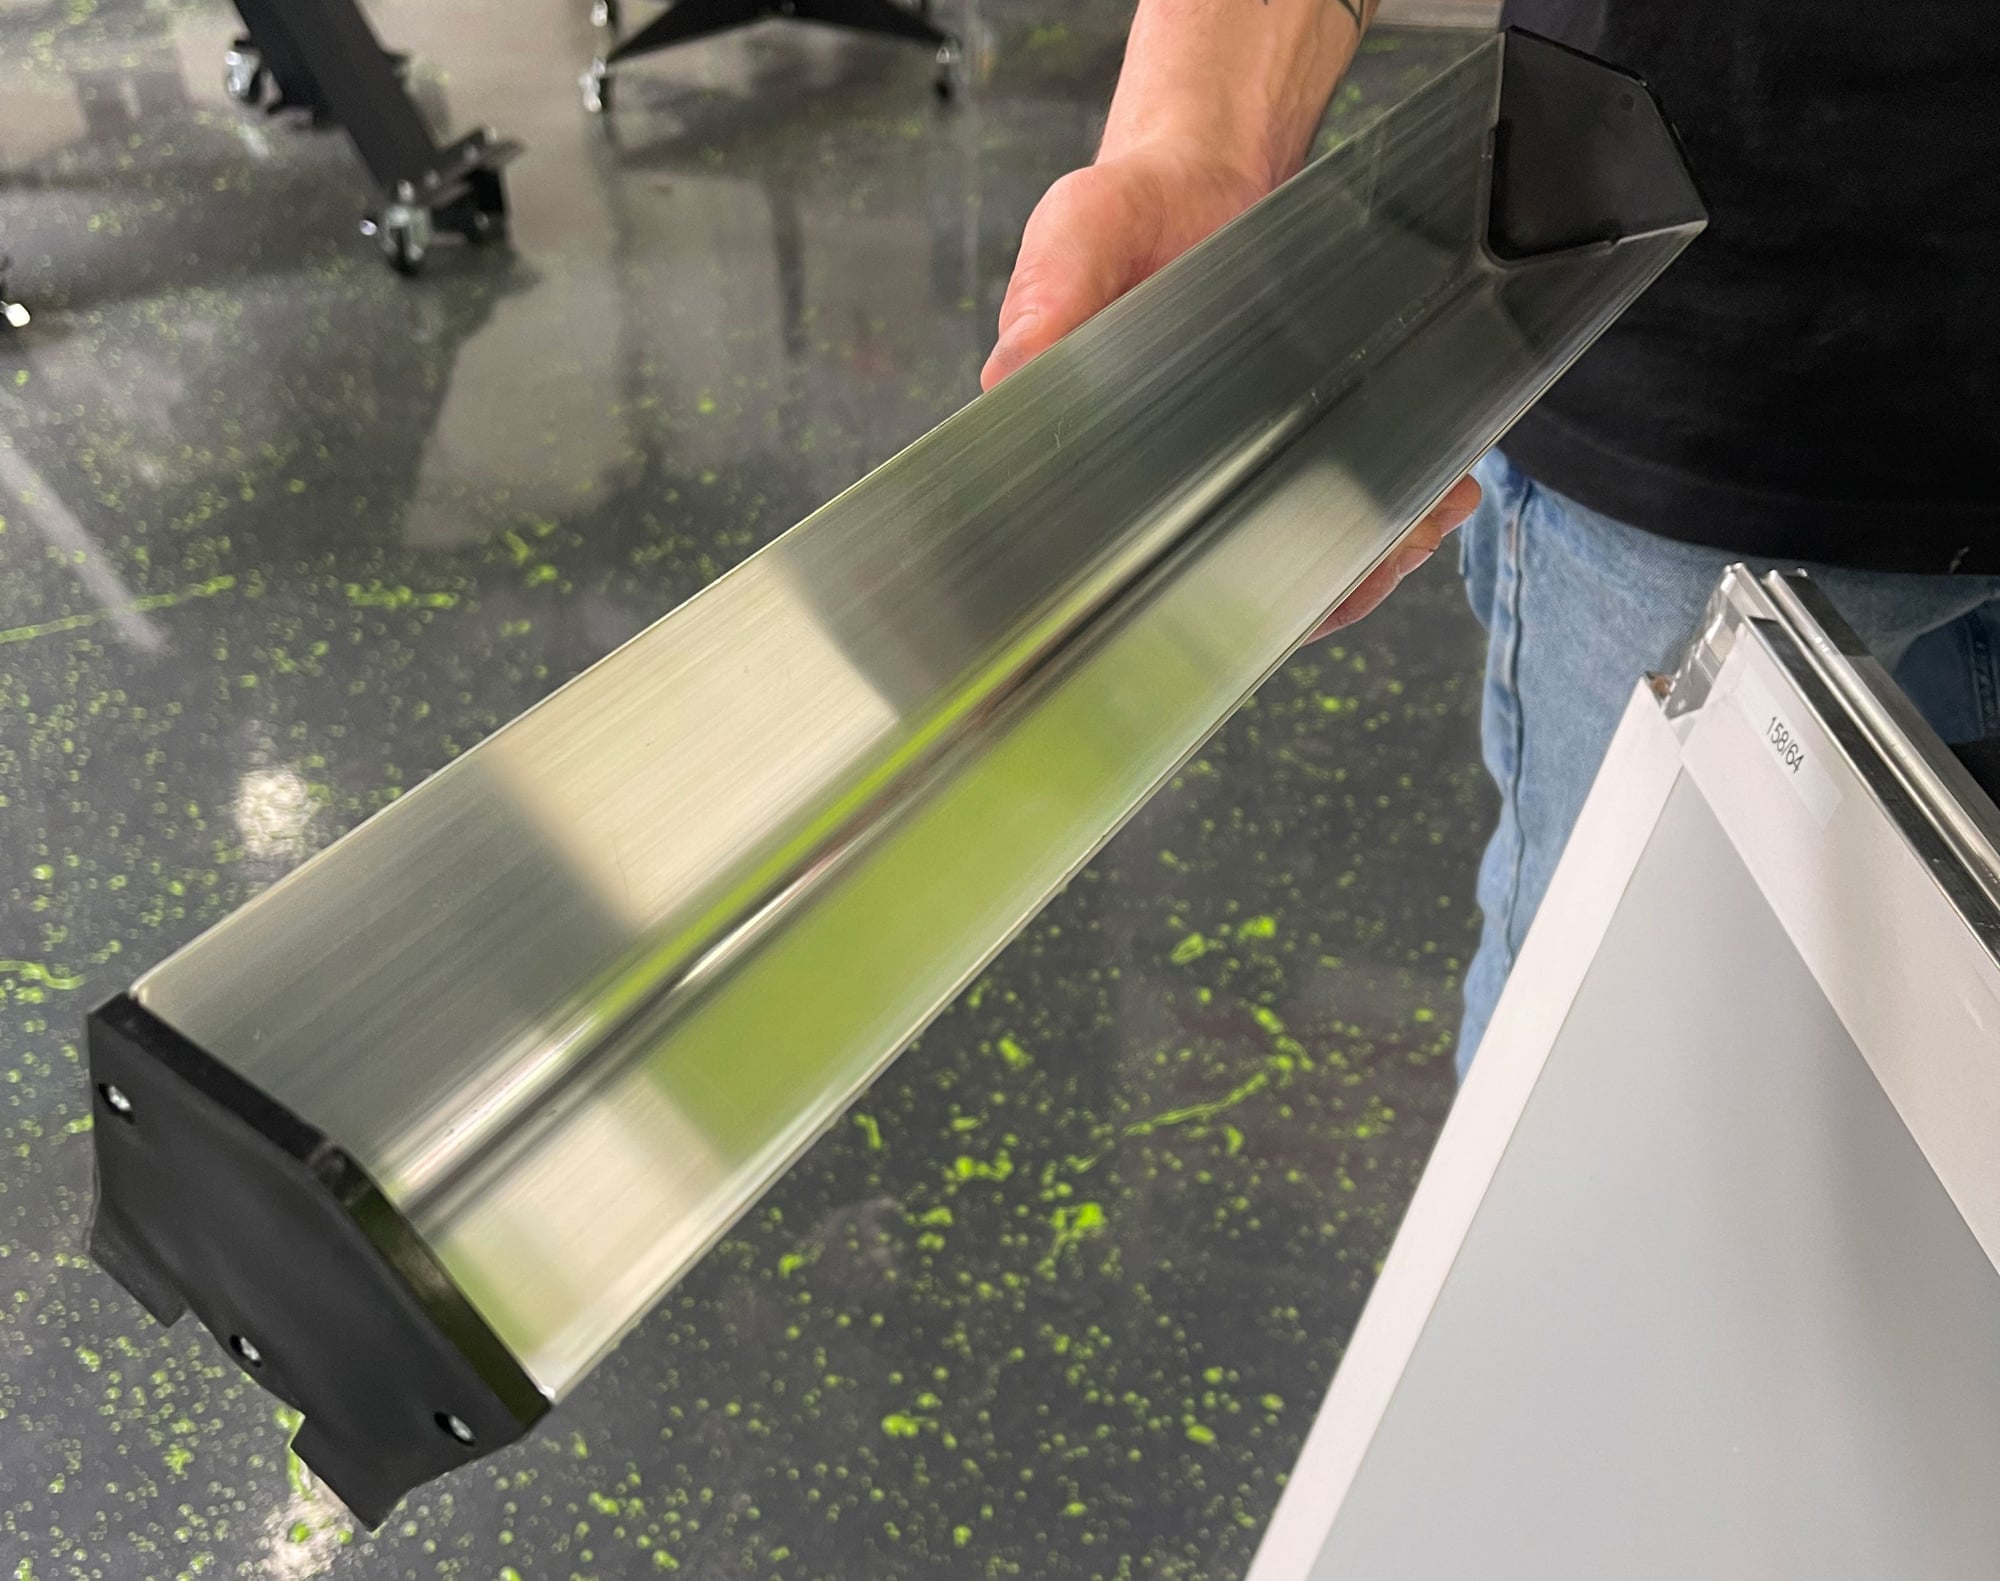
FIGURE 2
3. Stencil Edge Quality: Quality problems with an exposed screen stencil are not always obvious, and they are more common than many printers are willing to admit. If you haven’t reviewed your exposed screens with a magnifying glass (at least 20 to 25x) in the last couple of months you may have less than ideal edge quality without knowing it. Magnification can reveal dot gain, bleeding, or dull, ripped or otherwise distorted edges that are not always obvious to the naked eye. Causes of these problems include incorrect exposure amount for the emulsion type and quantity, poorly tensioned mesh, or a reduction in exposure bulb power over time. Controlling this issue and ensuring clean stencil edges ensures the ink maintains surface tension and your prints retain fine details throughout the print run (see Figure 3).
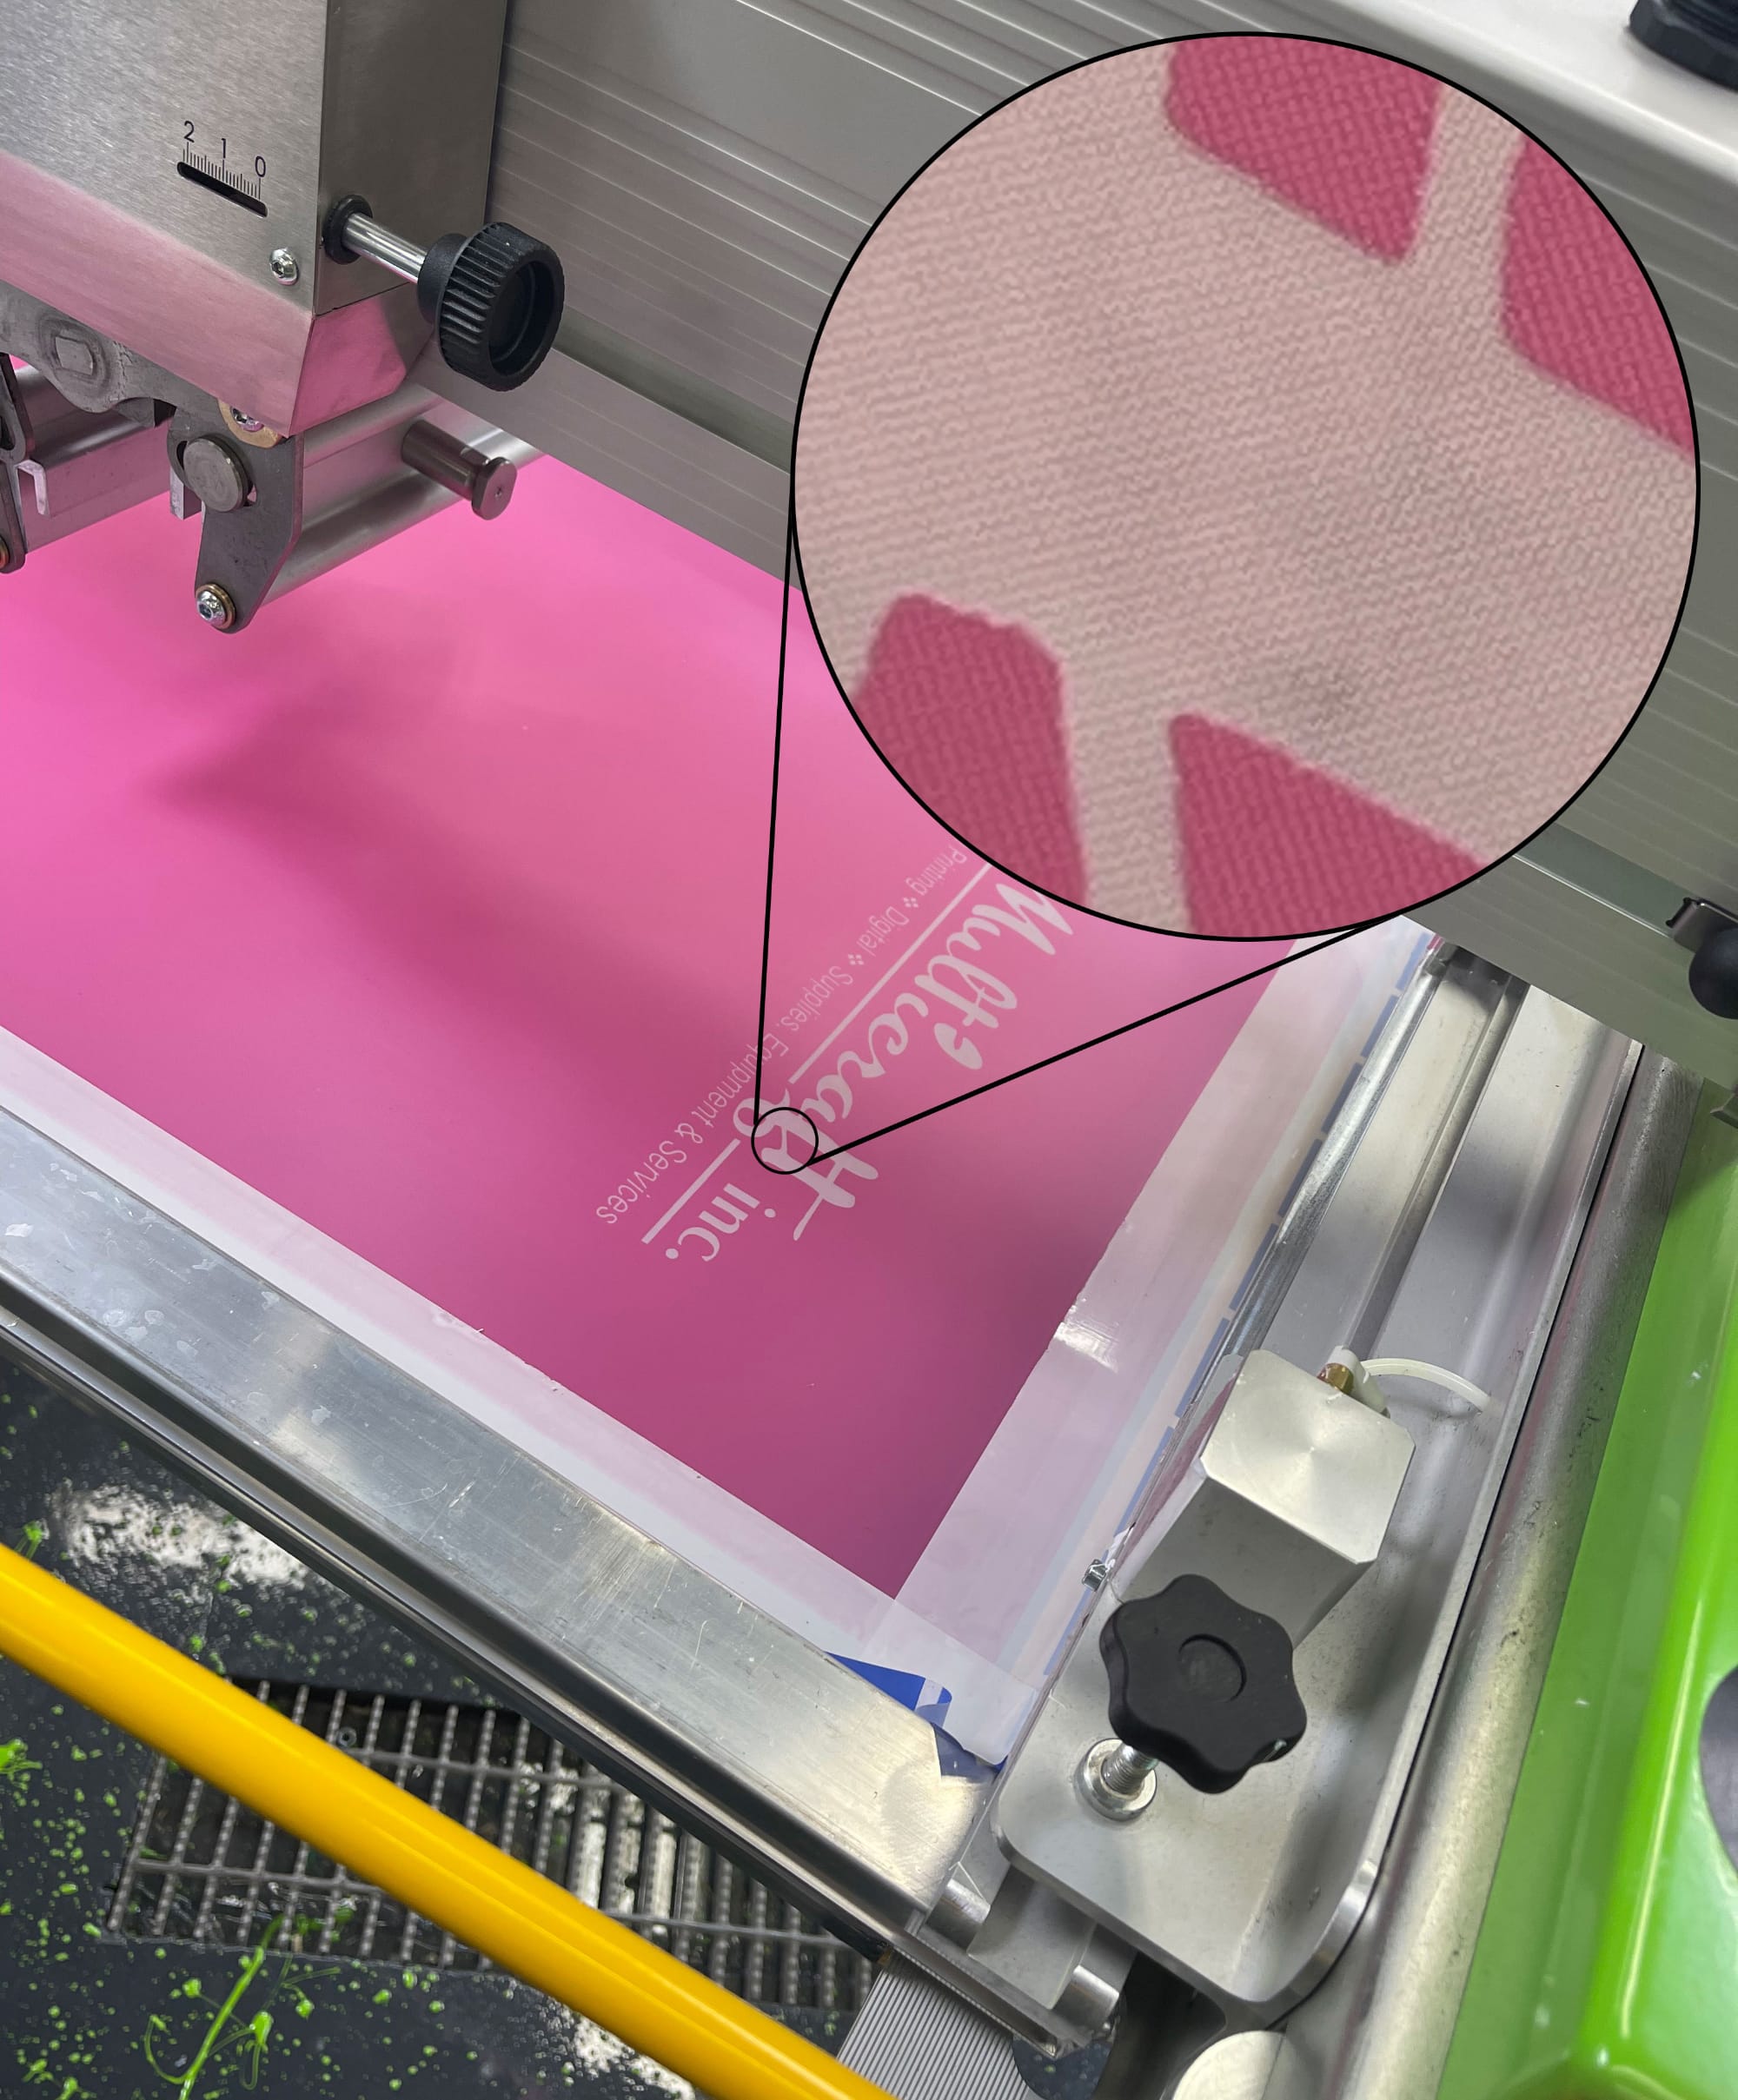
FIGURE 3
4. Ink Viscosity: Printers generally will not return an ink that is too pigmented and thick, but they will return an ink that is too thin to cover properly. As a result, screen printing ink tends to be overly heavy in solids and pigment. Stir or use an additive to adjust ink viscosity. Better flowing ink means prints require less pressure. Quality will improve, and you’ll save ink and energy. One of the best options is a simple motorized ink turnstyle that breaks the ink up (see Figure 4). Less expensive options include drills with stirring bits and old-fashioned elbow grease to manually stir the inks. A common rule of thumb is that the ink should pour out of the bucket into the screen rather than be too thick to pour like whipped cream. Of course there are exceptions (such as with a thick white underbase ink) depending on your screen mesh and application.
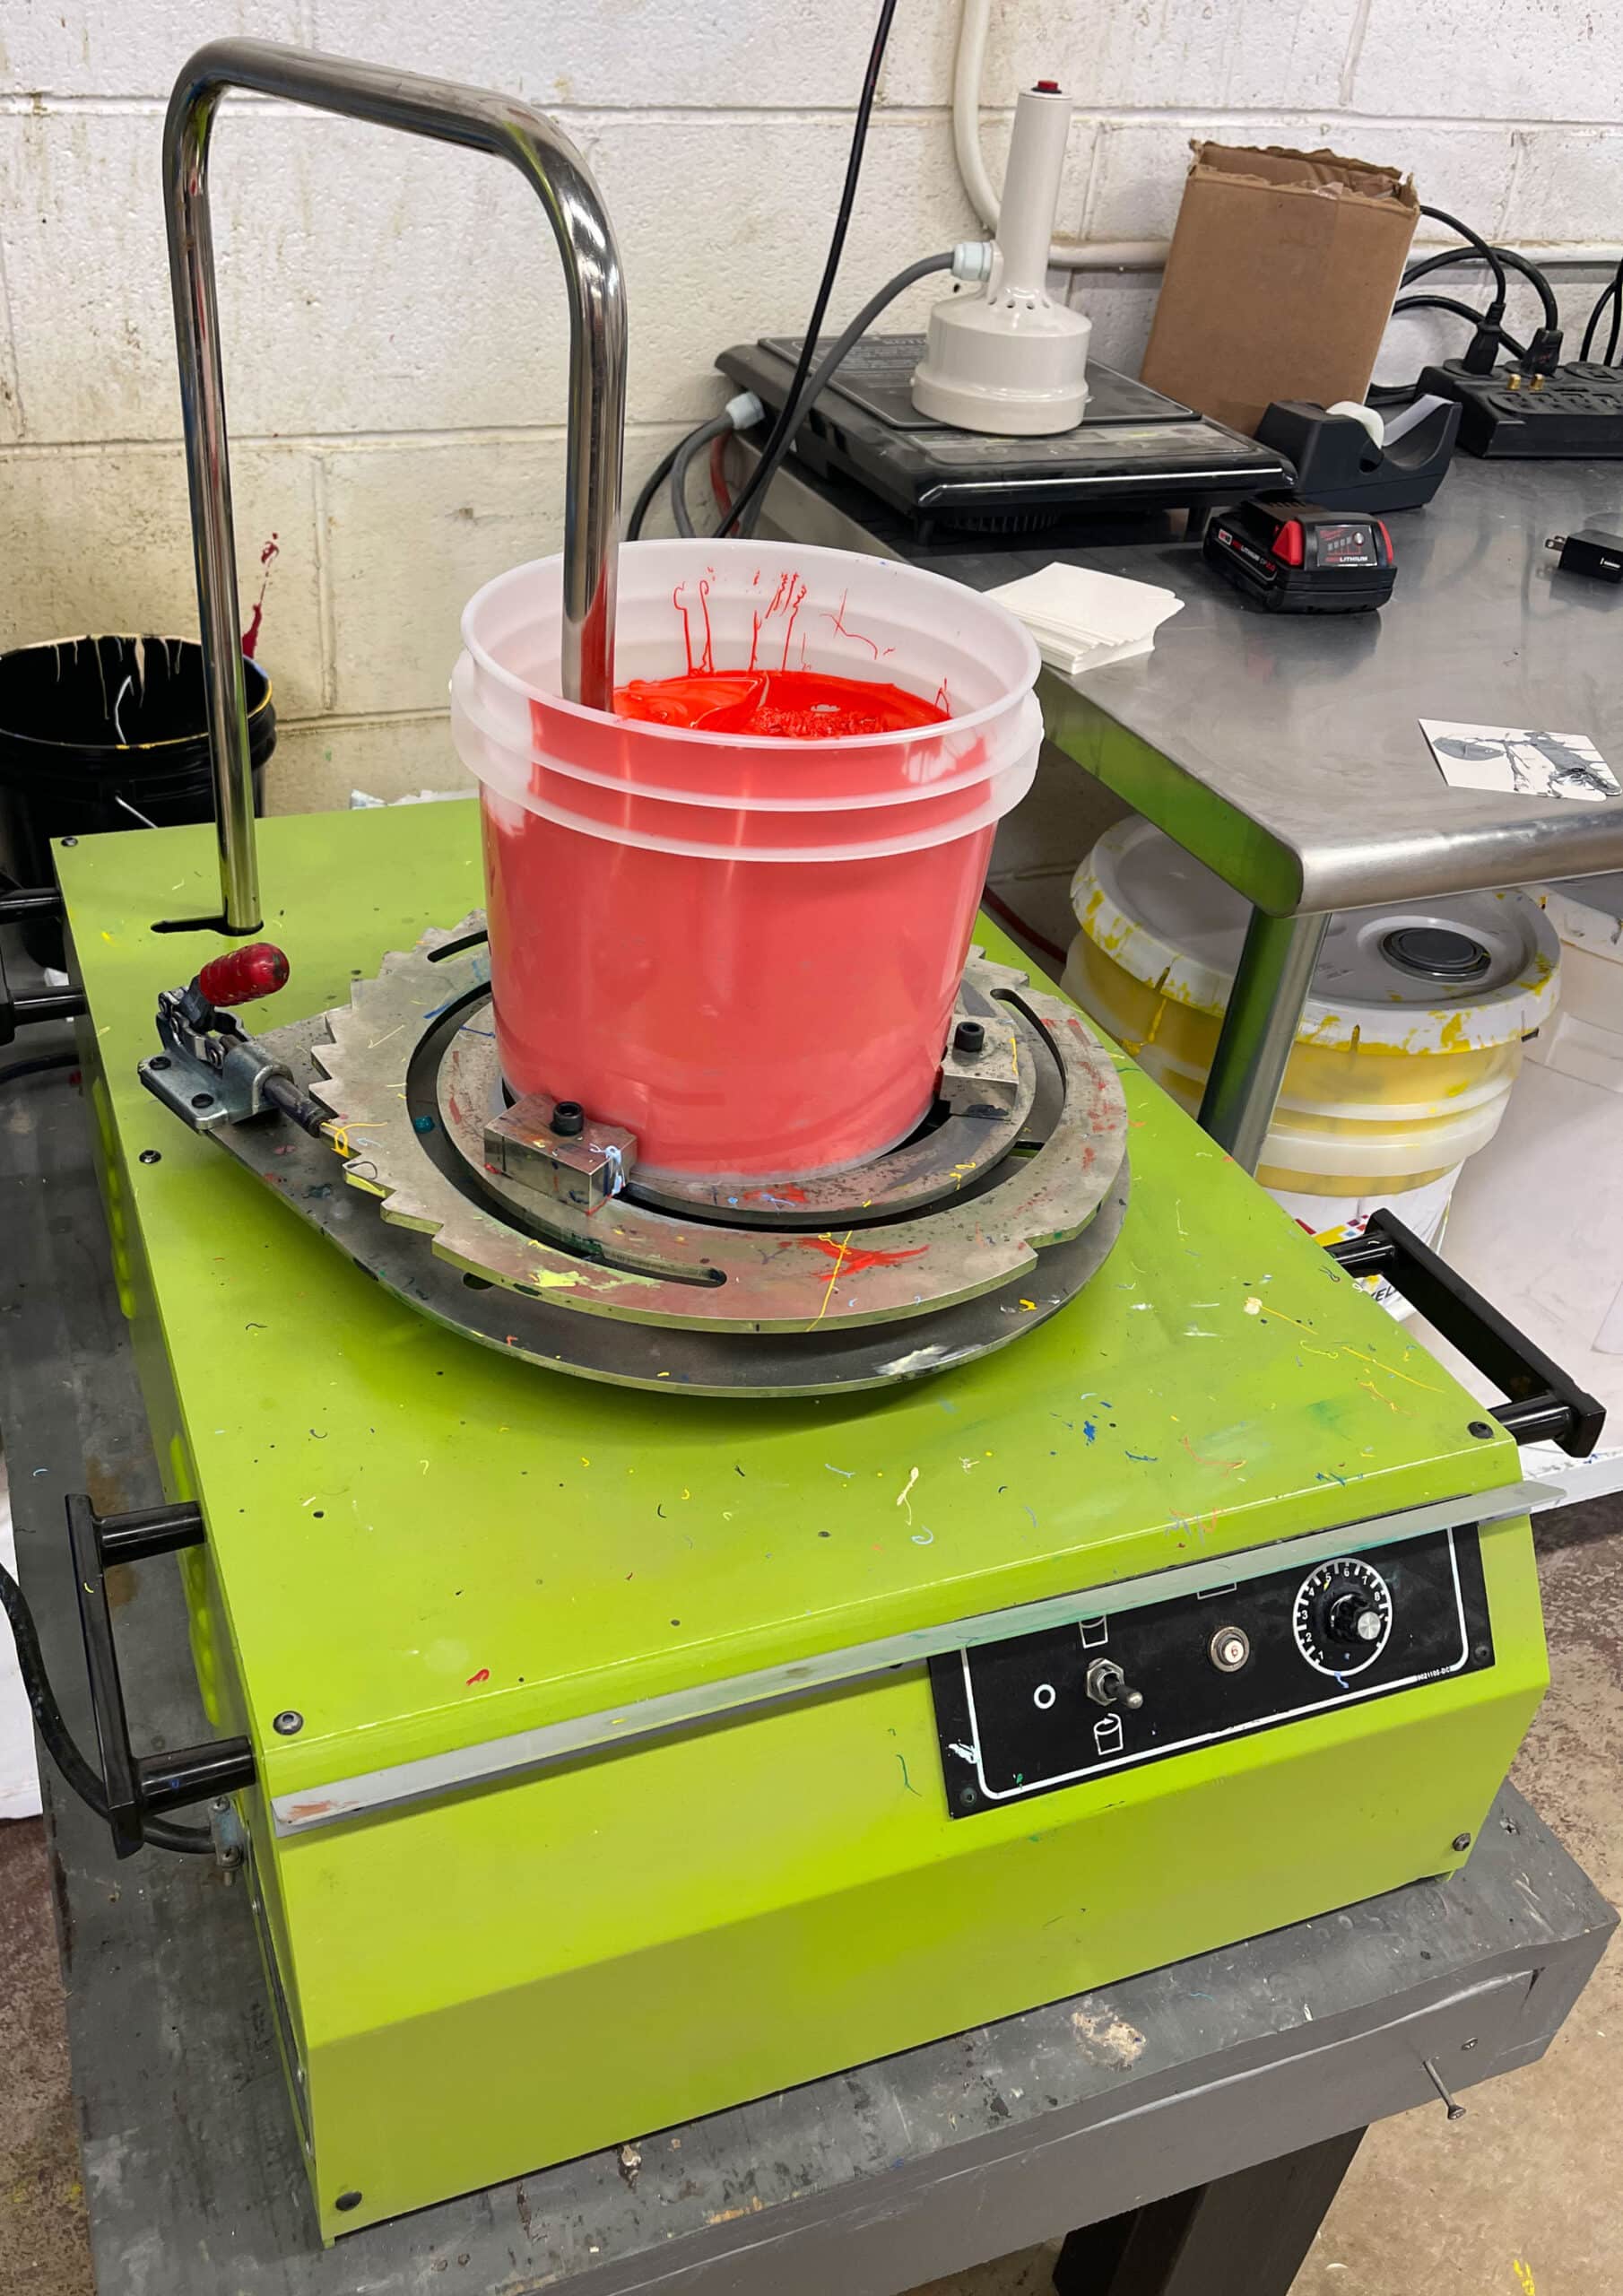
FIGURE 4
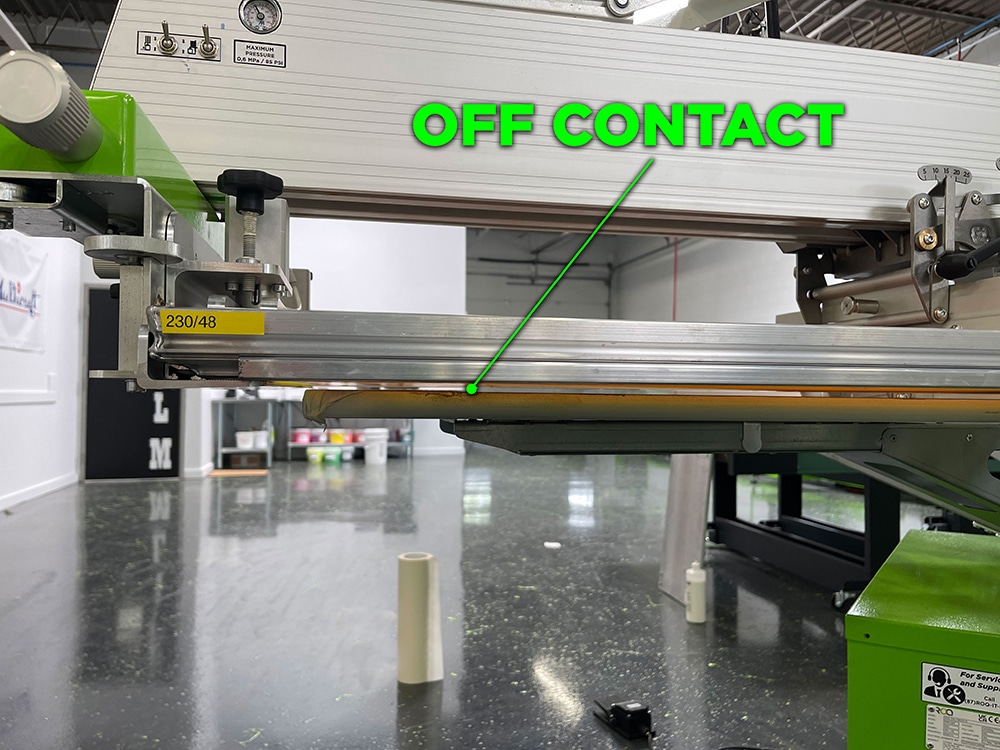
5. Off Contact: Off-contact amount is the distance between the screen in the down (ready to print) position and the printed surface. Generally, screens with less tension require increased off-contact amounts to ensure the ink pops clean from the stencil area of the print rather than being pulled back up into the screen (see Figure 5). However, too much distance can result in registration issues, bleeding, or image distortion. The common standard in screen printing is to have around a nickel (if viewed from the side) distance between the screen and the printed surface. There’s a lot of variation to this standard depending on the application, the surface being printed (such as hoodies, etc.), and the thickness of the emulsion and inks. Regardless, the off-contact amount can affect all the other issues listed here. So, it makes sense to stabilize and establish this variable after the other areas have been addressed.
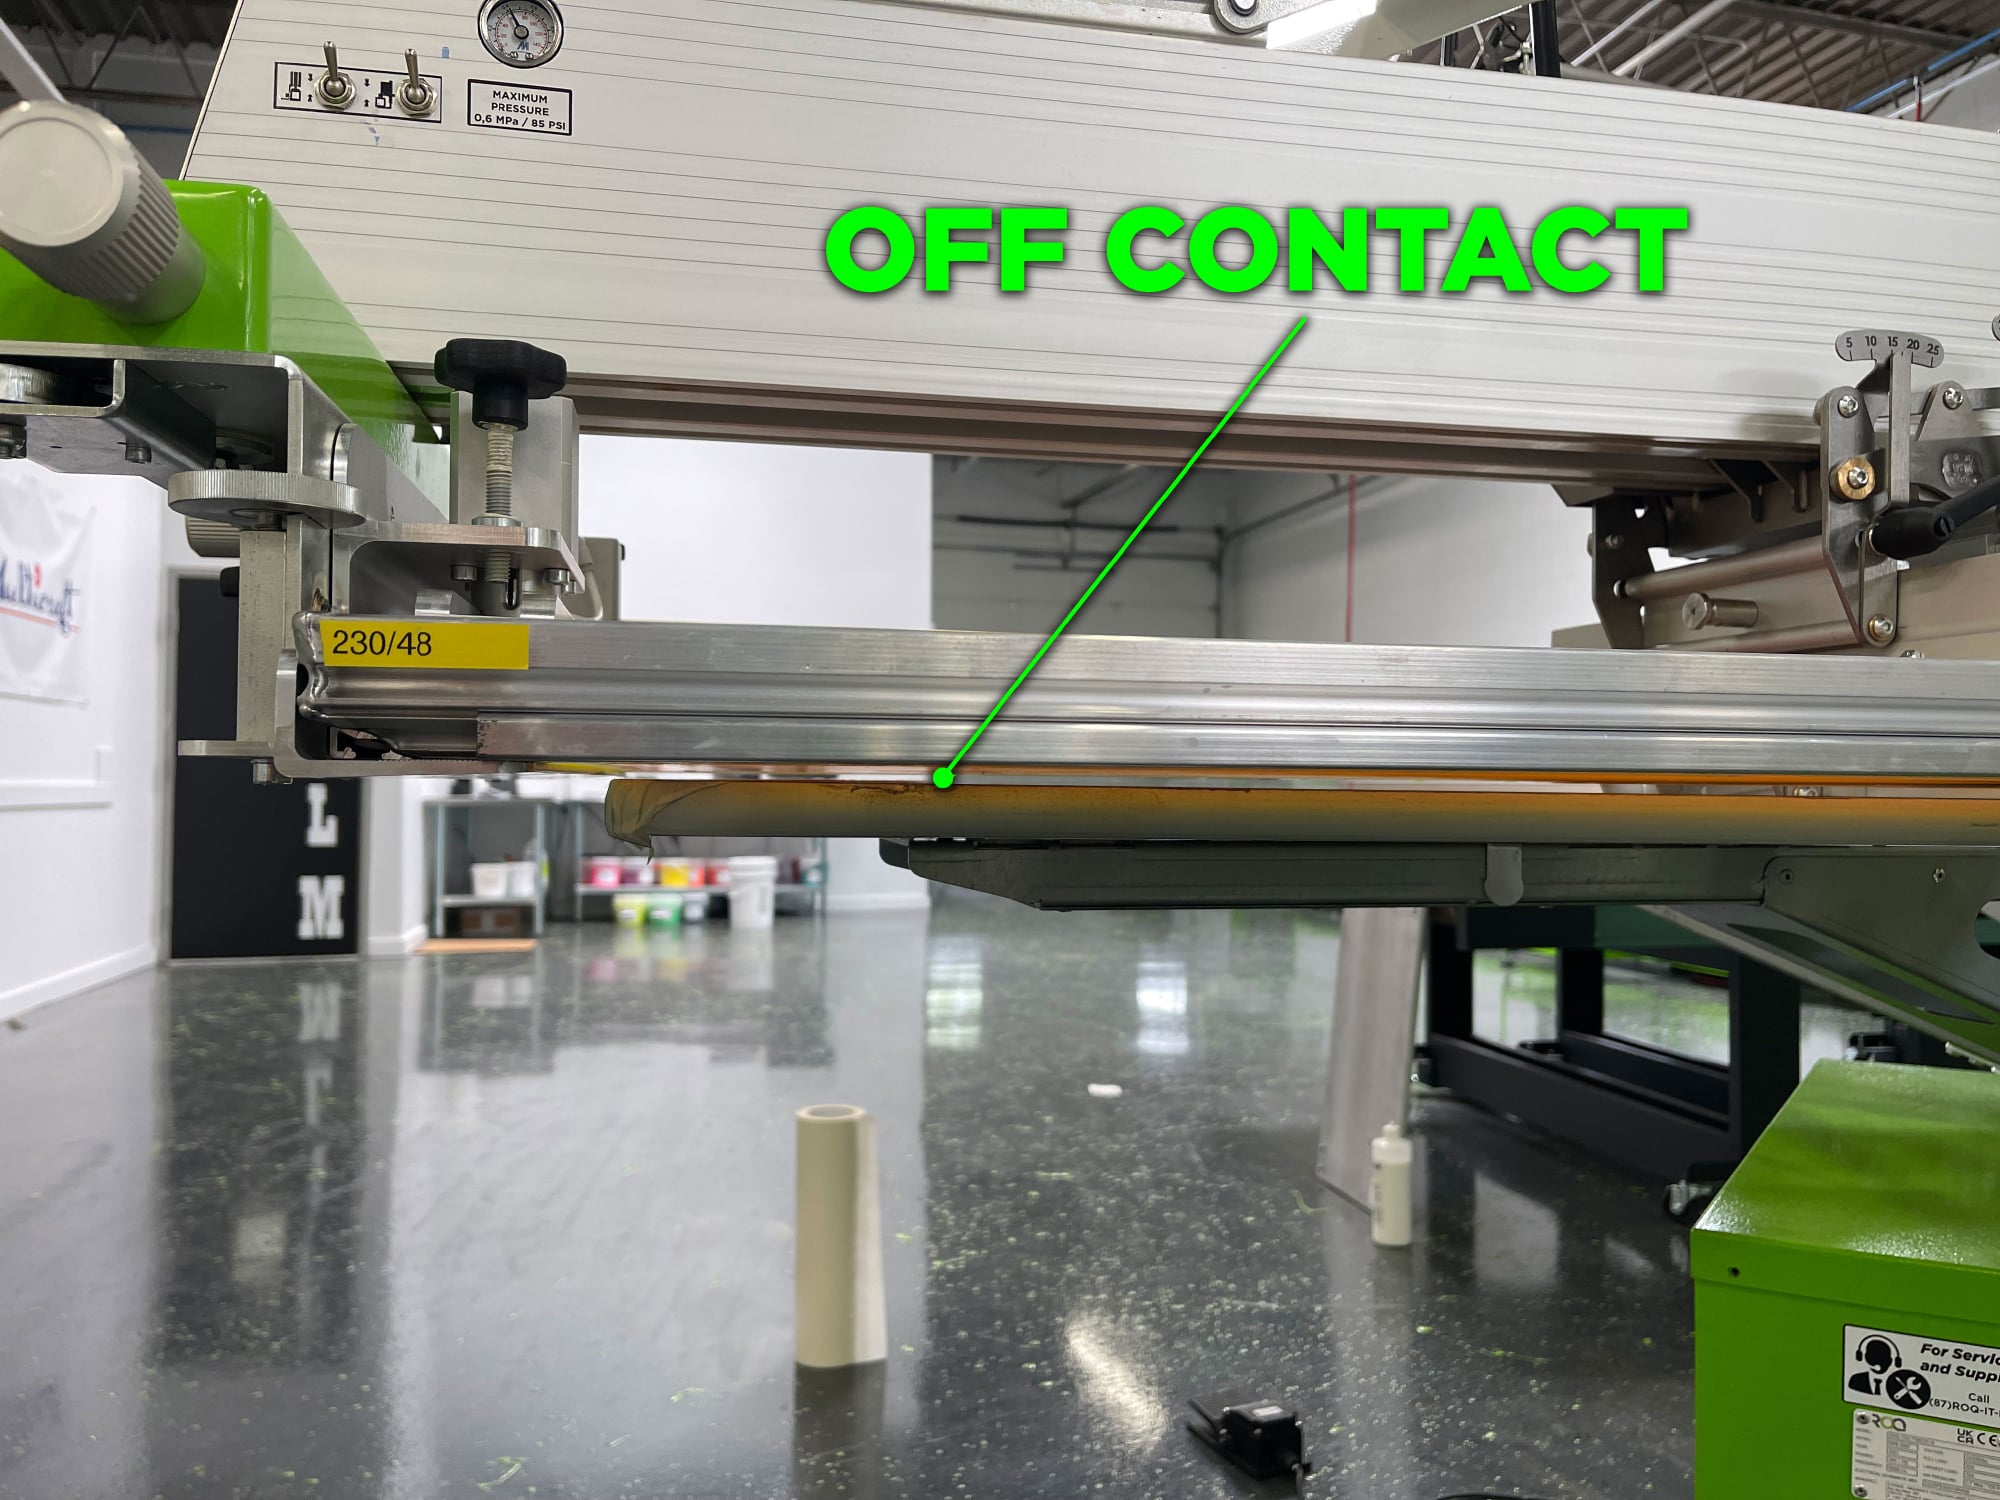
FIGURE 5
Properly managing screen tension, emulsion coatings, stencil quality, ink viscosity, and off-contact will yield dramatic increases in printing quality and prevent a host of problems. Just as they say it’s better to avoid trouble then to find cures, it’s also better to focus on screen and ink quality first. Then, printing becomes easier and more profitable.
PHOTO GALLERY (5 IMAGES)
Photos courtesy of Multicraftink.com


Let’s Talk About It
Creating a More Diverse and Inclusive Screen Printing Industry
LET’S TALK About It: Part 3 discusses how four screen printers have employed people with disabilities, why you should consider doing the same, the resources that are available, and more. Watch the live webinar, held August 16, moderated by Adrienne Palmer, editor-in-chief, Screen Printing magazine, with panelists Ali Banholzer, Amber Massey, Ryan Moor, and Jed Seifert. The multi-part series is hosted exclusively by ROQ.US and U.N.I.T.E Together. Let’s Talk About It: Part 1 focused on Black, female screen printers and can be watched here; Part 2 focused on the LGBTQ+ community and can be watched here.


Atlantis Headwear Goes Solar for Sustainable Future

Comfort Colors Announces New Proprietary Dyeing Process Called “Pigment Pure”

10 Production Scheduling Secrets That Will Have Your Team Ready to Rock


Bulletins
Get the most important news and business ideas from Screen Printing magazine's news bulletin.
-

 Case Studies2 months ago
High-Density Inks Help Specialty Printing Take Center Stage
-

 Art, Ad, or Alchemy2 months ago
F&I Printing Is Everywhere!
-

 Andy MacDougall2 months ago
Functional and Industrial Printing is EVERYWHERE!
-

 Columns3 weeks ago
8 Marketing Mistakes Not to Make When Promoting Your Screen Printing Services Online
-

 Editor's Note3 weeks ago
Livin’ the High Life
-

 Marshall Atkinson3 weeks ago
How to Create a Winning Culture in Your Screen-Printing Business
-

 Thomas Trimingham2 months ago
“Magic” Marketing for Screen Printing Shops
-

 News & Trends2 months ago
What Are ZALPHAS and How Can You Serve Them in Your Print Business?