Tips and How-To
Use These Affects to Add Something Special to Your Next Job
How to properly add special effects to your prints for results your customers will love.
EVERYONE WANTS TO add value to their prints and make more money per print. An easy way to do that is to incorporate a special effect, or multiple. While there are tons of special effects to experiment with, here we’ll detail some of the most popular ones and how to be successful when printing them.
The most important aspect lies within the basics. If your screens aren’t right, it will be increasingly difficult to print special effects. If you’re creating great screens, it makes it easy to control variables and therefore pin down errors when printing something new. After screens, you always need to have a great base, which becomes even more important when printing with special effects. This is true for all special effects and printing in general, even a one color or discharge. Properly laying down the first layer of ink through the screen will help ensure awesome results.
I’ll be referencing some ink brands below because that’s what I’m familiar with. However, there are a lot of great ink options out there; call your distributor or manufacturer and inquire. But don’t forget, you can read (telling because you’ve gotten this far in this article), so don’t let them read the technical data sheet to you. You want to talk to someone who knows how to print with the inks. They’ll be able to help you navigate the ups and downs of printing with something new and/or different.
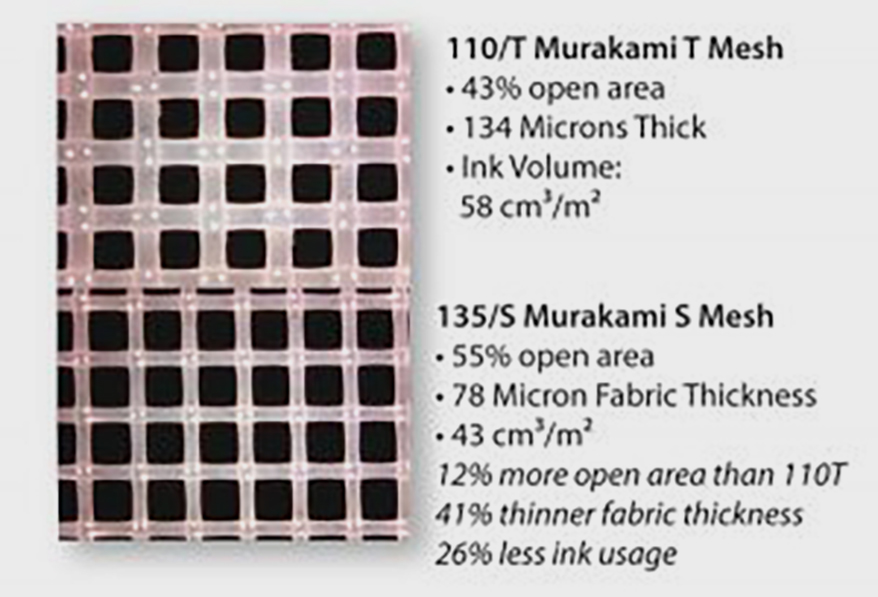
Image 1
Thin Thread Mesh
While not an actual special effect, printing with thin thread mesh can achieve superior results. The majority of screen printing mesh comes in three different thickness options: thick, typically designated by HD; regular or medium, typically designated by T; and thin, typically designated by S. The thicker thread offers the smallest open area to get ink through and the thin thread offers the most open area (see Image 1). Using thin thread allows more ink to pass through the larger openings and sheen onto the substrate, typically resulting in better coverage and lay down with far less additional strokes, therefore allowing thinner deposits and leaving a softer hand.
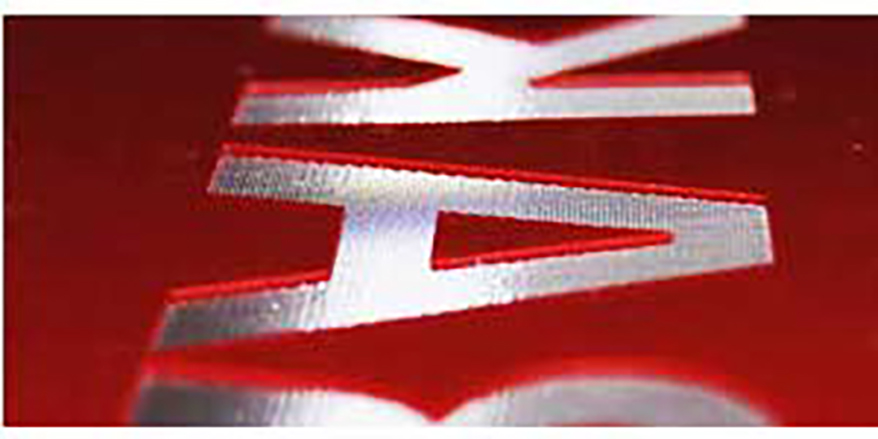
Image 2
AdvertisementHigh Density Inks
An oldie but goodie, high density inks can create a plethora of amazing effects by adding dimension to your prints. You want to keep in mind what you’re trying to do when you’re prepping your screens: lay down enough ink to create a dimensional or raised effect. To do that you’ll want to use low mesh, low enough to allow a significant amount of ink through the mesh openings. Depending on the manufacturer of ink and mesh, 80 mesh (and lower) is normally recommended, and if able, use thin thread.
Next, you’ll want to create a stencil that can deposit as much ink as possible. You can continually coat your screens with normal emulsion, but it’s far easier to use thick stencil emulsion or capillary film (see Image 2). Capillary film is a sheet (or roll) of emulsion you apply to your screen and secure with emulsion. The way capillary film is manufactured allows complete and even control of the thickness (EOM = emulsion over mesh) of the emulsion that you’re using and makes printing your finished image that much easier. (Pro Tip: Apply two coats of emulsion to your capillary film to help it adhere to the screen.) The most important aspect of capillary film is time. You must allow the screen to fully dry after the capillary film is adhered and after washing out the image. When you rush the process, the capillary film can lift or peel in sections, ruining the definition of your stencil.
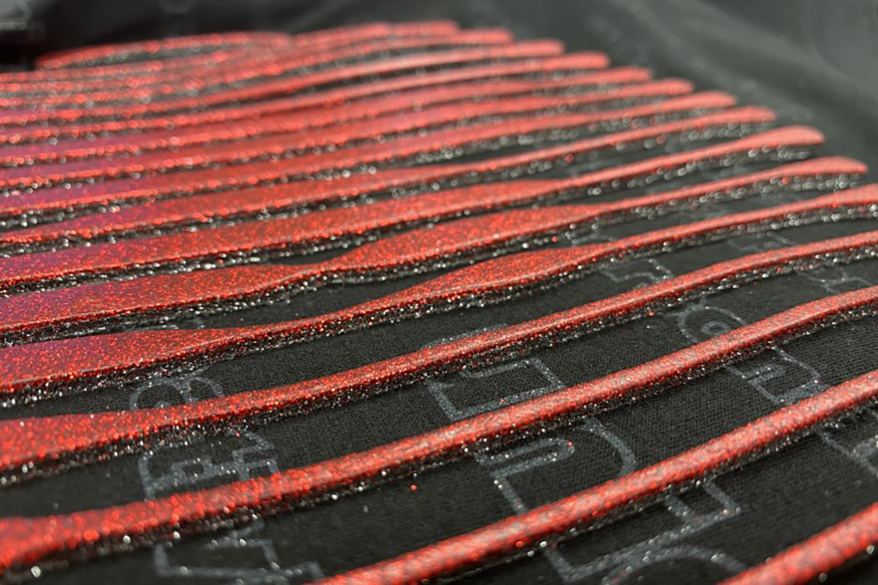
Image 3
Now that your screen is prepped, it’s time to think about your exposure. You’ll want to ensure you’re using a proper light source. Weak light sources will take an extended period of time, which will degrade the edge definition of your image. Now you’re finally going to press. You’ll want to grab a soft durometer squeegee, preferably triple durometer, like 62/90/62. Employ a deep angle and just enough pressure to clear the screen. Best results come from one squeegee pass as any additional passes tend to smudge and smear the ink you’ve already laid down. Don’t forget to adjust off contact as needed (see Image 3).
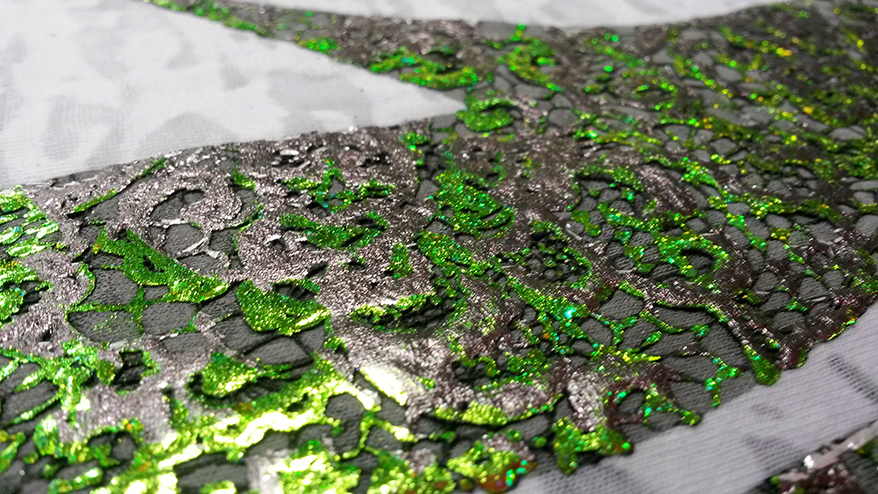
Image 4
Foil with High Density
Utilize all that hard work above by applying foil to our high density after printing. The two biggest components you’ll want to consider when doing this are temperature and pressure. You won’t want to apply too much additional heat to the ink as it can cause it to begin to re-gel and lose some of the crispness of the print. Applying too much pressure will crush it. To achieve the outcome without a lot of effect, you can R&D tap the high density (lightly) as it’s coming out of the dryer to “speckle” the print (see Image 4).
Advertisement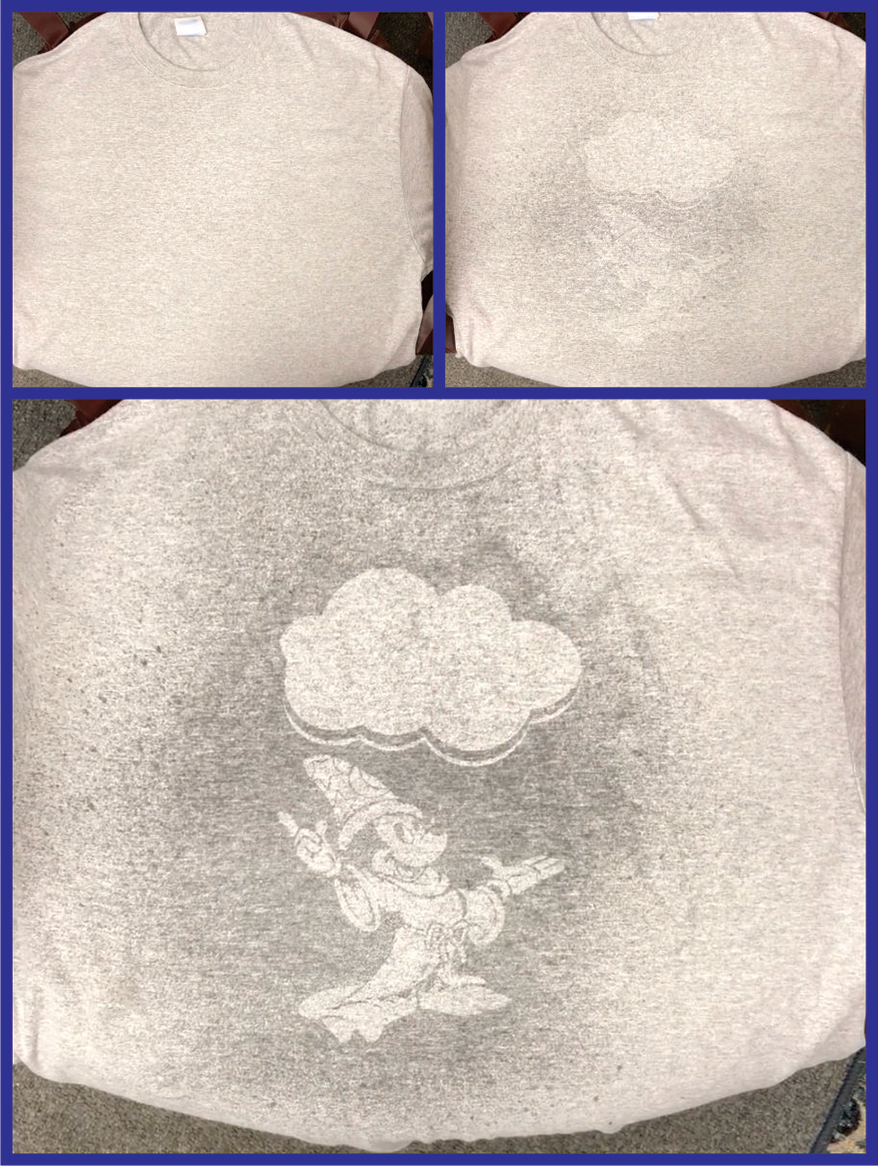
Image 5
Appearing Ink (When Wet)
A new(ish) effect is an ink that blocks the garment area where it’s printed from getting wet (see Image 5). When used on heathered garments (not too light, not too dark), the ink is invisible when not wet, and “appears” when the garment is wet. Being utilized for water entertainment venues and within the fitness industry, it’s becoming a new craze in printing. While it looks great on its own, it can really add a wow factor when added to another image on the garment. This particle wet appearing ink is a water-based ink and therefore you must prepare your screens appropriately. The most common problem with screens when prepping for printing with water-based ink is under exposure. This will cause the emulsion to break down on the press. You’ll want to ensure you’re using an emulsion that can handle water-based inks, but if you’re not exposing correctly, you won’t stand a chance. Pull out your exposure calculators on a regular basis and document your results. Also consider post exposure and temporary hardeners when needed. You’ll want to pay attention to your dryers and ensure that cure times and temperatures are being met. Other than that, it’s a breeze to work with.
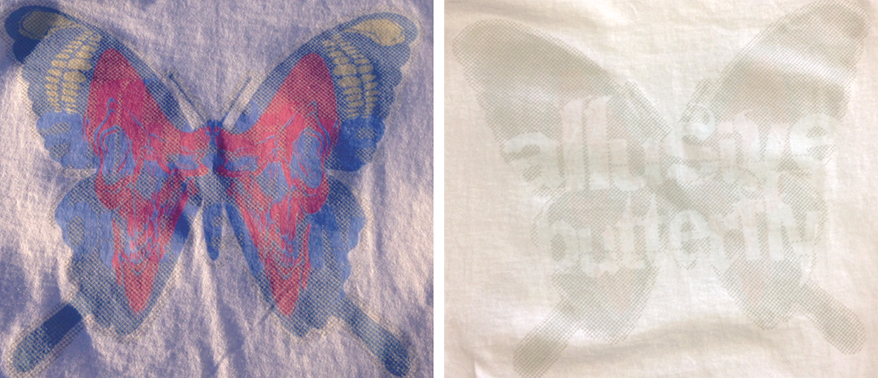
Image 6
Photochromic
A dramatic special effect that can create great drama in so many designs is the use of photochromic ink. Now widely available and in assorted color shades, photochromic inks activate or produce color when exposed to UV rays (sunlight or black light). Without them, they appear clear (or sometimes another color). Depending on the ink used, you’ll want to apply directly to a light colored garment or onto a base. Laying on top of a light color will assist in getting the most dramatic shift in color and true pigmentation of the shade chosen. One of the most difficult parts for someone trying the ink out for the first time, specifically in production, is registration of the ink. Being that it’s clear when not in the sun (and most shops are indoors), it can be handy to keep a black light around to shine on the garments when registering on press. Cure temperatures and times are going to be the most vital to provide the best effect (see Image 6).
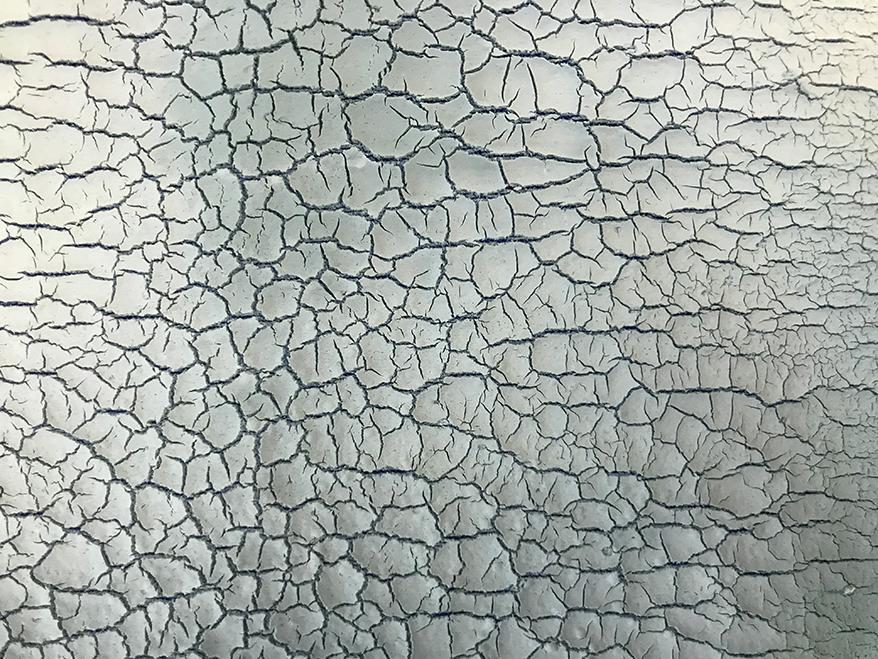
Image 7
Crack Inks
Gone are the days of pulling and stretching at the end of the dryer with your fingers crossed that crack ink worked. New crack inks will dry on press (with the use of a flash) so you’ll know they’ve reacted correctly before it goes into the dryer. From deep effects to simpler overlays on top of contrasting colors, crack is back (see Image 7). Achieving great deposit and being patient with your dwell and flash times will be the saving grace with this ink. Use the information on screens, capillary film, durometer, and exposure in the high density section to make your screens to produce a great looking print. Exploiting the press dehydration of this ink (what makes it crack) will make it effortless as long as you do some investigation into temperature and timing. Break out your donut probe and ensure you’re applying the heat consistently without breaks to allow it to cool down. Now, off to the presses!
AdvertisementLet’s Talk About It
Creating a More Diverse and Inclusive Screen Printing Industry
LET’S TALK About It: Part 3 discusses how four screen printers have employed people with disabilities, why you should consider doing the same, the resources that are available, and more. Watch the live webinar, held August 16, moderated by Adrienne Palmer, editor-in-chief, Screen Printing magazine, with panelists Ali Banholzer, Amber Massey, Ryan Moor, and Jed Seifert. The multi-part series is hosted exclusively by ROQ.US and U.N.I.T.E Together. Let’s Talk About It: Part 1 focused on Black, female screen printers and can be watched here; Part 2 focused on the LGBTQ+ community and can be watched here.


Arcus Printers Barracuda Conveyor Flatbed Cutter

The Profit Impact of a Market Dominating Position

Inkcups Announces New CEO and Leadership Restructure


Bulletins
Get the most important news and business ideas from Screen Printing magazine's news bulletin.

-

 Case Studies2 months ago
High-Density Inks Help Specialty Printing Take Center Stage
-

 Art, Ad, or Alchemy2 months ago
F&I Printing Is Everywhere!
-

 Andy MacDougall2 months ago
Functional and Industrial Printing is EVERYWHERE!
-

 Columns3 weeks ago
8 Marketing Mistakes Not to Make When Promoting Your Screen Printing Services Online
-

 Editor's Note3 weeks ago
Livin’ the High Life
-

 Marshall Atkinson3 weeks ago
How to Create a Winning Culture in Your Screen-Printing Business
-

 Thomas Trimingham2 months ago
“Magic” Marketing for Screen Printing Shops
-

 Case Studies3 weeks ago
Screen Printing for Texture and Depth